
AKA: “Volcano Rolls”…The cheese will erupt, like molten lava, from some of the rolls while baking and form a delicious cheesy crust – Oh my! yes! Imagine dunking in some soup, chili or spicy mustard! We could not eat them fast enough hot out of the oven! ( :
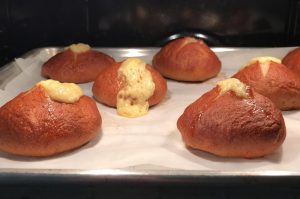
Photo Directions for How to Stuff Cheese in Dough:
 Shred the cheese and press into tablespoon sized “balls”
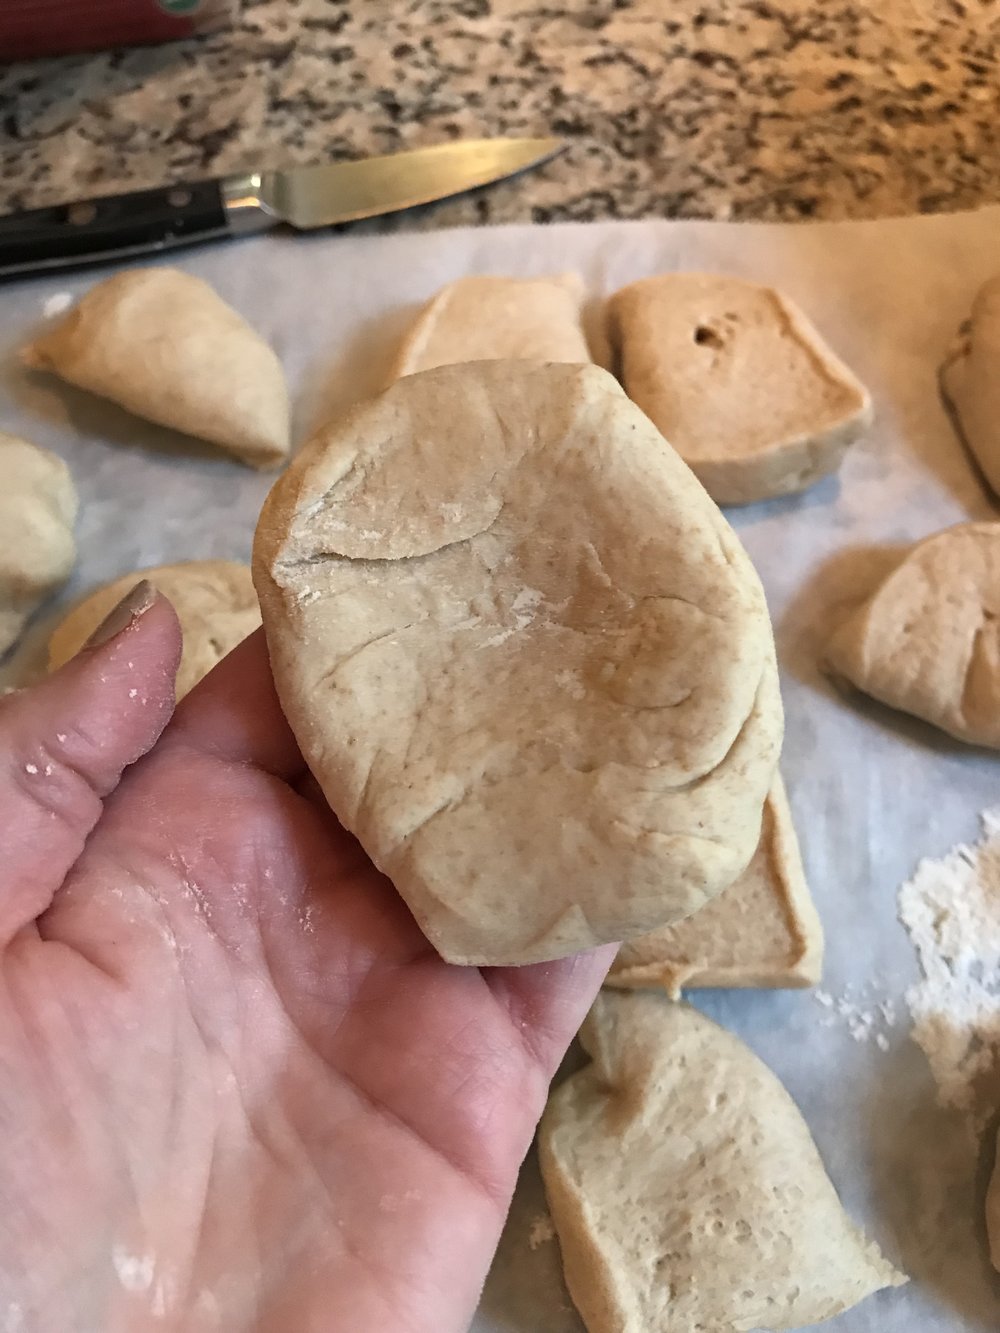 Flatten the dough portion slightly
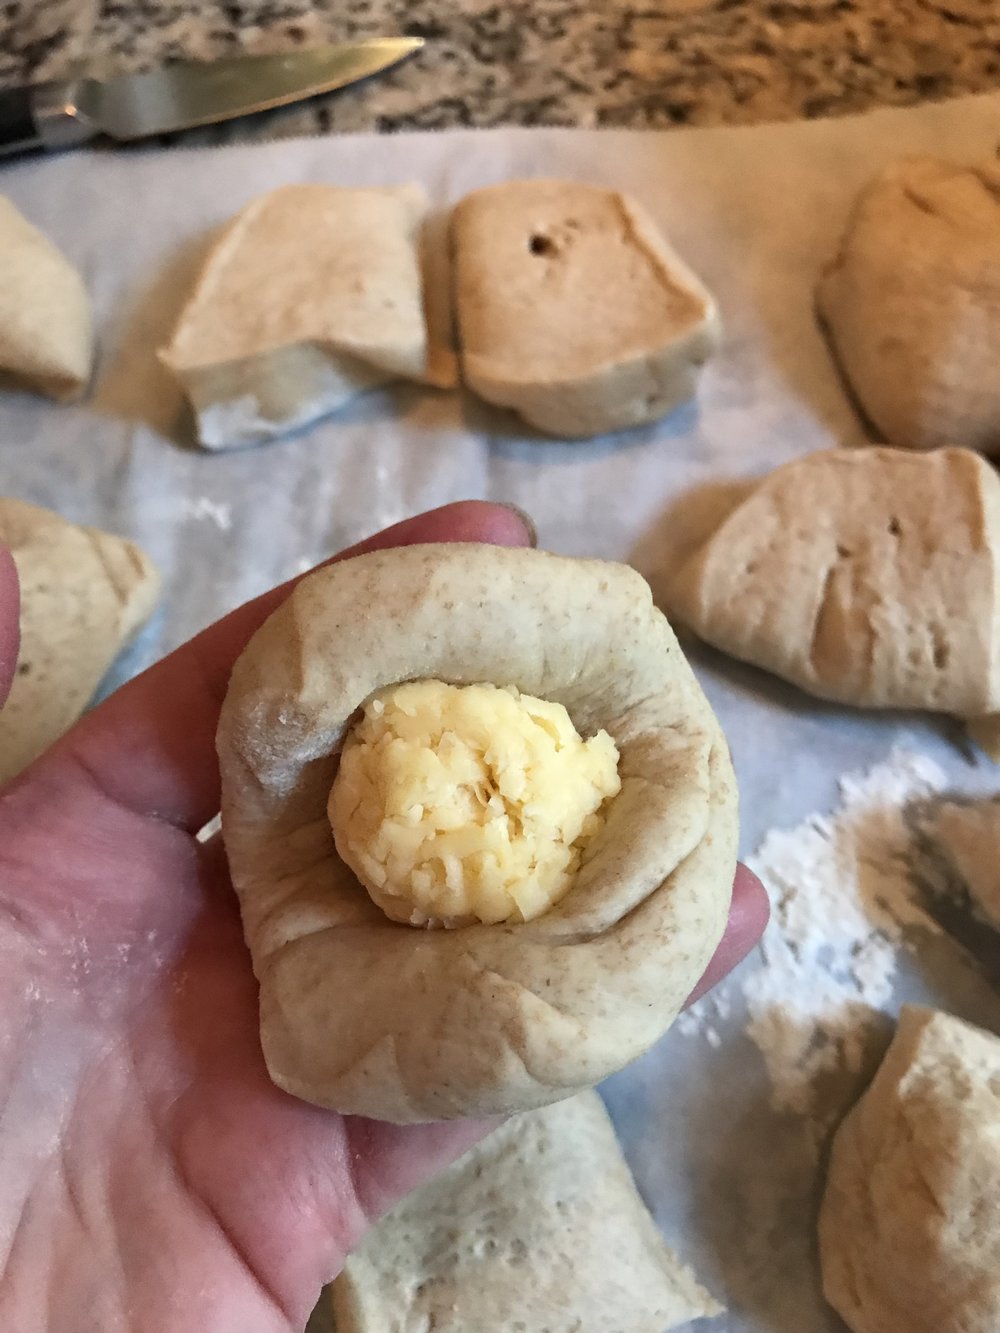 Place a cheese “ball” in the center
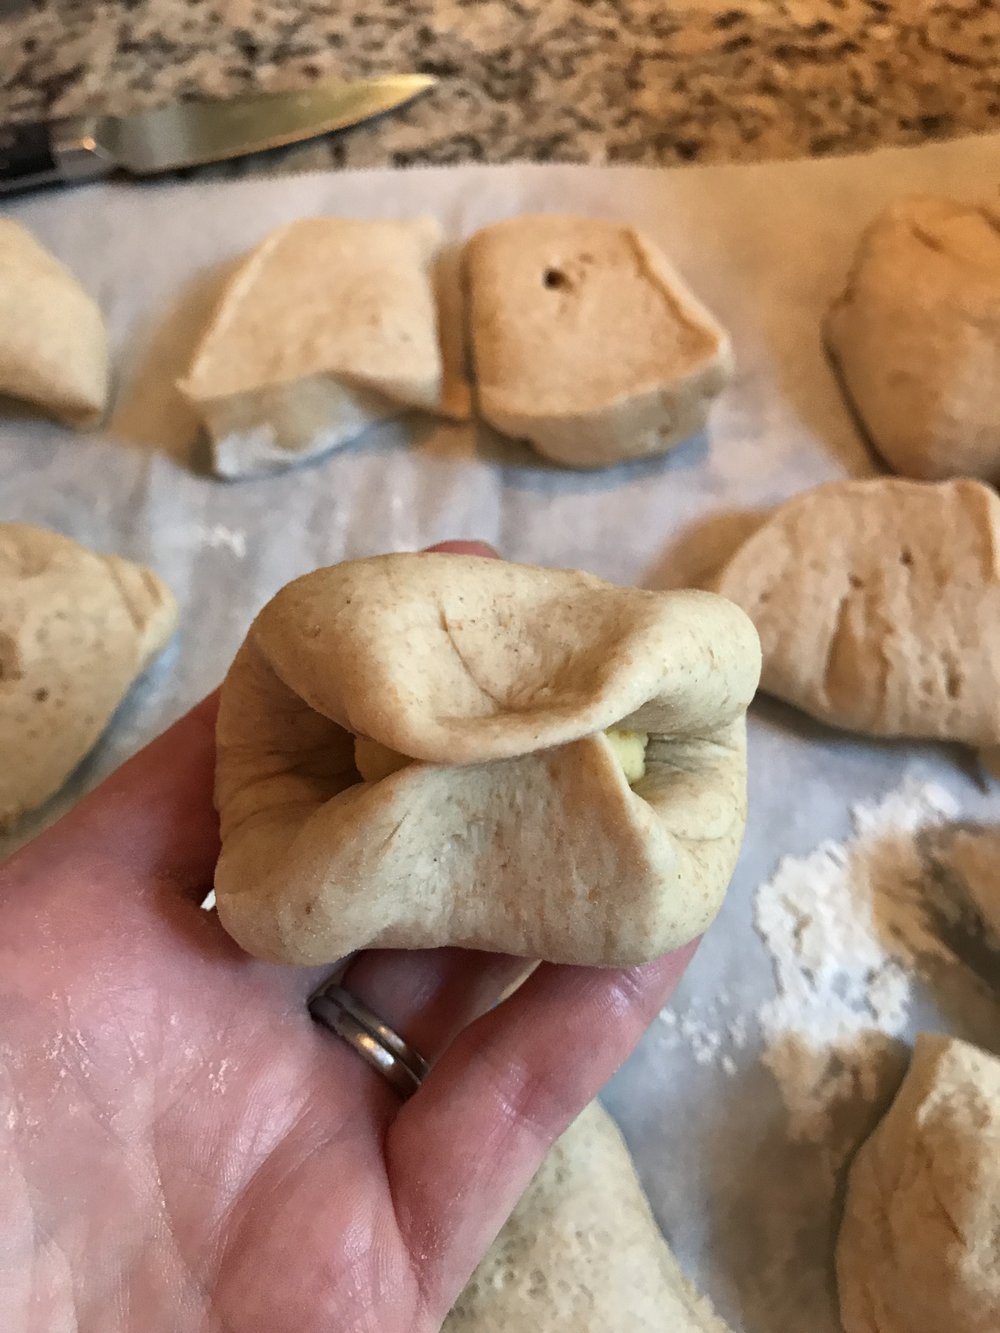 Pull dough up around the cheese
Gather edges and pinch to seal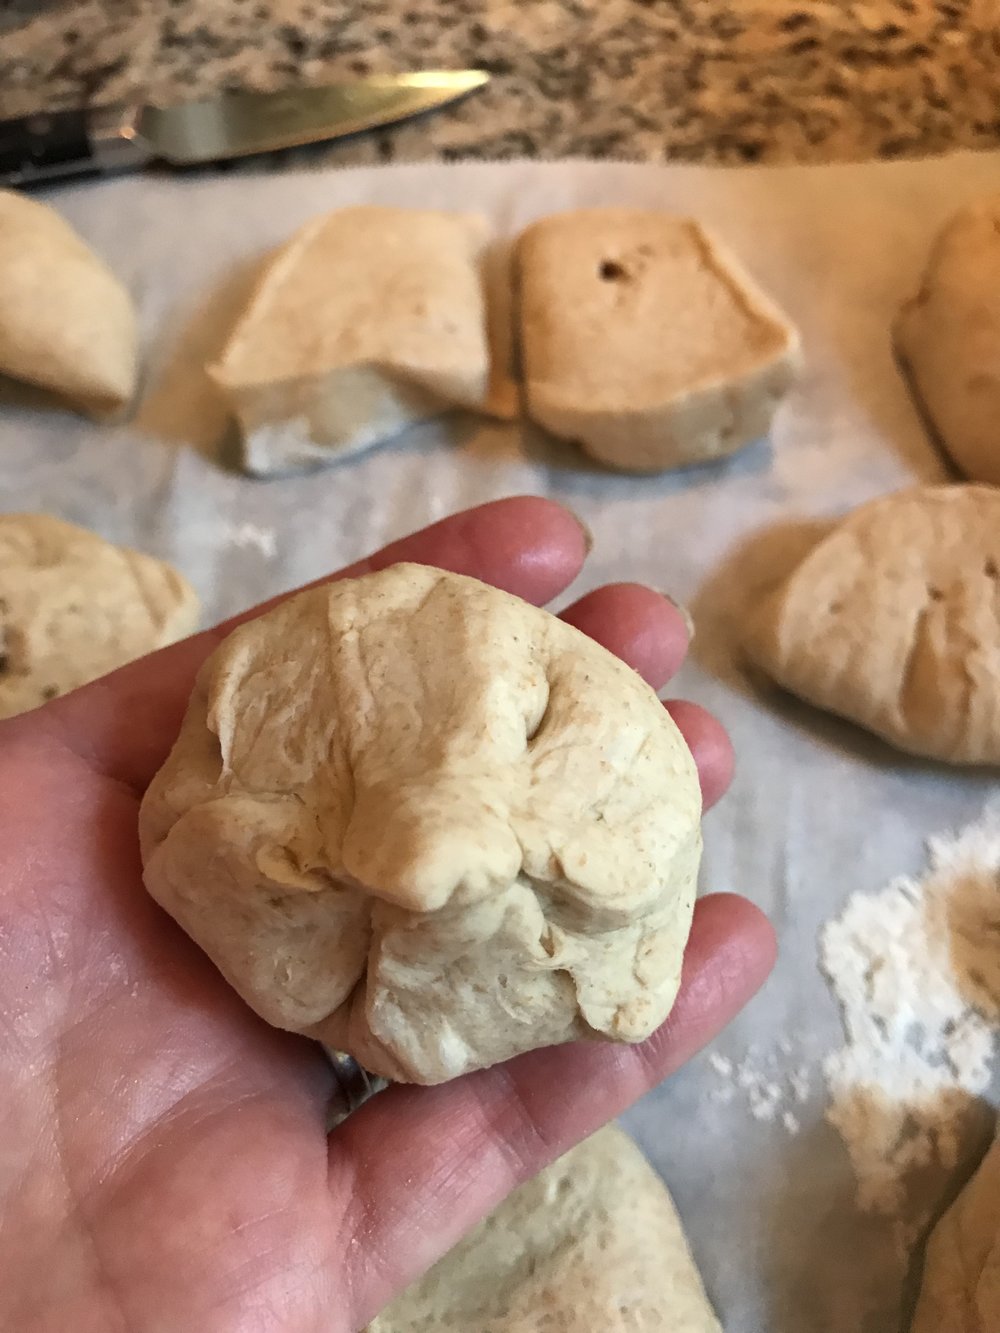 Gather edges and pinch to seal
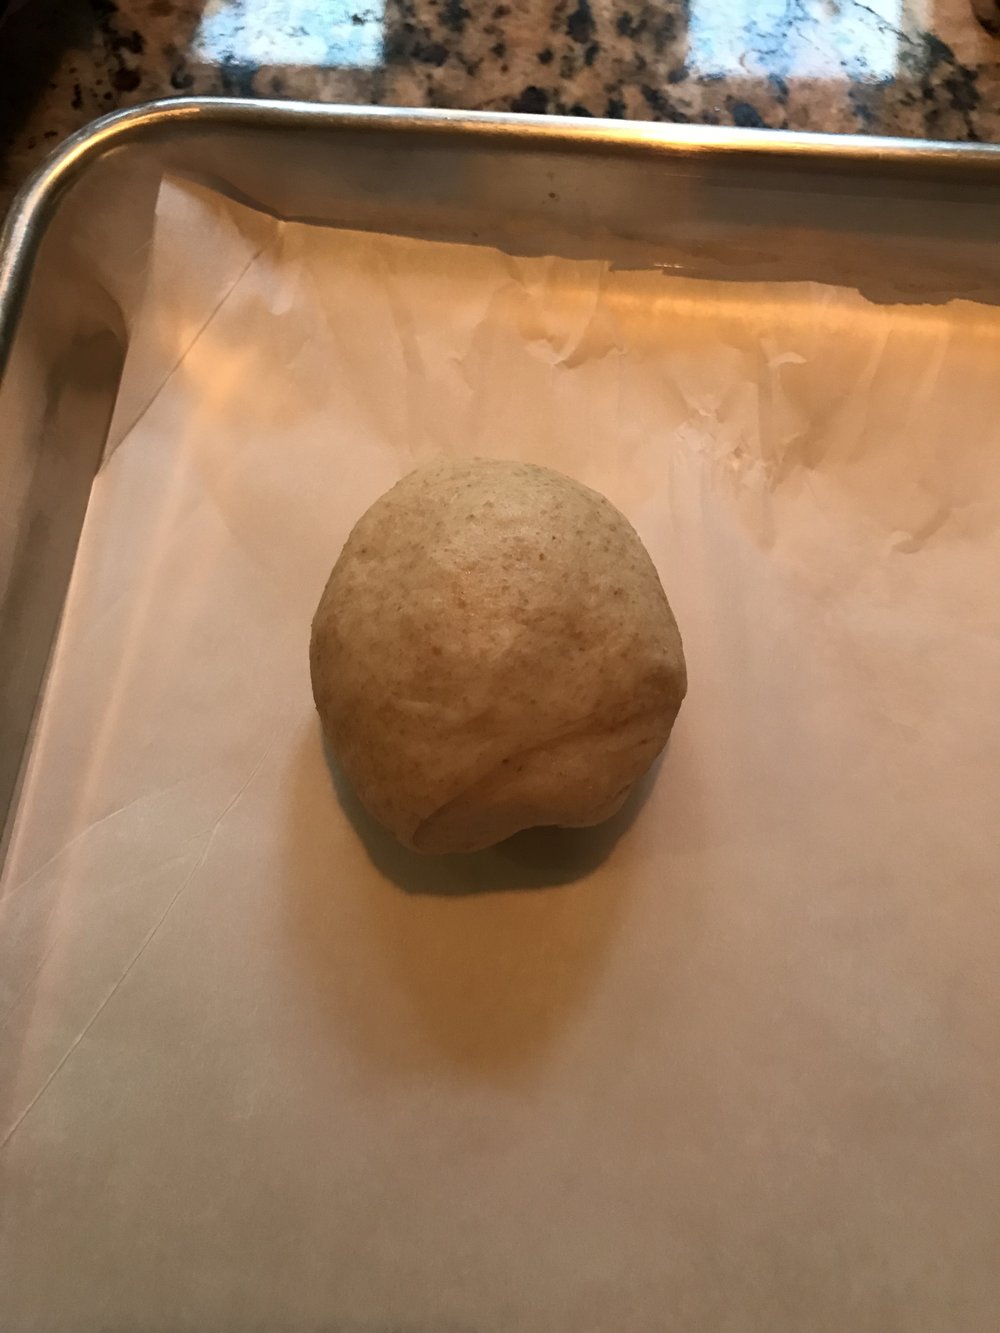 Place pinched side down on baking sheet

Cheddar Cheese Stuffed Pretzel Roll!

Cheese Stuffed Pretzel Rolls
AKA: "Volcano Rolls"...The cheese will erupt, like molten lava, from some of the rolls while baking and form a delicious cheesy crust - Oh my! yes! Imagine dunking in some soup, chili or spicy mustard! We could not eat them fast enough hot out of the oven! ( :
Print
Pin
Rate
Servings: 16 rolls
Ingredients
Rolls
- 1 1/3 cups warm water (about 105-110 degrees F.)
- 1 packet active dry yeast (about 2 1/4 teaspoons)
- 2 tablespoons warm milk
- 2 tablespoons light brown sugar
- 2 tablespoons oil (plus more to oil bowl/baking pans)
- 4 cups bread flour (plus additional as needed)
- 1 teaspoon salt
- 8 ounces gouda, smoked gouda or cheddar cheese (not pre-shredded)
- 1/4 cup pretzel salt or coarse koshar salt (optional, with the cheese it's not really essential)
Boiling Liquid
- 2 1/2 quarts water (in 6-quart pot)
- 1 tablespoon salt
- 1/2 cup baking soda
Instructions
Start Rolls
- In stand mixer bowl, add warm water, yeast, milk, sugar, oil and 1 cup of the flour. Stir with flat or flex Allow yeast in mixture to “bloom” for 5 minutes. You will see some bubbles push through the surface of the mixture if the yeast is active. In stand mixer bowl, add warm water, yeast, milk, sugar, oil and 1 cup of the flour. Stir with flat or flex edge beater just until combined.
- Add pour shield (if using) and turn stand mixer to speed 1. Add flour a little at a time. Once combined, stop mixer, remove pour shield and switch to dough hook.
- Knead on speed 2 for about 5 minutes or until smooth dough ball forms. If seems very sticky, can add a little extra flour a tablespoon at a time.
- Place the dough in an oiled bowl and turn dough over so both sides are oiled. Cover the bowl with a clean towel or plastic wrap and place in a warm place to rise for about 45 - 60 minutes or until approx. doubled in size.
- Shred the cheese. Press tablespoon portions of cheese into a ball shape. You can squeeze gently in the palm of your hand. (*Don’t use pre-shredded cheese, it won’t stick together.)
- Press down on the dough to release the air from rising, place on your baking mat or lightly floured surface and roll into an even cylinder shape. Cut into 8 equal pieces. Cut each piece in half so you have 16 total pieces. Take each piece and pat out with your fingers to form an approx. 2-3-inch round or square.
- Place a ball of cheese in the center of the dough. Gather up the edges of the dough and pinch together as if it were a drawstring purse or bag. Turn over and gently press down to help seal bottom and form roll shape (about the size and shape of a small hamburger bun, about (2.5 – 3 inches diameter.)
- Place rolls on two baking sheets, lined with silicone mat or greased parchment paper. Repeat with other rolls.
- Lightly cover with a damp towel or greased plastic wrap. Place in warm spot to rise for 30-40 minutes. Should be fluffy and larger, not quite doubled.
- Preheat oven to 400 degrees.
Start Boiling Liquid While Rolls are Rising:
- Add 2 ½ quarts water and salt to large pot (6-8 quart) and bring to boil. Make sure the water only fills the pot about 1/2 full so as to prevent boil over when you later add the baking soda.
- Add baking soda a little at a time to boiling water. Be cautious, as water will tend to boil up when you add the baking soda.
Finish Rolls
- Take two rolls at a time and place in boiling water mixture. Boil for 30 seconds, flip and boil for another 30 seconds on the other side.
- Remove with a spider, slotted spoon or tongs and place back on baking sheet, arrange the rolls about 2 inches apart. You will fit 8 rolls on each baking sheet.
- While the rolls are still wet, score the top in a shallow “X” shape with a sharp knife.
- Optional: Sprinkle with a pinch or two of pretzel or kosher salt.
- Bake for about 15 minutes, rotating baking sheets halfway through. They will be done when they are a deep brown color and sound hollow when tapped.
- Remove from oven and allow to rest for about 5 minutes, then transfer to cooling rack. Serve warm or at room temperature.
Tried this recipe?Share it! Tag @epicuricloud - Please Leave A Comment & Rating Below! TY!
Do you have to use bread flour; unfortunately I only have all purpose flour? Thanks
Hi Stephanie – Go ahead and use your all-purpose flour! We have to use what we have these days! Take care!
In Step #1 the first thing is says is to let the yeast bloom for 5 minutes. Do I understand this means first you add the water, yeast, milk, sugar, oil and 1 cup of flour, mix to combine, and then let it rest for the yeast to bloom?
Hi Sarah – Yes, Combine the water, yeast, milk, sugar, oil and 1 cup of the flour. Stir and let sit for about 5 minutes – so the yeast can activate. I rearranged the wording in the post, so hopefully makes sense for others – THANK YOU!