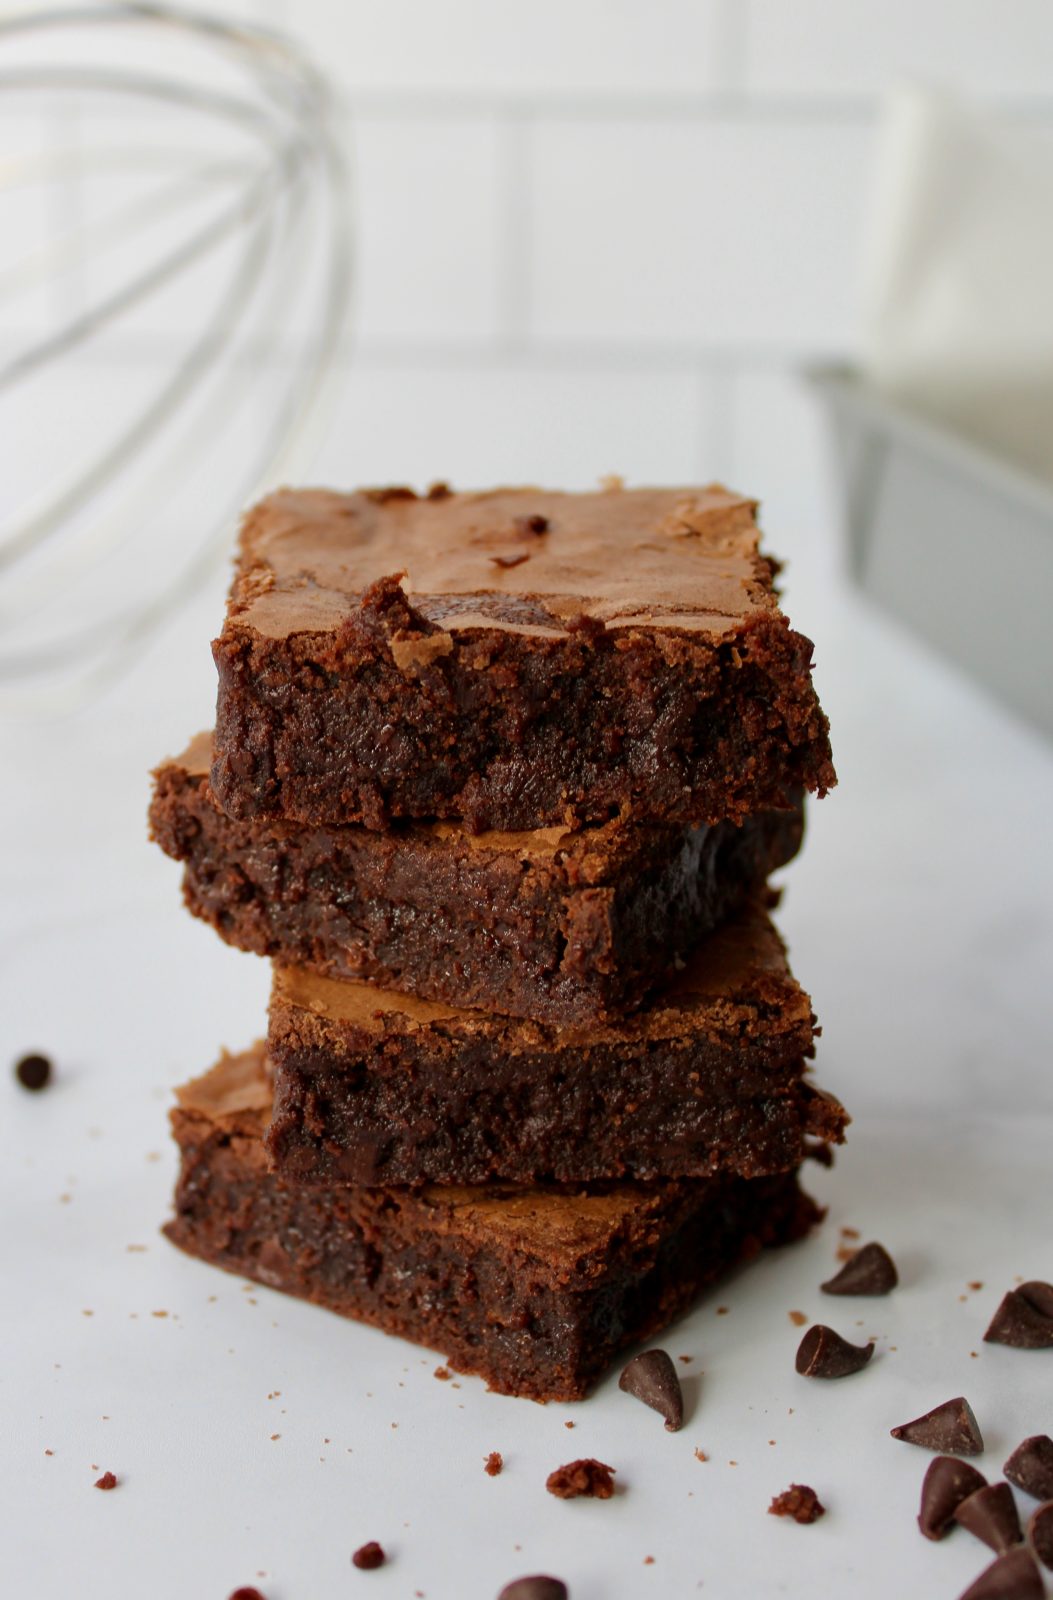
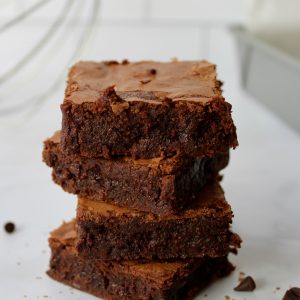
Fudgy, Chewy, Chocolatey Brownies with a Shiny, Crinkly Top:
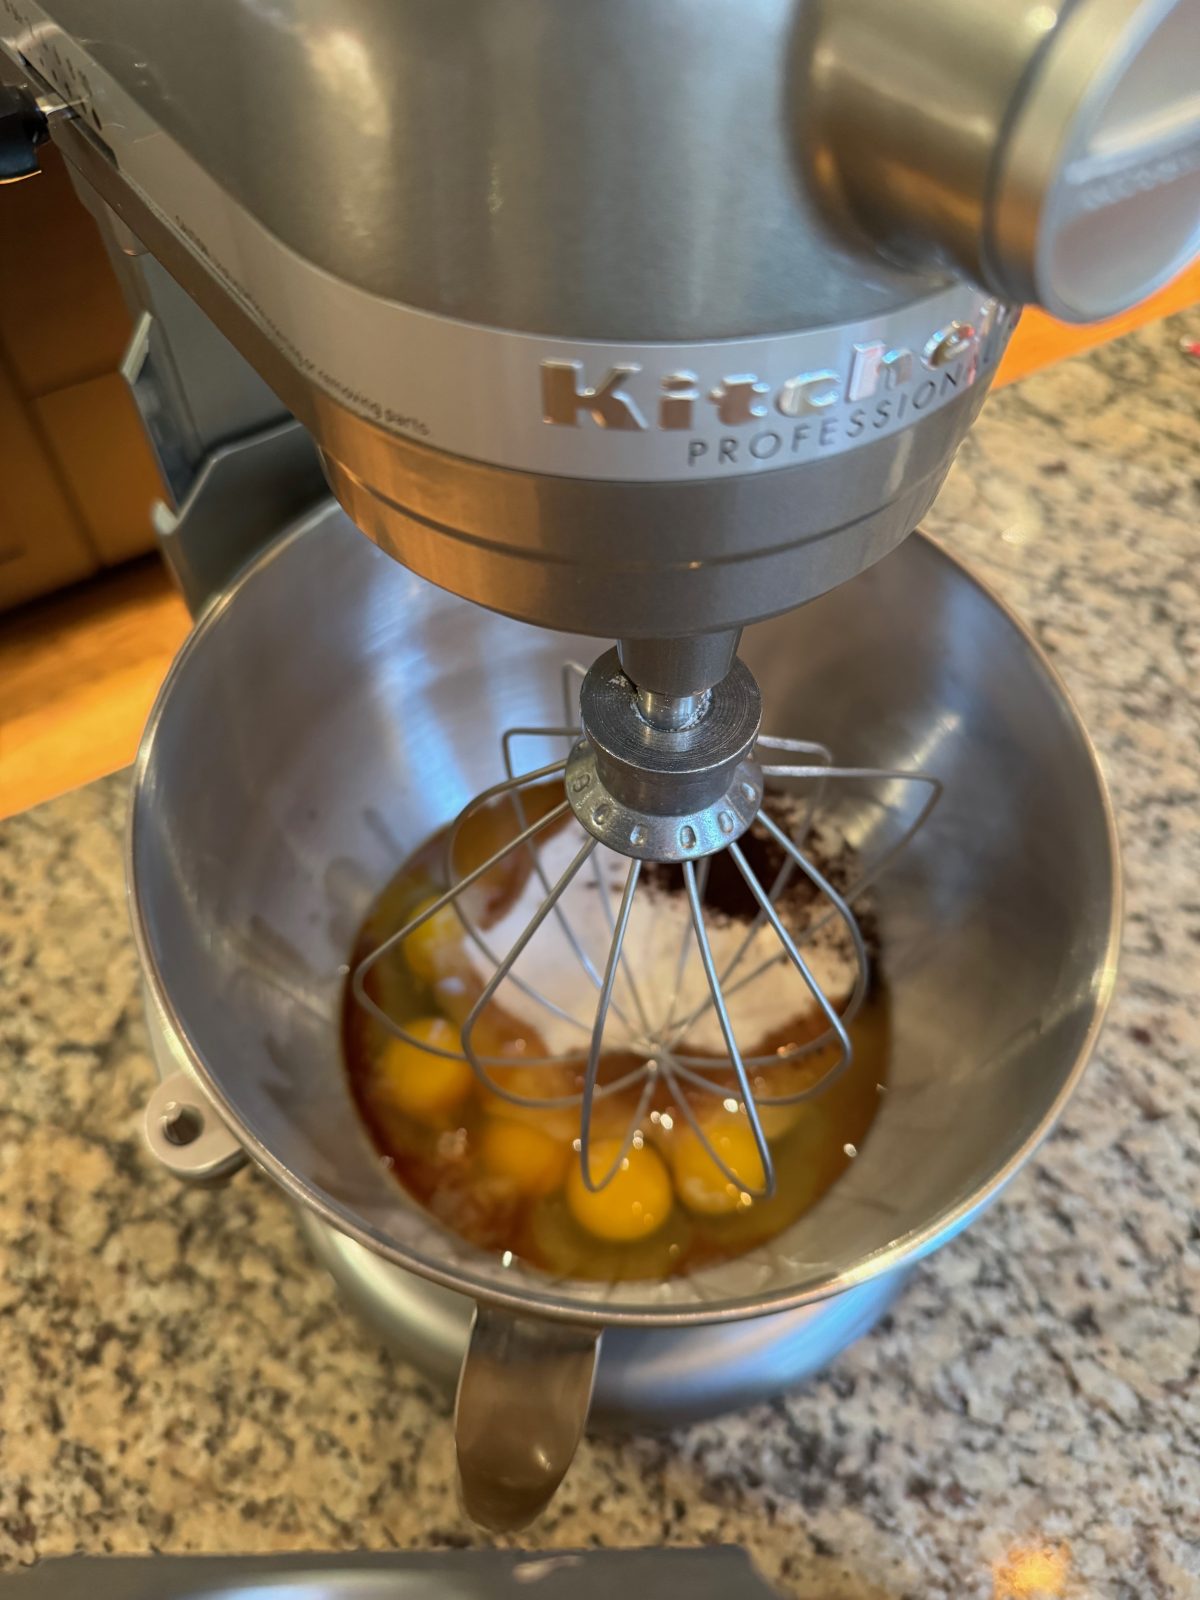
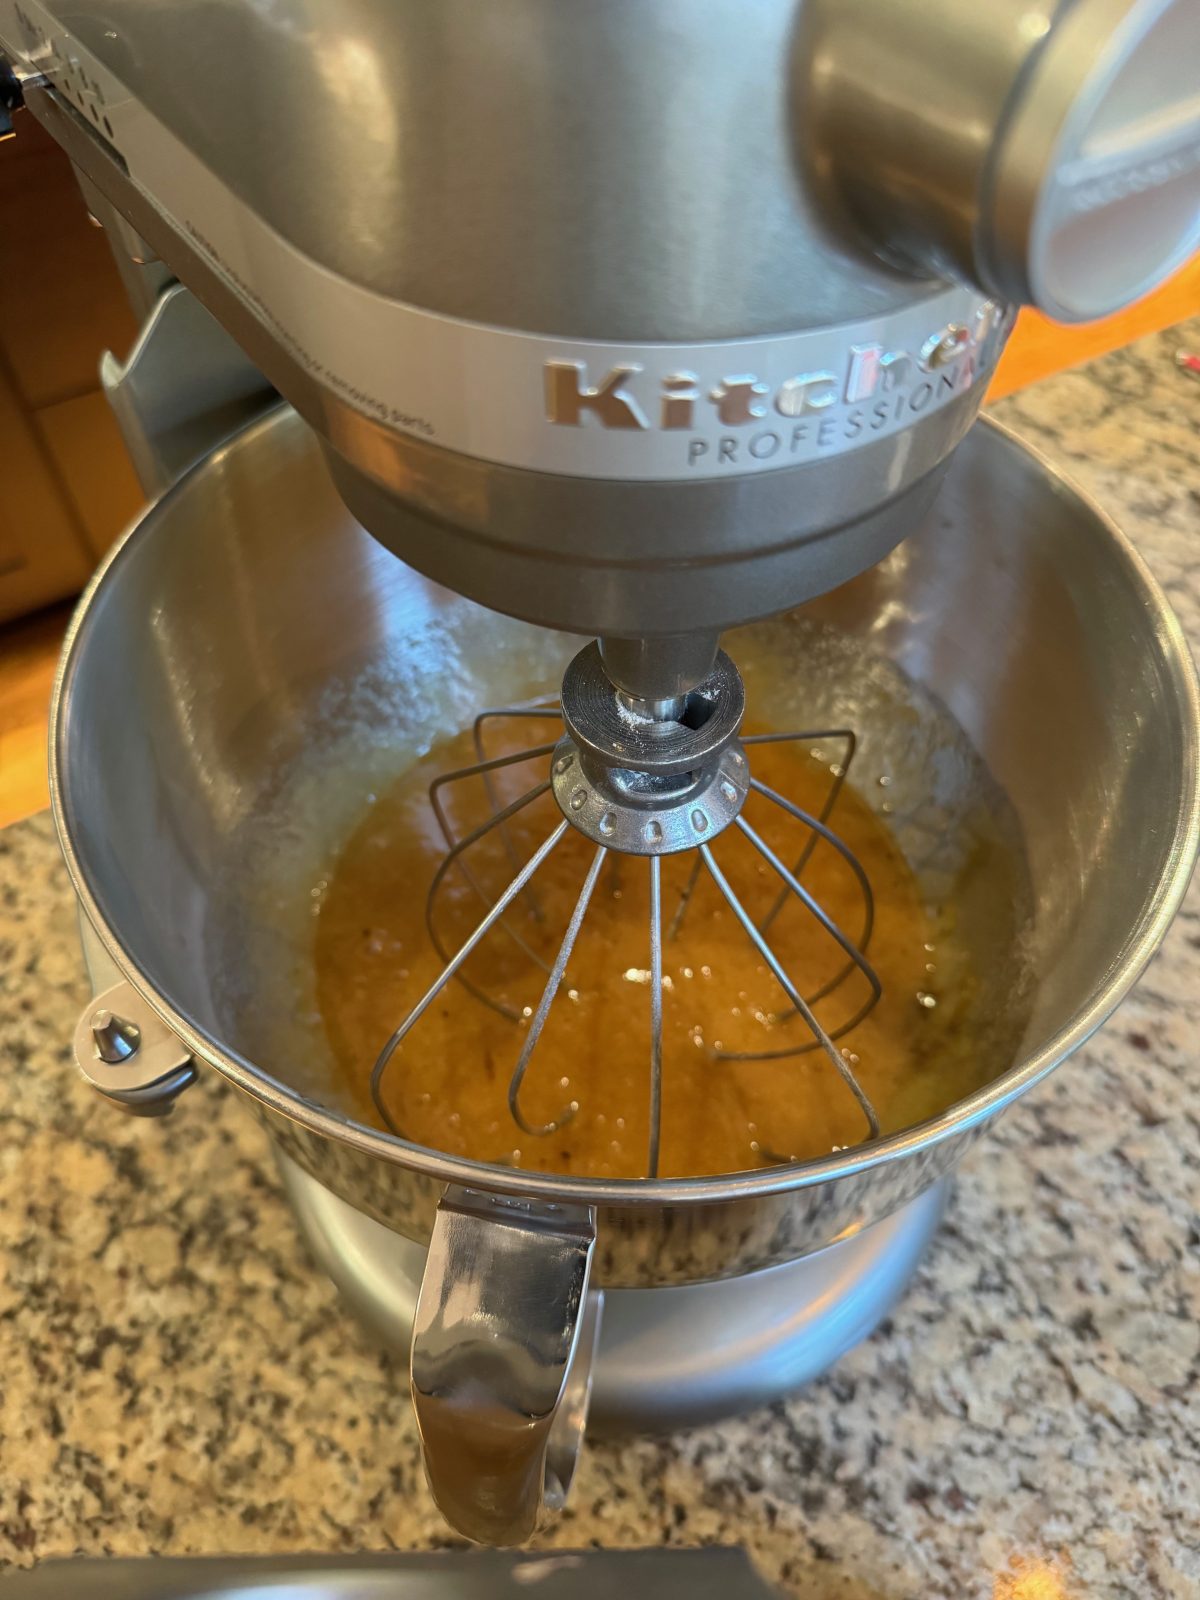
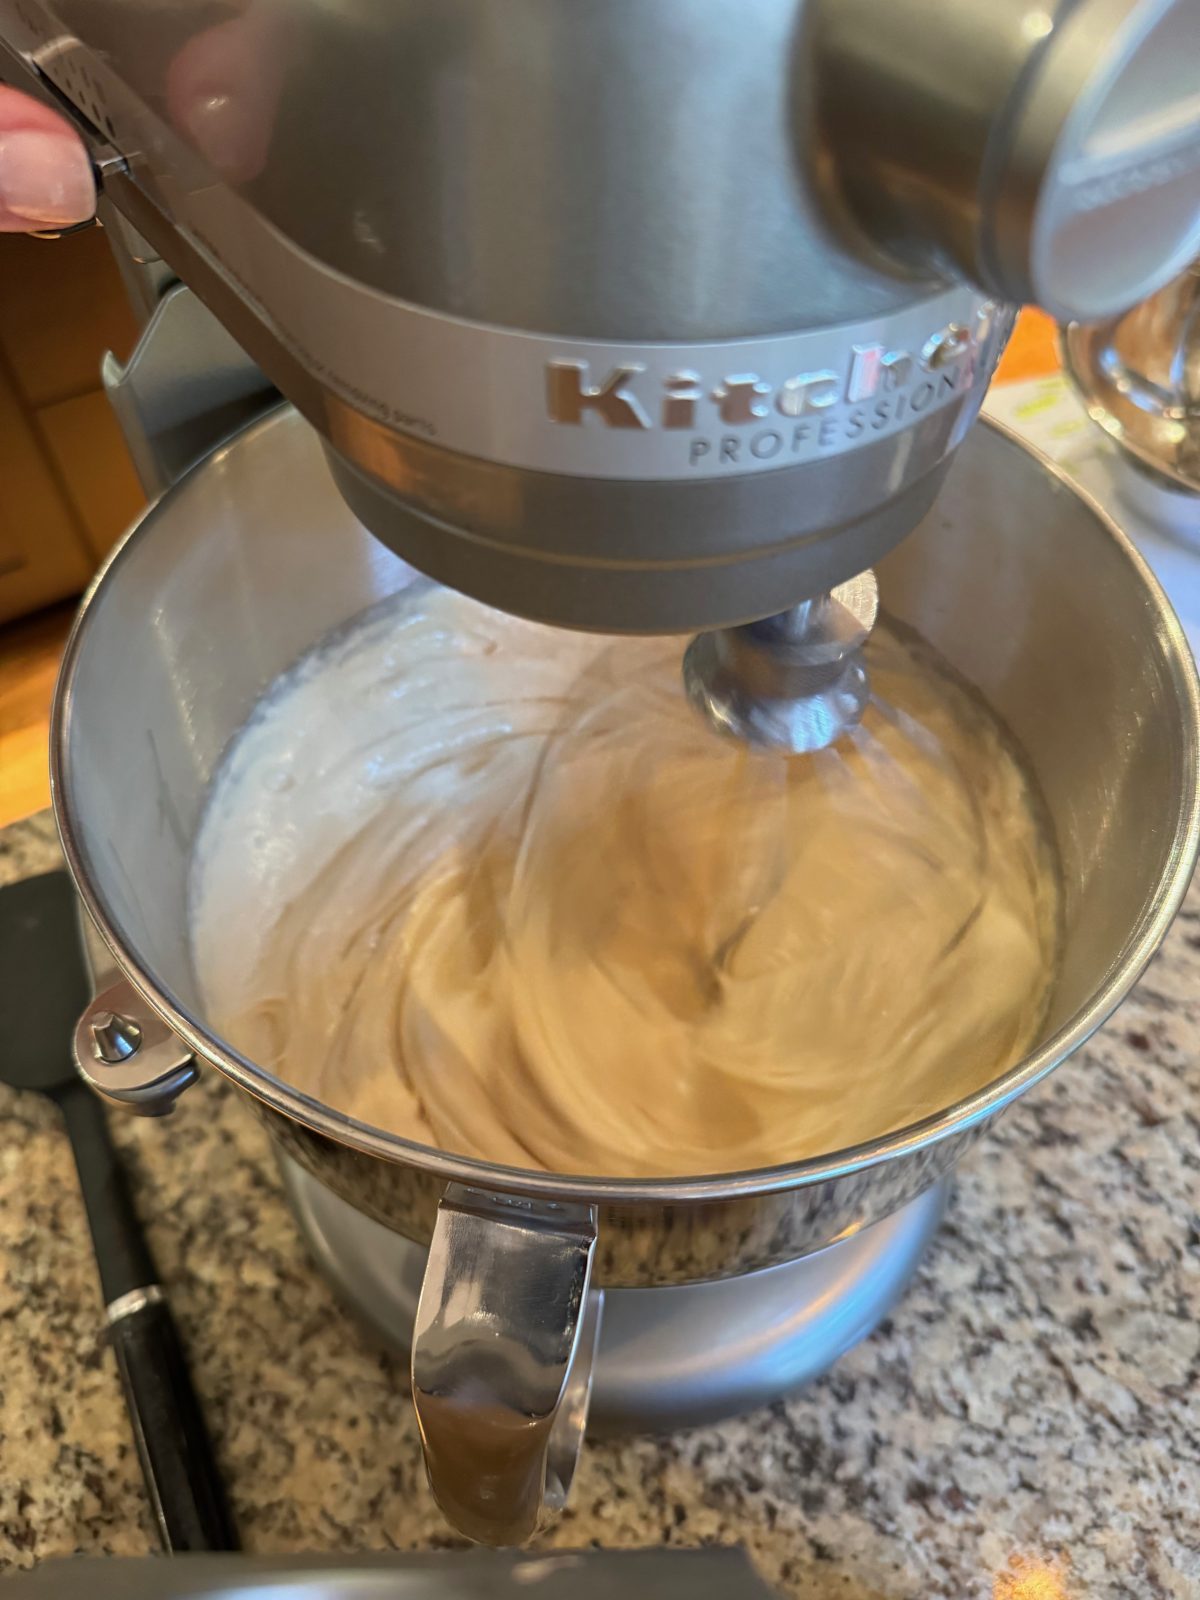
I discovered a new method for mixing brownies! My whole life, I thought you were supposed to hand mix brownies… through some research, I discovered the egg foam technique! In recipes calling for whisking together eggs and sugar, turns out you’re supposed to whisk if for way longer than I ever realized – and a stand mixer fitted with wire whip is perfect for this – Literally let it do all the work! This egg foam technique is used in sponge cakes, cake rolls, genoise, angel food cake, mousse and much more – basically the air you whip in acts as the leavener in the recipe. For my recipe, I whip in my Pro600 KitchenAid Stand Mixer for a full 6 minutes. That whipping transforms the mixture into a thick, voluminous mixture – that when finished will fall back into the bowl off the whisk in a thick ribbon – called the “ribbon stage.”
This technique gives you that delicious fudge brownie center with that beautiful shiny, crinkly top – the hallmark of a perfect brownie!
Perfectly Fudgy Stand Mixer Brownies
Equipment
- 1 light colored metal baking pan – 13" x 9" x 2"
- 1 stand mixer I used my KitchenAid Pro600 model
- 1 Sifter or fine mesh strainer
Ingredients
- 4 ounces unsweetened baking chocolate bar I use the 4-ounce Baker's orange box – unsweetened
- 3/4 cup butter (1 1/2 sticks) I use salted
- 4 large + 1 yolk eggs
- 2 1/4 cups sugar
- 1 tablespoon vanilla
- 1/2 teaspoon instant espresso granules optional
- 1 cup (125g) flour
- 1/3 cup (29g) cocoa powder I use regular Hersheys Cocoa Powder
- 2/3 cup mini semi-sweet chocolate chips
Instructions
- Preheat oven to 350 degrees F. Arrange rack to lower center. I highly recommend using an inexpensive oven thermometer* to check your oven temperature. Most ovens are not preheated to the correct temperature.
- Grease and Line a 13" x 9" x 2" light colored metal baking pan* with 2 layers or parchment or foil. Overhang the parchment or foil on the long sides of the pan so you can easily lift out the whole slab of brownies once cool for easy cutting.
- Melt butter and unsweetened chocolate in a saucepan over very low heat – stirring until just melted. Turn off heat. (You can alternatively melt in the microwave using 30 second increments and stirring in-between.)
- In bowl of stand mixer, combine eggs, egg yolk, sugar, vanilla, instant espresso. Use wire whip accessory to whip for 4-6 minutes* (I start on low speed until combined, then whip on speed 8). The mixture should be transformed to very light color yellow and should be fluffy and increased 2-3x in volume.
- While, mixture is whipping, Sift flour and cocoa into a separate bowl.
- After whipping, turn mixer to low speed and drizzle in slightly cooled chocolate/butter mixture.
- Then, add in sifted flour and cocoa mixture, continue mixing on low speed, just until partly combined. Remove bowl, sprinkle chocolate chips over mixture and fold by hand gently until all the dry mixture is mixed in. Take care not to over-mix – you don't want to deflate all the air you whipped in.
- Pour into prepared baking pan and bake for about 25- 30 minutes. (start checking at 25 minutes.) When finished baking, top will be shiny and evenly puffed. Edges will look set and may start pulling away from the sides of the pan. A toothpick inserted in the center will still have some moist brownie crumbs on it. Remove to a cooling rack. Cool 20-30 minutes in pan, then use parchment/foil to remove to cooling rack. Fully cool before cutting and enjoying. (They cut more cleanly when they are cool and it gives the crumb/texture time to fully settle.)
Tina, would Tara’s 9 x 13 ceramic baker work for your brownie recipe? Or is the light metal pan a must?
Hi Kim – I do prefer light colored metal baking pans for baked goods. I think you get the best, even baking results. You can of course bake in what you have – I’m sure it will still taste yummy!
Thank you, Tina.
Can’t wait to make these brownies!! I’m making them for Christmas! Thank you Tina!!!
Enjoy Gloria! and Merry Christmas!
Your instructions are always so detailed and easy to follow. I love watching your demos because you teach us so much and come up with great recipes. Keep up the good work. My mixer is from the mid 1980’s and I bought the flex edge beater and love it. Can’s wait to see what you demo next. I have many kitchen aid products – they are truly an aid in the kitchen as the same says.
Thanks so much Ricki! Appreciate your joining us!
Hi Tina! I just made these and they are delicious! The espresso makes all the difference. I did need to whip mine for a longer period of time- 8 minutes- to get the ribbons you showed us on In The Kitchen this past Sunday. Thank you for the recipe:)
Glad you enjoyed Fatima!