
Up your Sandwich Game – With Homemade Rolls!
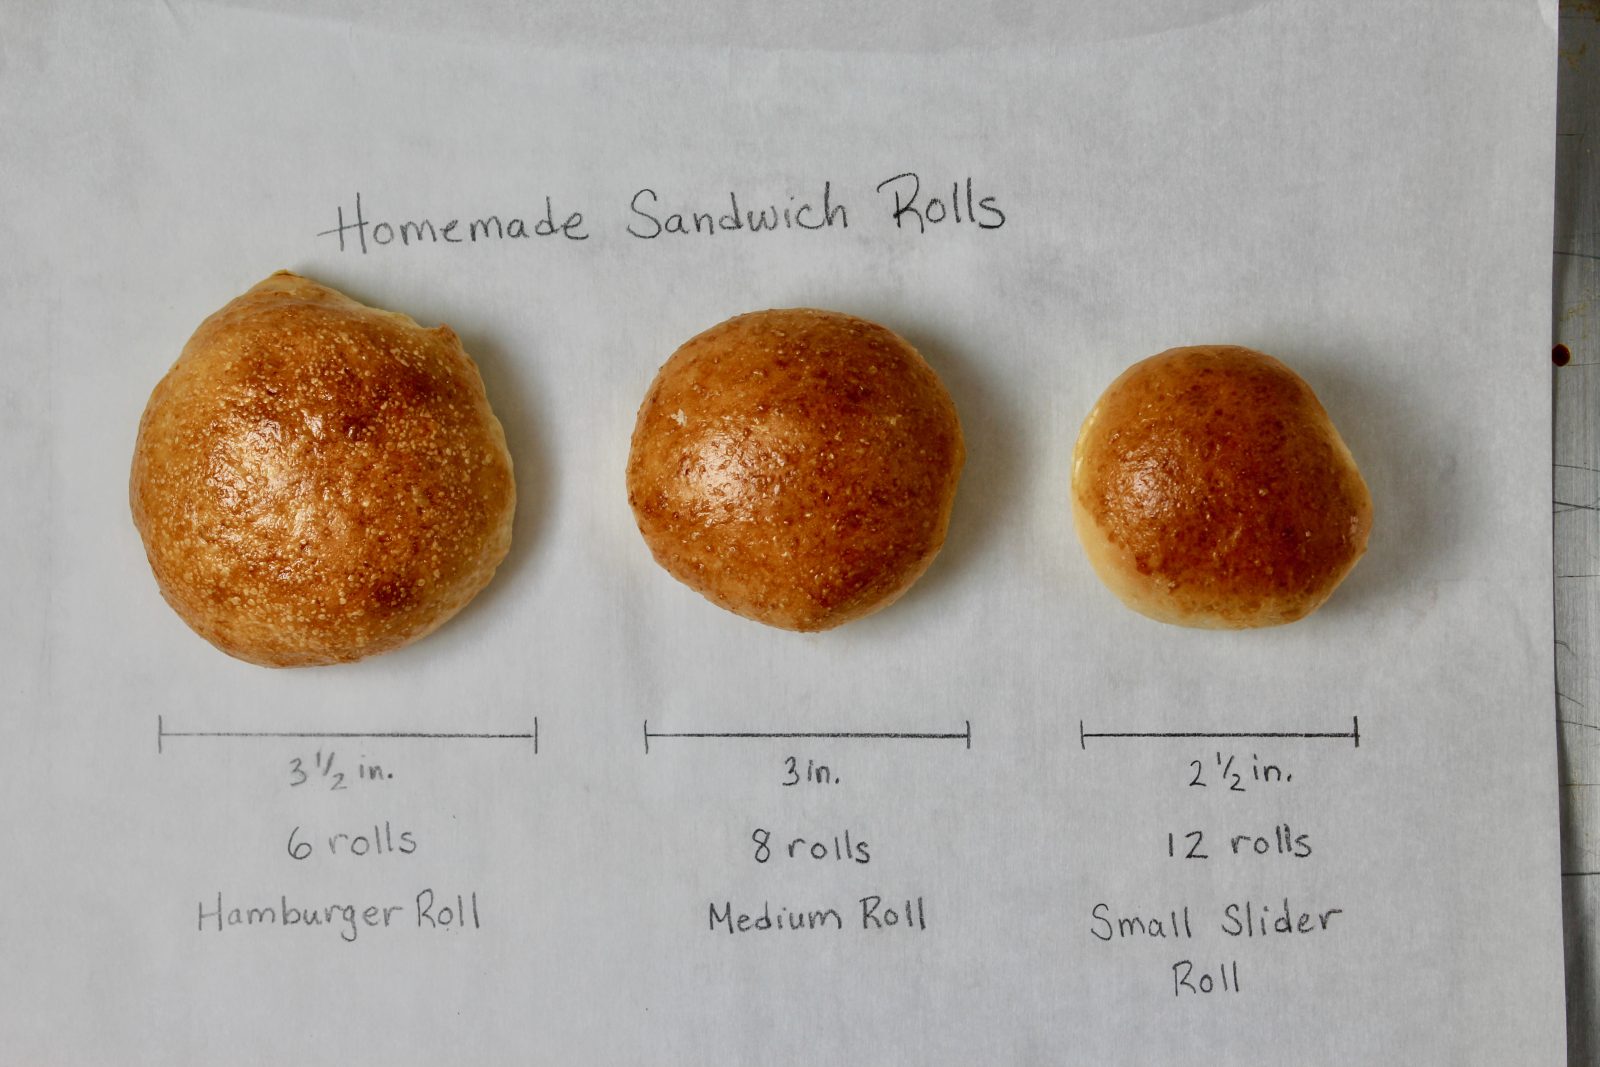
With this one simple yeast roll recipe, you can make 12 Small Slider Rolls, 8 Medium Sandwich Rolls or 6 Homemade Hamburger Buns! If you want to make a pan of traditional Fluffy Yeast Dinner Rolls check out my recipe here!
These rolls are absolutely delicious! We LOVE them!! They make your burger, pulled pork or really any sandwich extra special! They have a nice soft texture on the inside, but are sturdier than those typical floppy, squishy store-bought sandwich rolls. These homemade rolls will hold-up better with a nice juicy burger or saucy sandwich like pulled pork or sloppy joe!
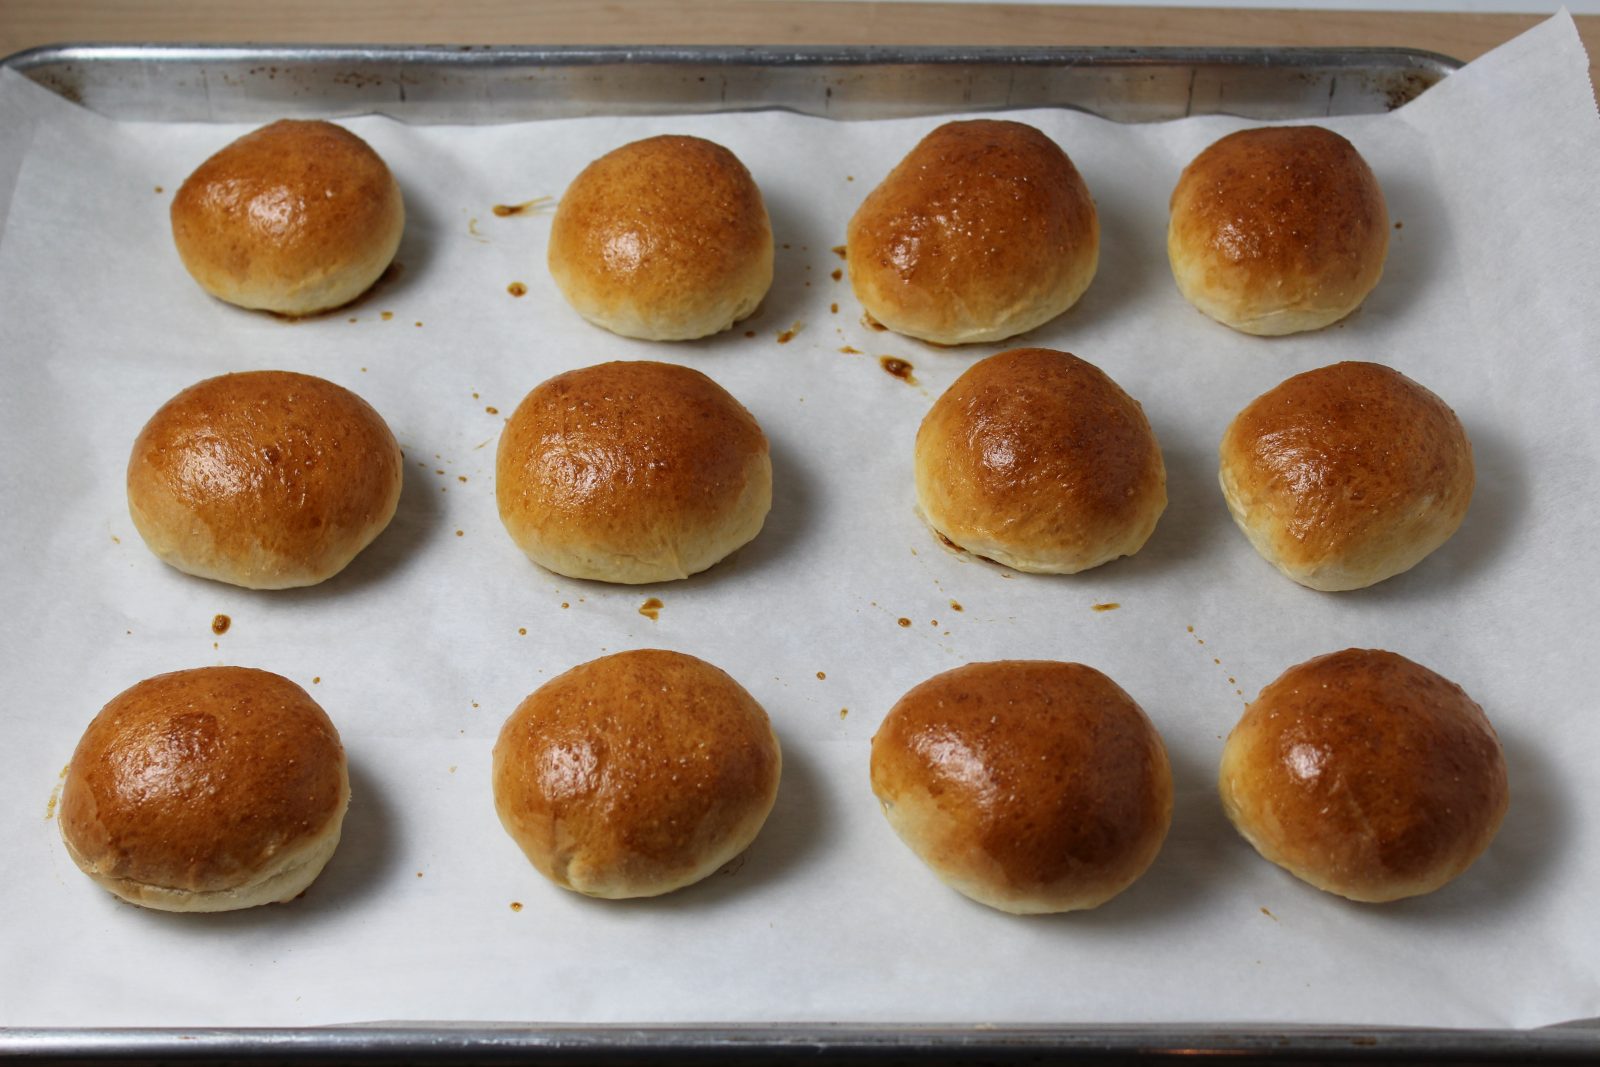
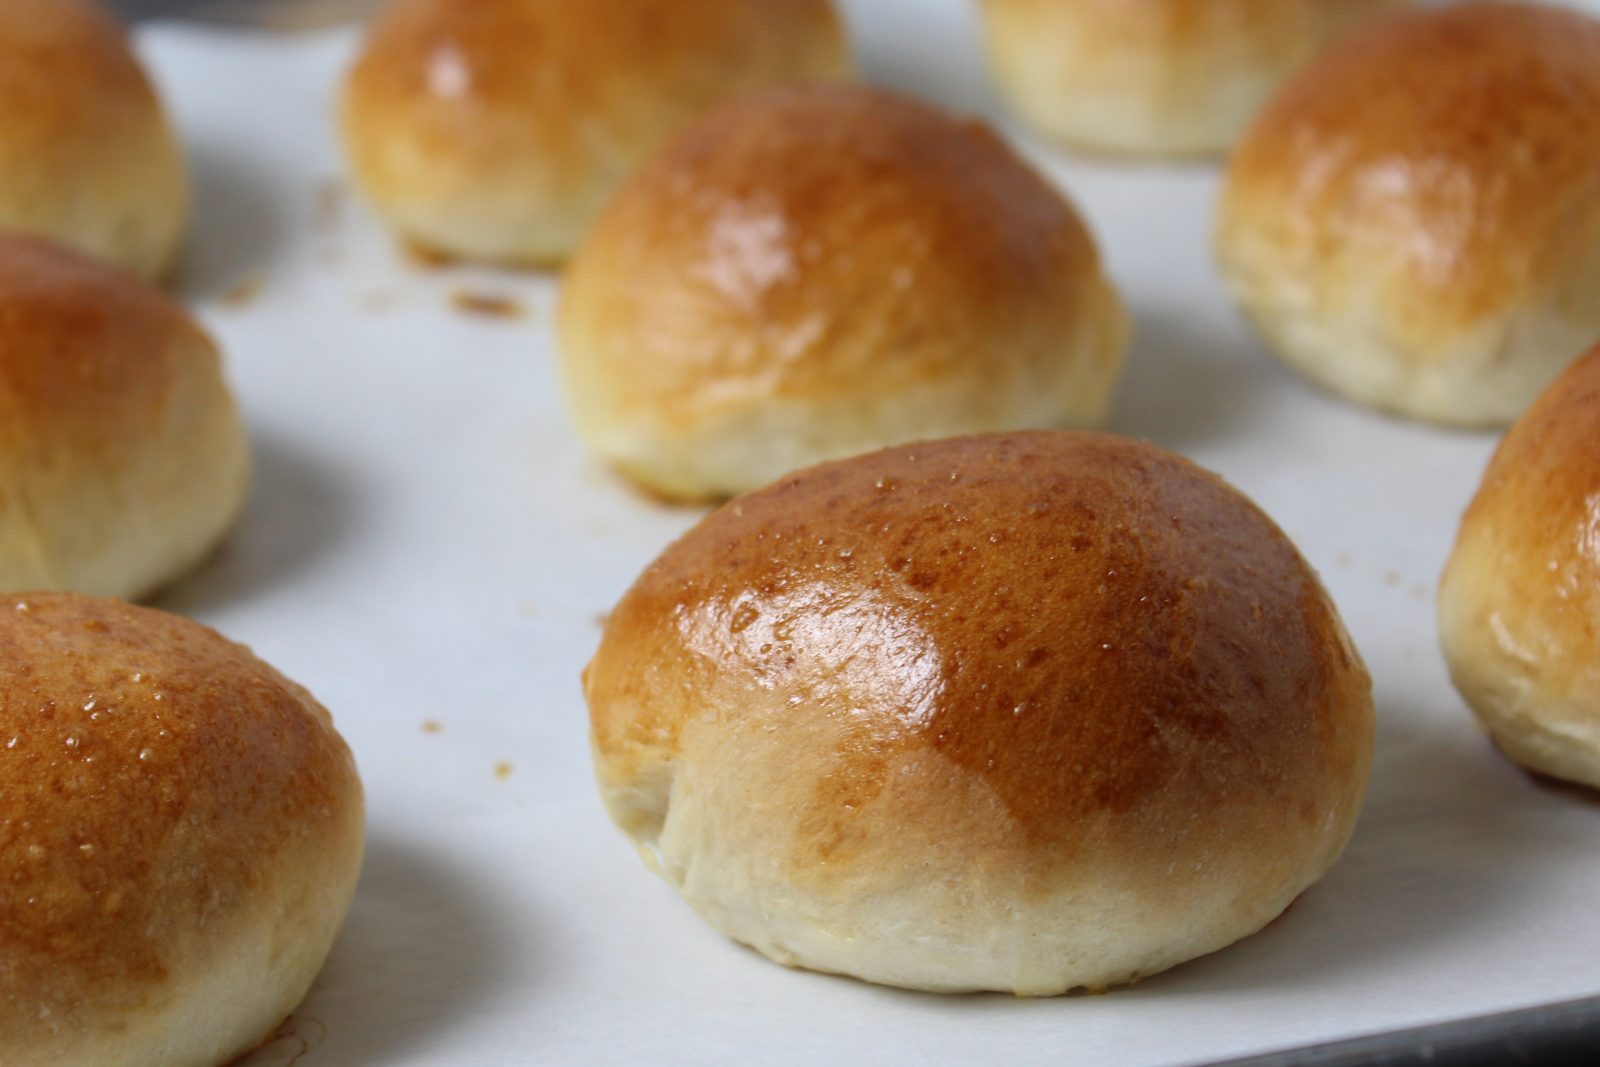
An egg wash brushed on before baking gives them a nice shiny golden brown crust! …and also helps stick-on any toppings! We love them with a sprinkling of sesame seeds, but you could also try poppy seeds or everything bagel seasoning!
They are amazingly fresh the same day they’re baked, but are also delicious a day or two later – especially toasted, grilled or buttered and warmed up on a griddle. They freeze well too!
Step-By-Step Recipe VIDEO:

Homemade Sandwich Rolls (Slider & Hamburger Buns)
Ingredients
- 290 grams (about 2 cups) flour plus more as needed
- 1 teaspoon instant/rapid rise yeast see note
- 2 tablespoons sugar
- 3/4 teaspoon salt
- 1/2 cup milk
- 1/4 cup water
- 2 tablespoons butter
- 1 tablespoon oil for greasing bowl
- 1 large egg for egg wash - optional
- 2 teaspoons water for egg wash - optional
- sesame seeds optional
Instructions
To Mix & Knead by Hand, Hand Mixer or Stand Mixer Fitted with Dough Hook(s)
- Combine the flour, yeast, sugar and salt in bowl, stir to mix.
- In microwave-safe measuring cup or in saucepan warm milk, water and butter to 110 degrees F.
- Add warmed milk mixture to flour mixture in bowl and mix on low speed (2 on stand mixer.) Knead until smooth and elastic (2-5 minutes). If mixture is very wet and sticky, add another tablespoon or 2 of flour - use as little as possible.
To Mix & Knead in Food Processor
- Fit dough blade into the bowl of food processor. Combine the flour, yeast, sugar and salt in bowl, pulse to mix.
- In microwave-safe measuring cup or in saucepan warm milk, water and butter to 110 degrees F.
- With food processor running on high, pour warmed milk mixture in through the feed tube of food processor. (Pour in a steady stream, should take less than 10 seconds to pour in.) You may need to stop and scrape the mixture down from the sides of the bowl. Pulsing sometimes is helpful to pull the mixture together. Once it forms a ball, allow it to roll around in the food processor a few times to knead the dough. If the dough seems way too wet or way too dry, you can add a tablespoon or two of flour or a teaspoon or two of water during the process.
First Rise of Dough:
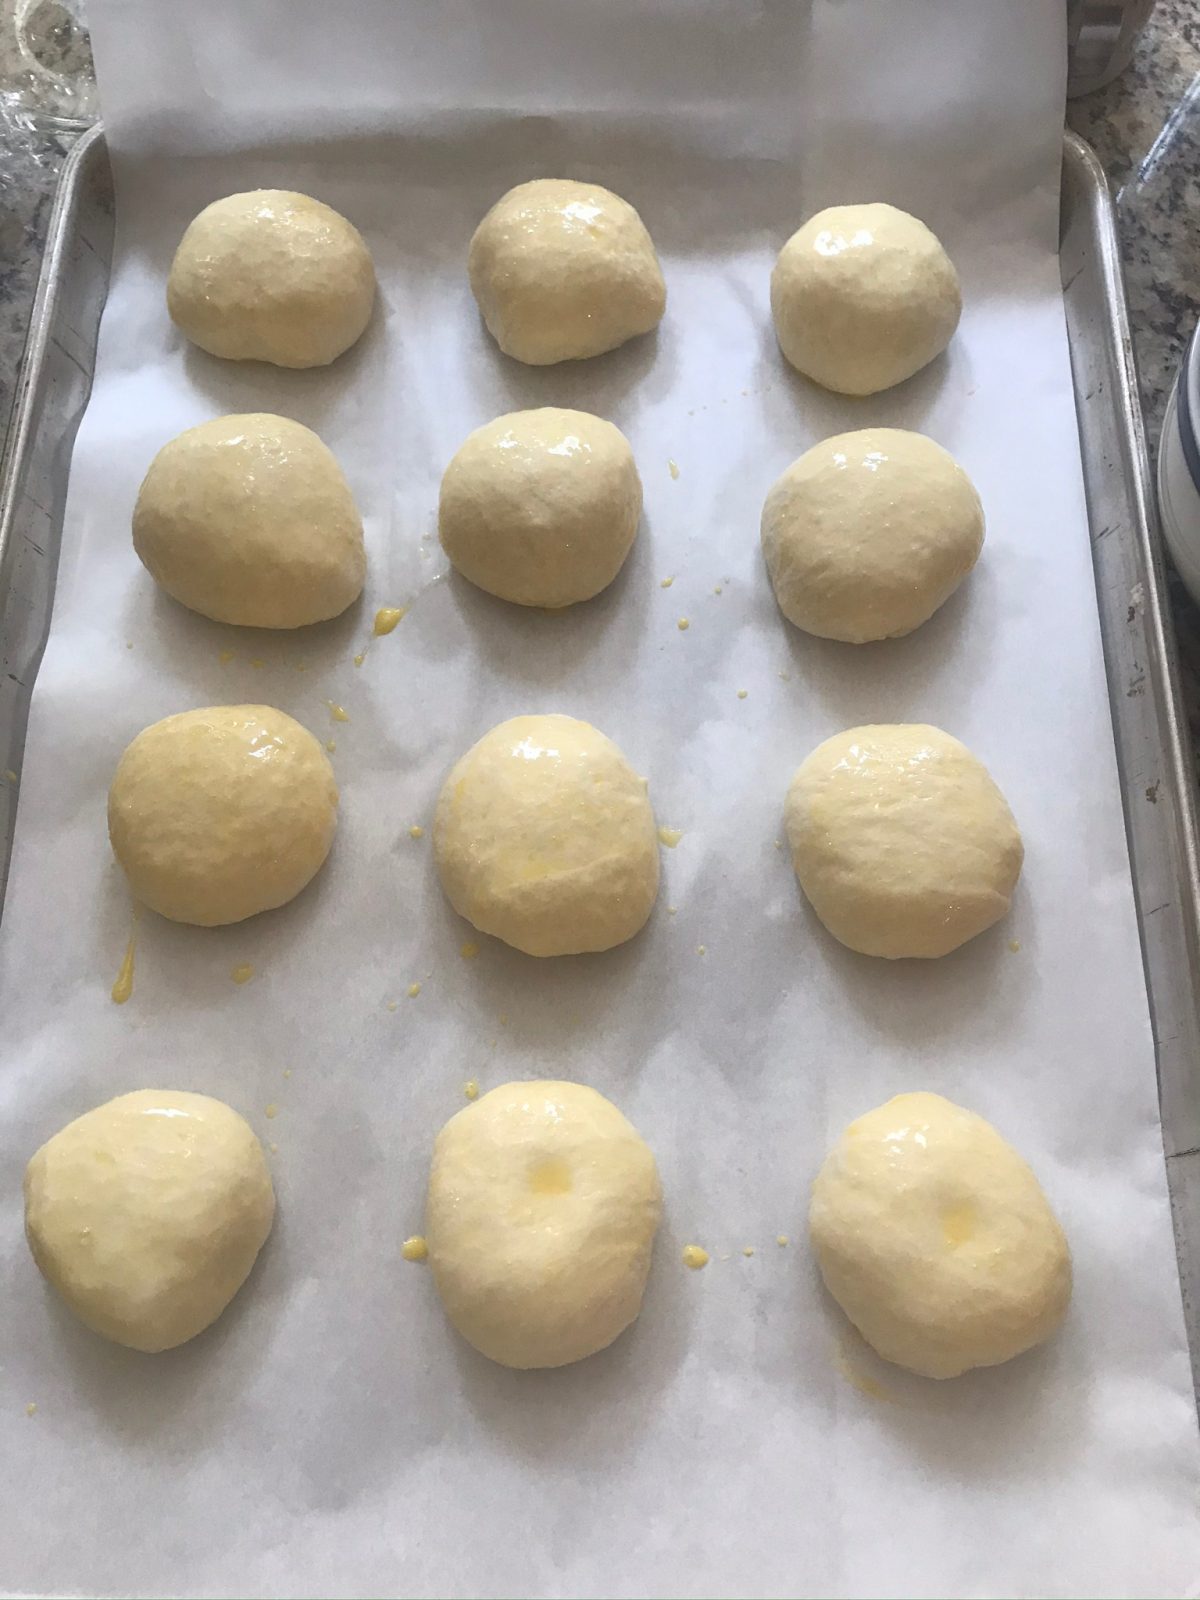
- Use some of the oil to grease the inside of a bowl. Place your ball of dough into the oil, then turn it so the oiled side is upwards (this helps the dough from drying out.) Cover the bowl with plastic wrap or a clean kitchen towel and place in a warm spot (80 degrees or so) to rise. (Sometimes at this point I'll snap a quick picture of the dough on my phone to help determine later when it has risen and doubled in size)
- Once it's doubled in size (check your photo if you took one) and you can push a finger into the dough, pull out the finger and if the indentation remains, it's risen enough. Can take 20 minutes to over an hour depending upon how warm your room is.
- Line a baking sheet with parchment paper or grease.
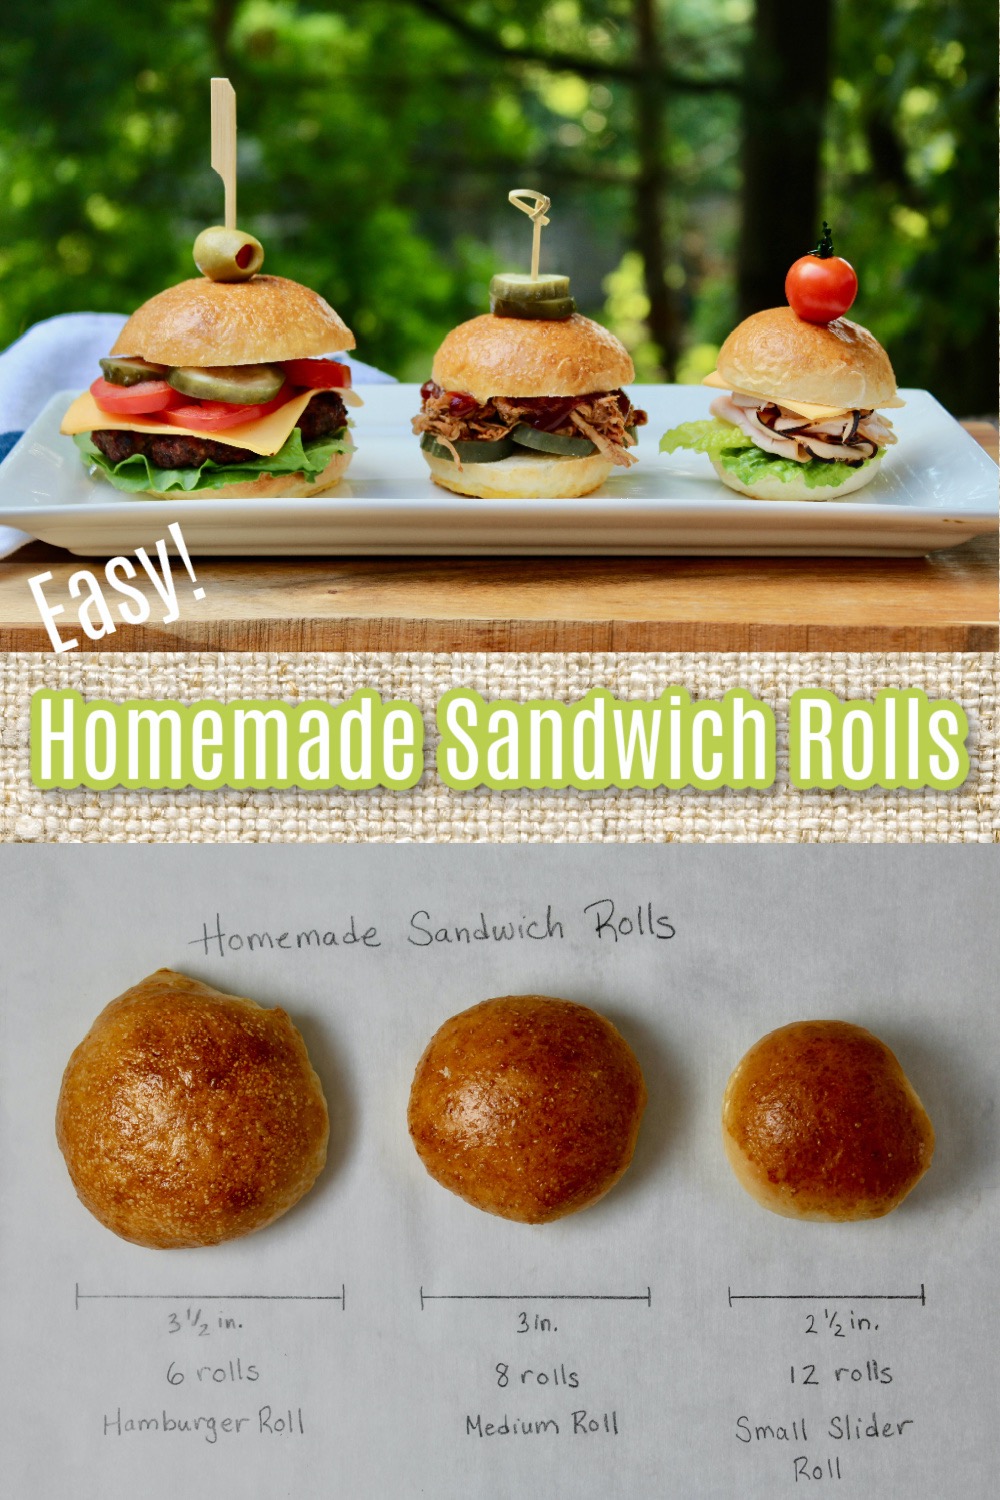
- Gently press down the dough to release the air that made it rise. Divide the dough into 12 (small 2.5 inch slider buns), 8 (medium 3 inch rolls), 6 (hamburger 3.5 inch), 4 (large hamburger/"Kaiser" size roll) portions. Form each piece into a rounded ball and arrange in the prepared pan. Pat them down a little to flatten. Leave a little space between them. Cover loosely with greased plastic wrap.
Second Rise of Dough:
- Want to Make Ahead? At this point, if you want to bake them off later, you can cover them in the pan and place in the refrigerator for a few hours or overnight. They will take a little longer to rise when taking out of the refrigerator as they will be much colder. I usually account for an extra 30-45 minutes or rise time.
- Preheat oven to 375 degrees F. Oven rack should be in lower-middle position.
- Cover with plastic wrap, waxed paper or a clean kitchen towel and place in a warm spot until doubled in size, warm and puffy. I usually wait until the rolls are just about the diameter (see notes) the finished roll should be.
Bake:
- When ready to bake, remove any coverings from pan. If brushing with egg wash, whisk together the egg and 2 teaspoons water and lightly brush over the risen rolls. (You won't use all the egg wash.) Sprinkle with sesame seeds if desired.
- Place in oven and bake for about 20 minutes (rotate pan half-way through) or until golden brown.
Video
Notes
Weigh Your Flour:
I highly recommend using a digital kitchen scale to weigh your flour. Using a measuring cup is not as accurate as weighing.Yeast:
I use instant/rapid rise yeast for this recipe. If you have active dry yeast, you can use that as well, but usually when using this type of yeast I will dissolve and "bloom" the yeast (let it get foamy for about 5 minutes in the liquid). If you are trying to rise the dough in a cold environment, you can increase the yeast to 2 1/4 teaspoons (1 packet.)Where is a Warm Place to Let Dough Rise?
If you have a nice sunny window or warm place in your kitchen, place dough there. Some ovens have a "Proof" feature you can use for letting dough rise - just make sure it doesn't go above 90-100 degrees F. I always like to double-check my oven temperature with an inexpensive oven thermometer. Sometimes I create my own warm spot. You can use your oven (turned off). Place a heat safe dish on a lower rack - fill the dish with hot water. Put your dough on a rack above and close the oven door. (leaving the oven light on can create some gentle heat too.)Nutrition (approx. data estimated via online nutritional calculator.)
Pin for Later on Pinterest! ⬇️
Thanks Tina for the recipe! I will be making them soon!!!
Thank you so much for the recipe, Tina!! I am so excited to try these rolls.
Hope you enjoy Pattie! Let me know if you have any questions!
These were great! Very tasty and easy to make.
Thanks Vince – Glad you enjoyed!
These were VERY tasty and surprisingly easy to make. These will be my go to rolls for burgers from now on.
Delicious, easy sandwich rolls. I did end up cutting the amount of sugar.
Can I use bread machine to make dough?
Hi Linda, I haven’t tried that, so I can’t say for sure. Thanks for reaching out!
Made this and they were delicious! Can you double the recipe?
Hi Emily – Glad you enjoyed! Yes, I’m sure I have doubled it at some point!