• Skip to primary navigation
  • Skip to main content
  • Skip to primary sidebar
  • Skip to footer

epicuricloud (Tina Verrelli) logo

  • Home
  • About
    • About Me
    • Cooking Contest Experiences
  • Tina’s Recipes
  • QVC Demo Recipes
  • Tasty Travels
  • Subscribe
  • Contact
    • Privacy Policy
  • Cookbook
  • Navigation Menu: Social Icons

    • Facebook
    • Instagram
    • Pinterest
    • Twitter
    • YouTube

Strawberry Rhubarb Pie {Star Cutouts Crust}

June 23, 2019 by Tina Verrelli Leave a Comment
Modified August 16, 2020 at 9:35 pm

Strawberry Rhubarb Pie with Star Crust, slice cut out

Thanks for Sharing!

251 shares
  • Share
  • Tweet
Jump to Recipe Print Recipe

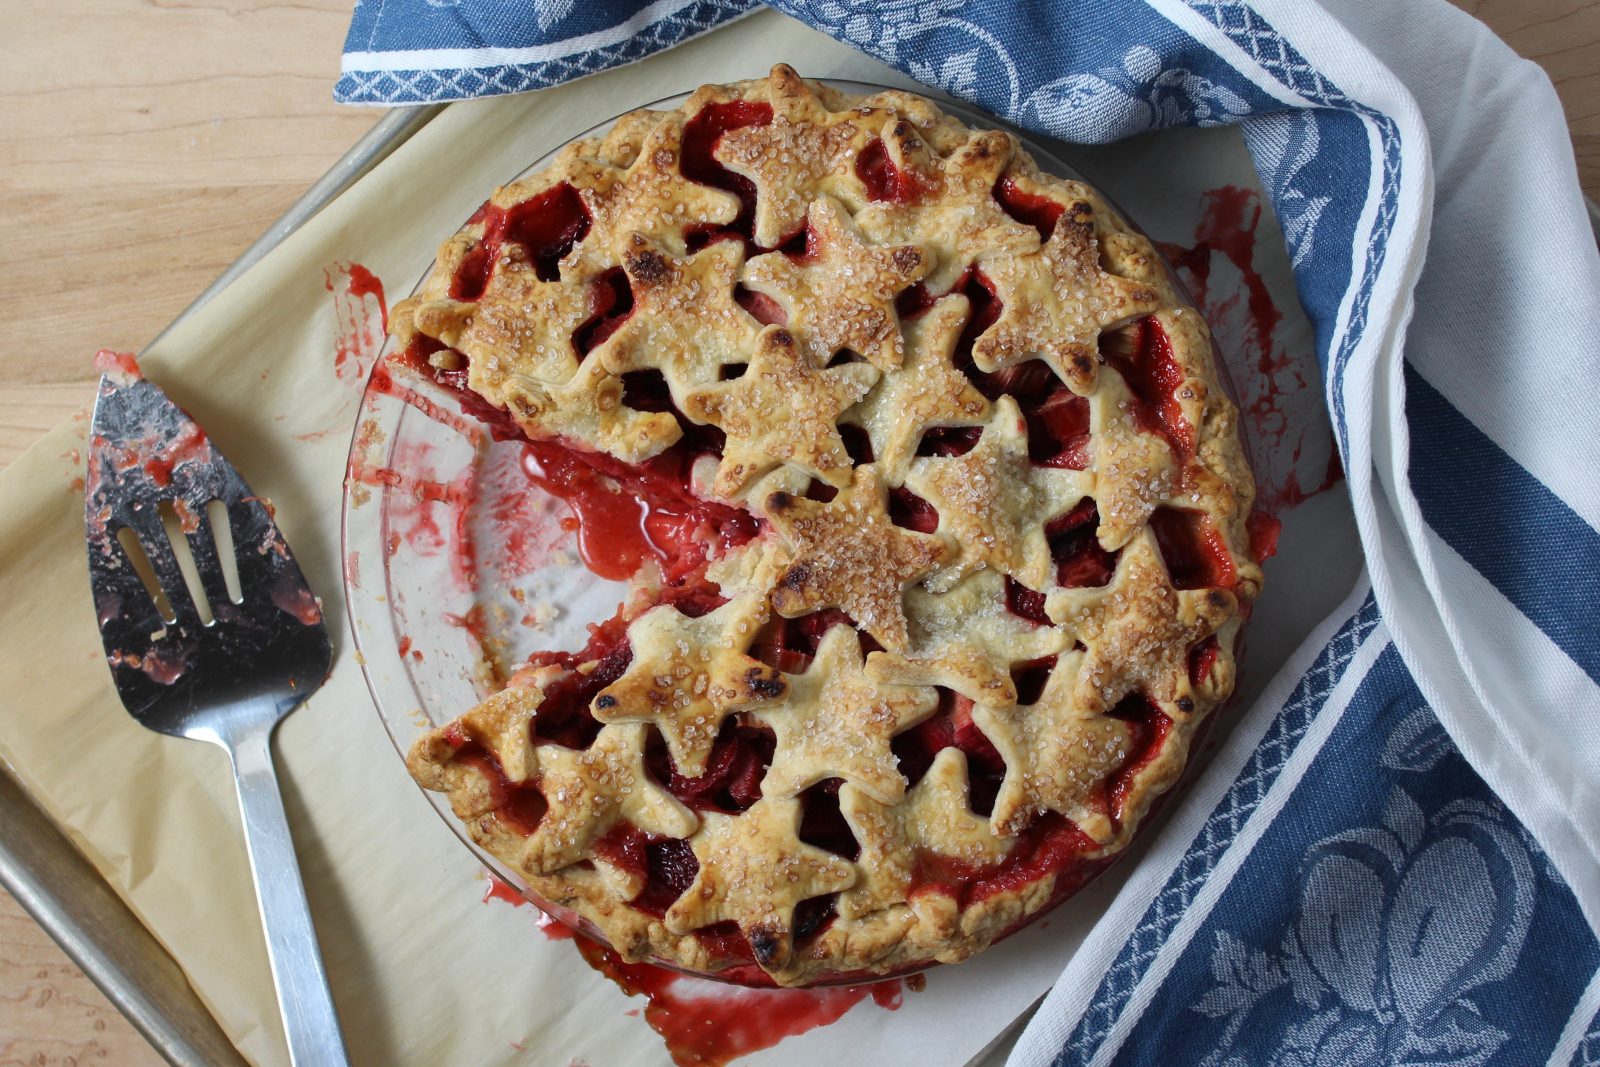
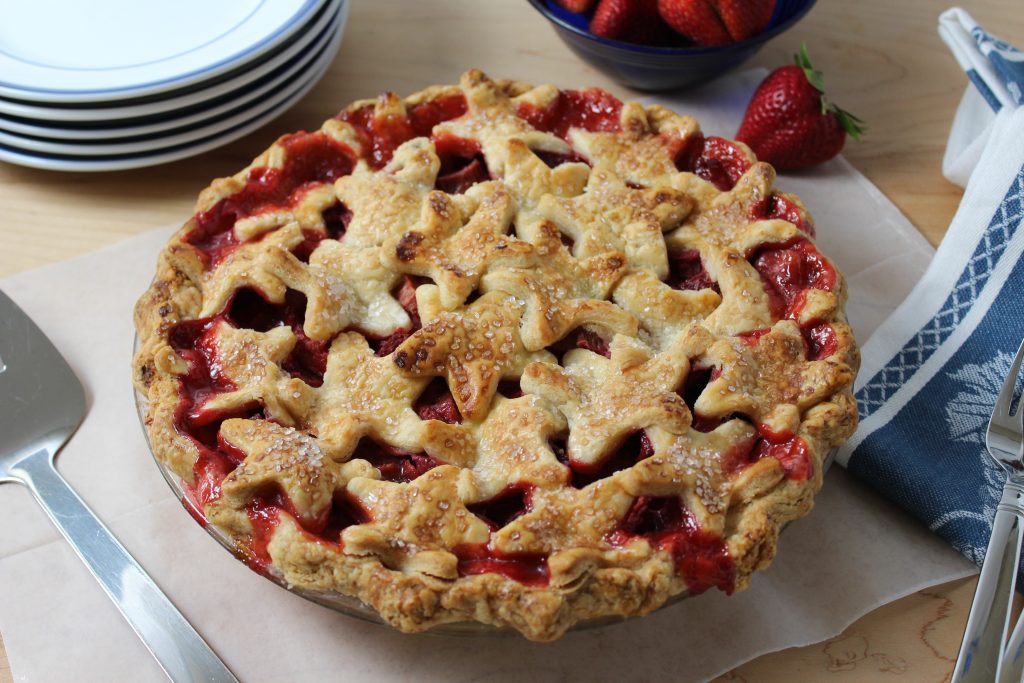
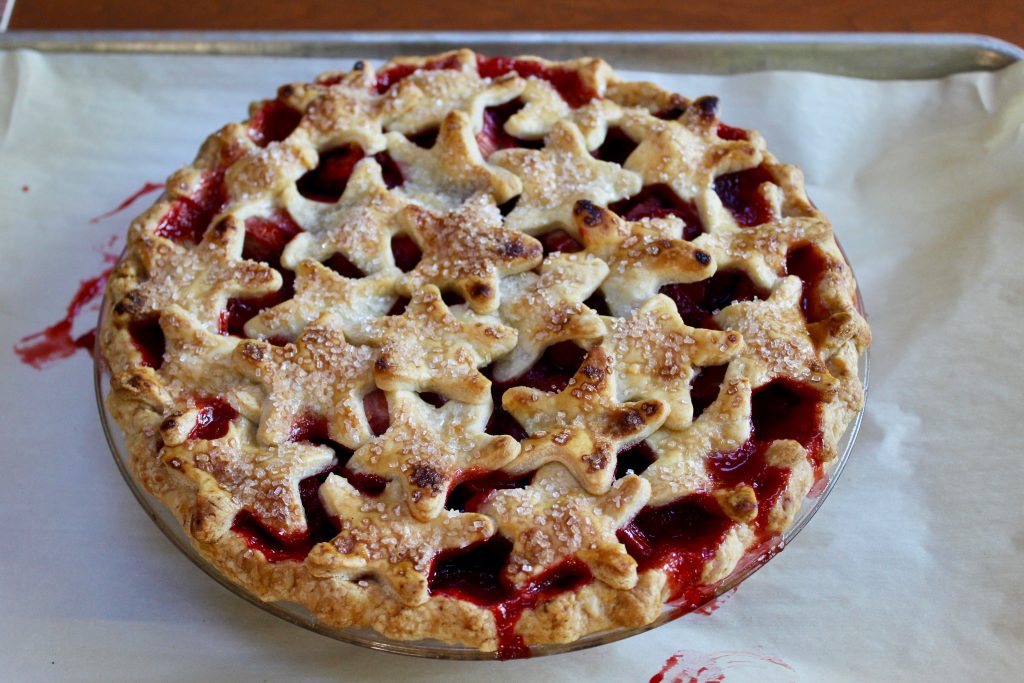
It’s a Star Spangled Strawberry Rhubarb Pie!

This is my official start-of-summer pie! Perfect for Memorial Day or The 4th of July!

I love this pie so much! – so worth all the testing it took to get the recipe just right! A tender, flaky crust filled with a fresh fruit filling, not too sweet, just a little juicy with a whisper of citrus and spice.

The hardest part of making this pie is actually waiting for it to cool! Fresh strawberries and rhubarb are very juicy! (and that juiciness can vary depending on the ripeness of the fruit.) The pie needs to cool a full 3-4 hours for the filling to thicken just right.

Speaking of thickeners – there are lots of options out there for thickening your pie. Each has its pros and cons. I found this article interesting. I use corn starch (as I always have it on hand) and had to play around with the amounts to get just the right thickness for the filling.

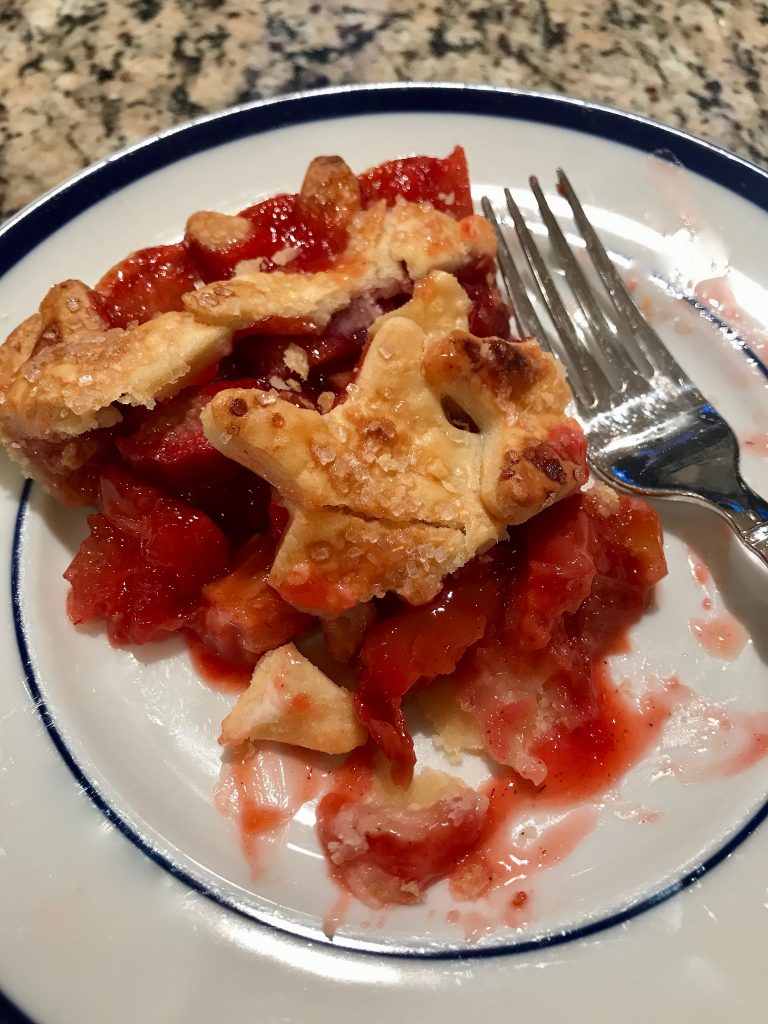
I like my pie filling to be not completely “gelled”, but not running all over the plate – just a little trickle of thickened fruit juicy goodness!

The Crust!

Here’s my recipe for Homemade Pie Crust (makes enough for the bottom crust and the stars) and a video to show you how to make it with your KitchenAid Stand Mixer. (Can also be made by hand or with a food processor.)

If you don’t have time to make the crust – use store bought, but you may need 2 boxes (3-4 crusts) to cut out all the stars.

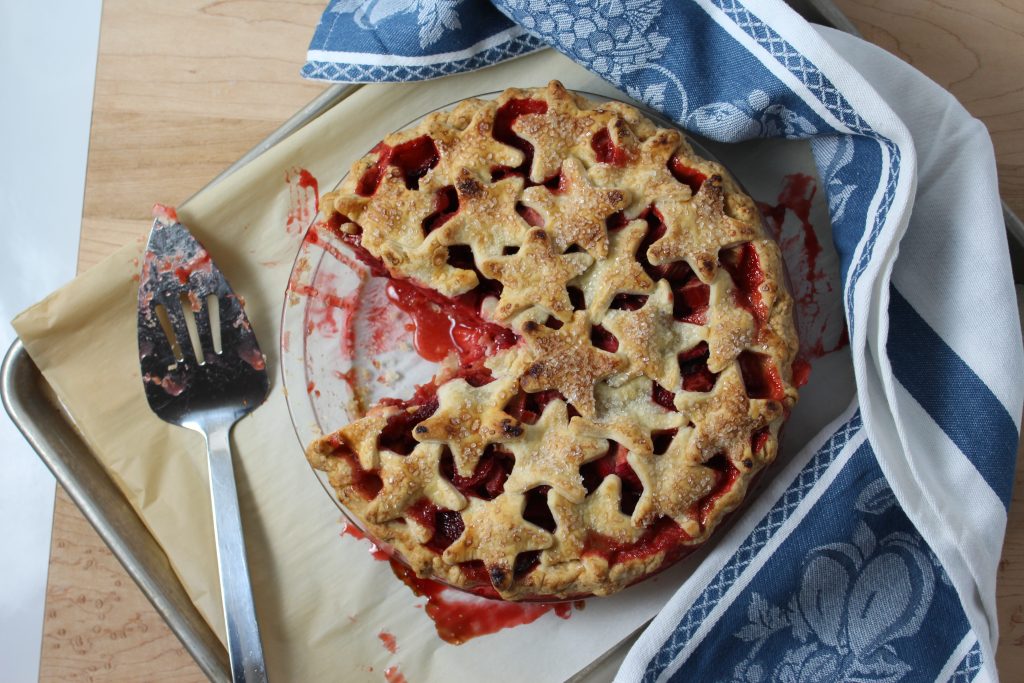
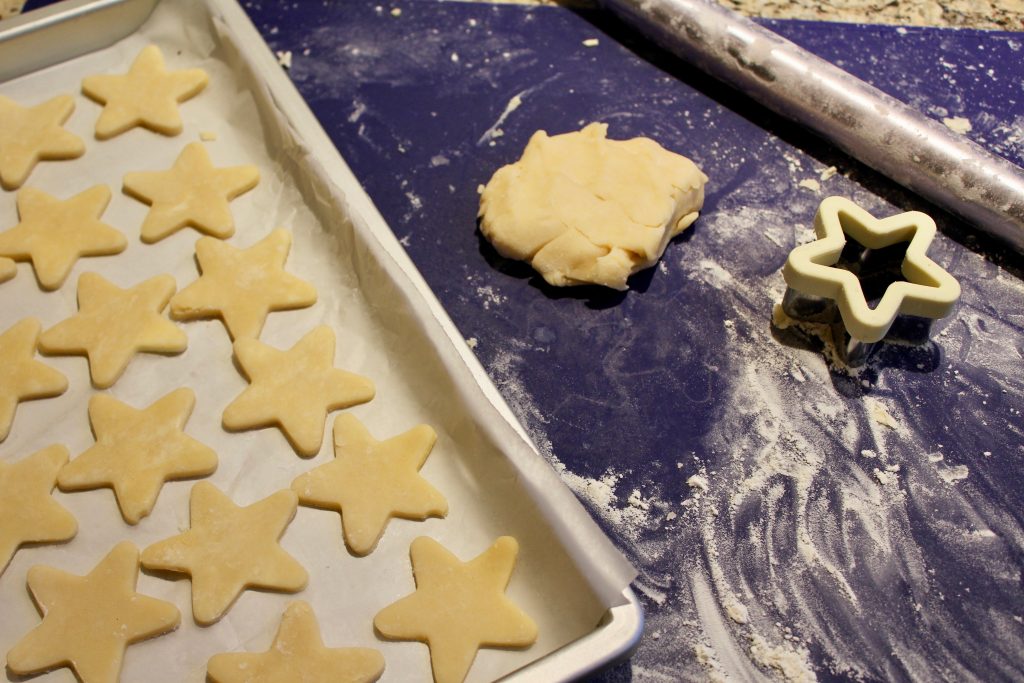
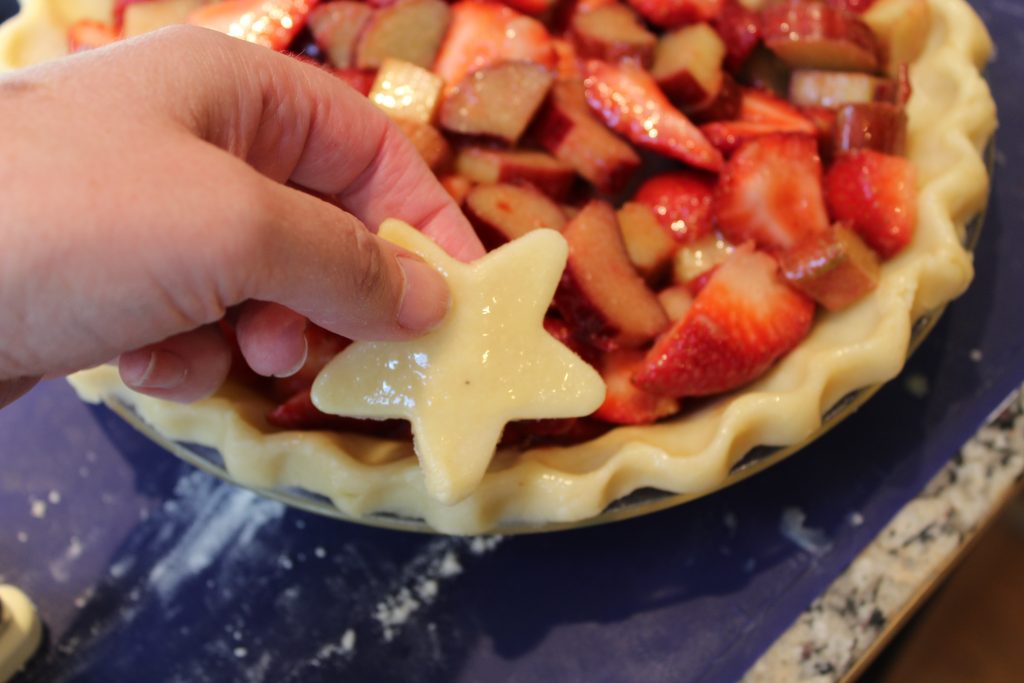
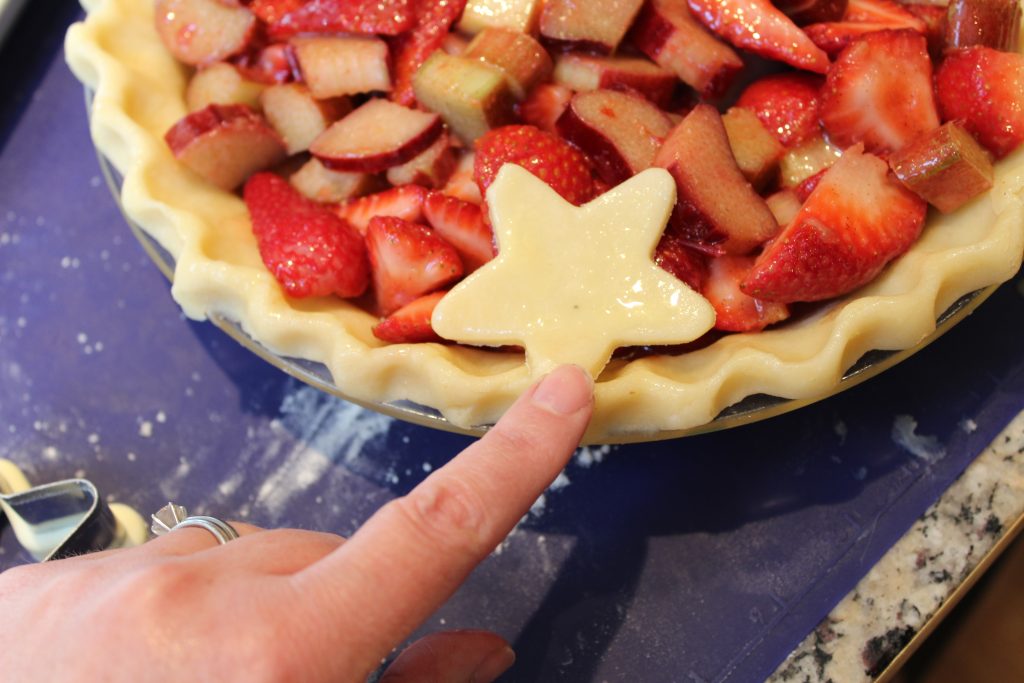
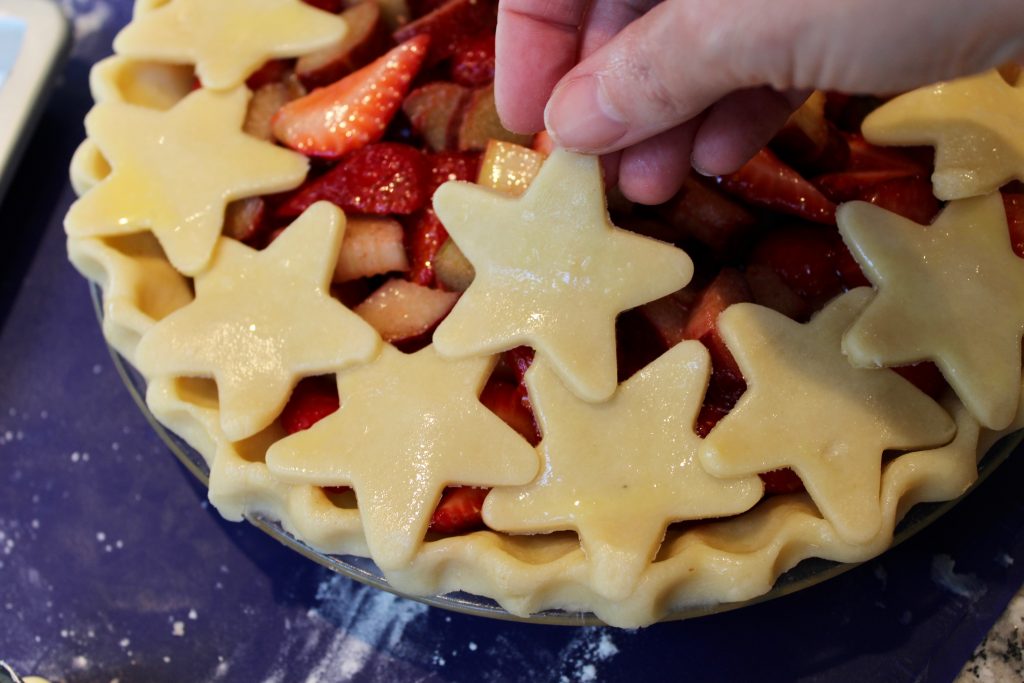
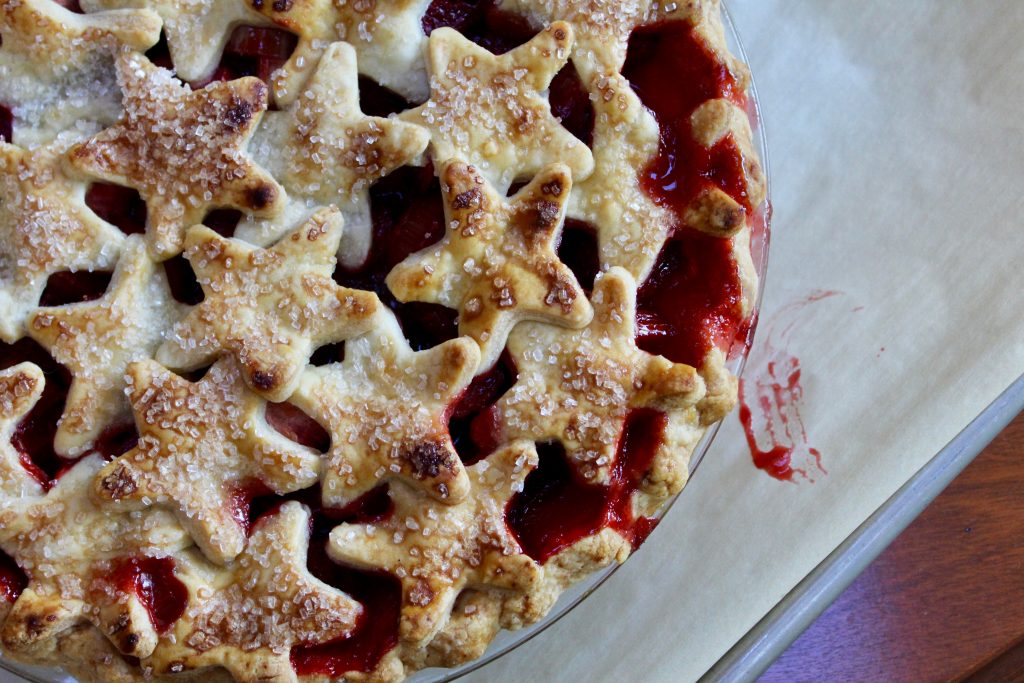
How to Assemble the Star Crust:

Cut out your stars. I used a 2 1/2 – inch star shaped cookie cutter.
Make an egg wash.
Brush the edge of the bottom crust with egg wash.
Brush the stars with egg wash.
Start by placing your first star on the edge of the pie.
Press gently to help the star stick to the edge crust.
Place your second star – it should overlap the first star just a little bit.
Press gently to the edge.
Press gently where the stars overlap.
Finish a row of stars around the edge, then continue towards the center of the pie.
I used 25, 2 1/2 inch stars.
Sprinkle some sugar over the crust. I use coarse sparkling sugar, but any granulated sugar will work.

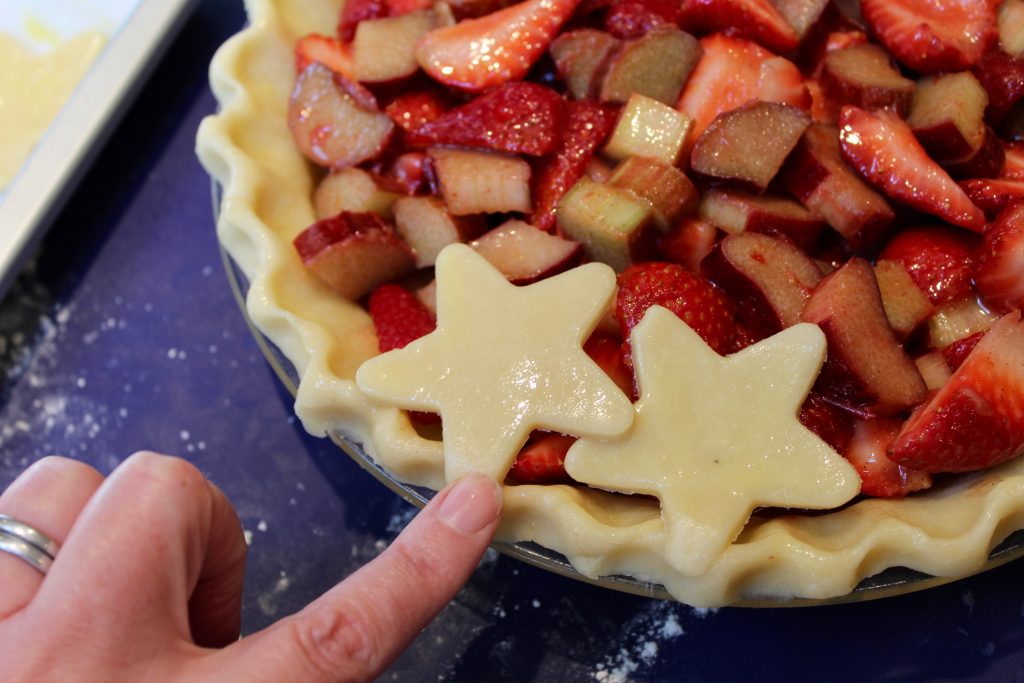
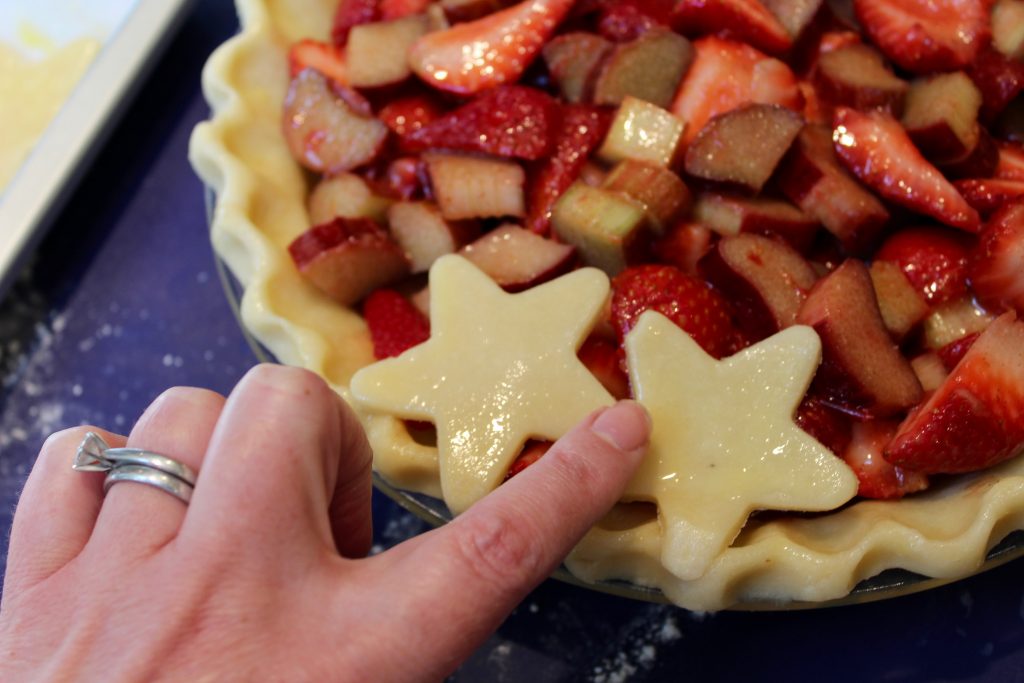
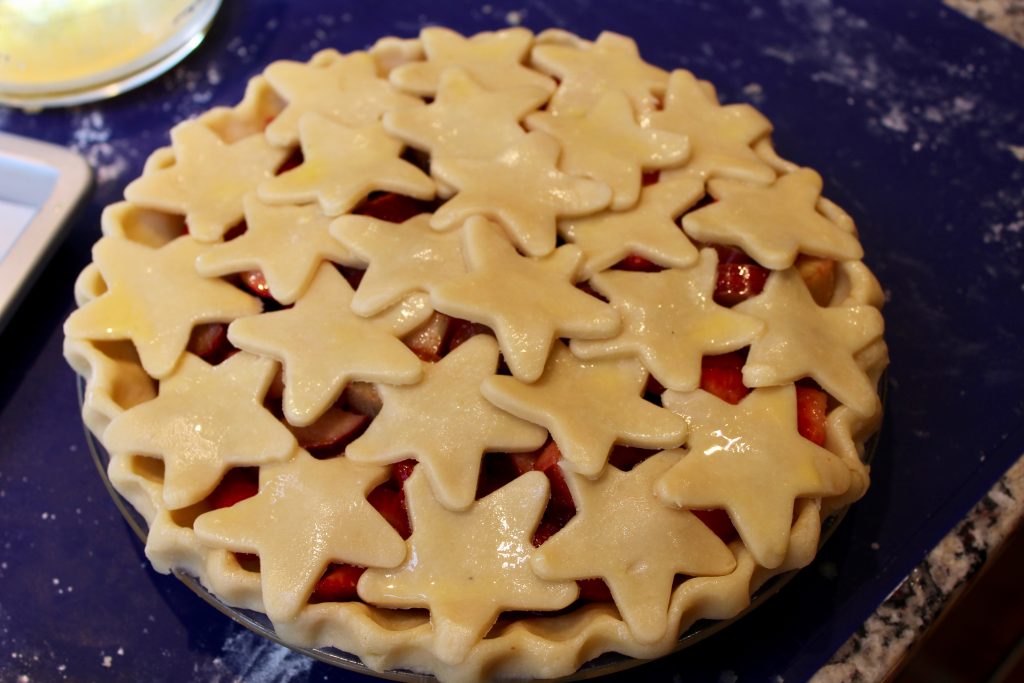
The spaces between the stars allow some of the fruit juices to evaporate, if you want to use a different style of crust, choose one with lots of venting holes, such as a lattice crust.

Perfect for Pinning to Pinterest:

Strawberry Rhubarb Pie with Star Crust, slice cut out

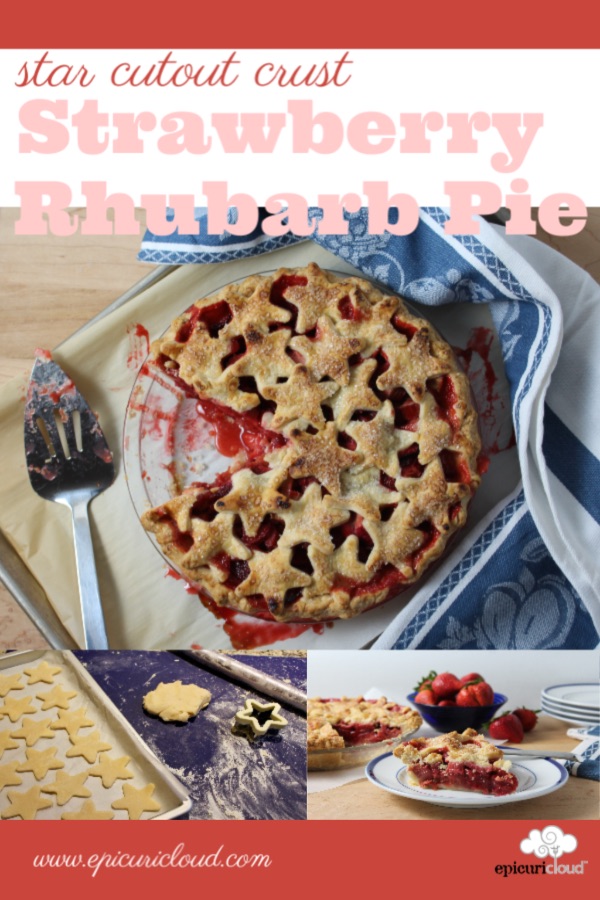
Strawberry Rhubarb Pie {Star Cut-outs Crust}

This is a perfect late spring or start-of-summer pie when strawberries and rhubarb are in season. The tender flaky crust is filled with a fresh fruit filling, not too sweet, just a little juicy with a whisper of citrus and spice. The stars form a festive top to the pie - perfect for Memorial Day or The 4th of July!
Tina Verrelli - epicuricloud.com
Print Pin Rate
Keyword: Dessert, Pie
Prep Time: 30 minutes
Cook Time: 1 hour
Total Time: 1 hour 30 minutes
Servings: 1 9-inch pie

Ingredients

  • pie crust (double crust, for top and bottom) If using store bought, you may need 3-4 crusts to cut out all the stars
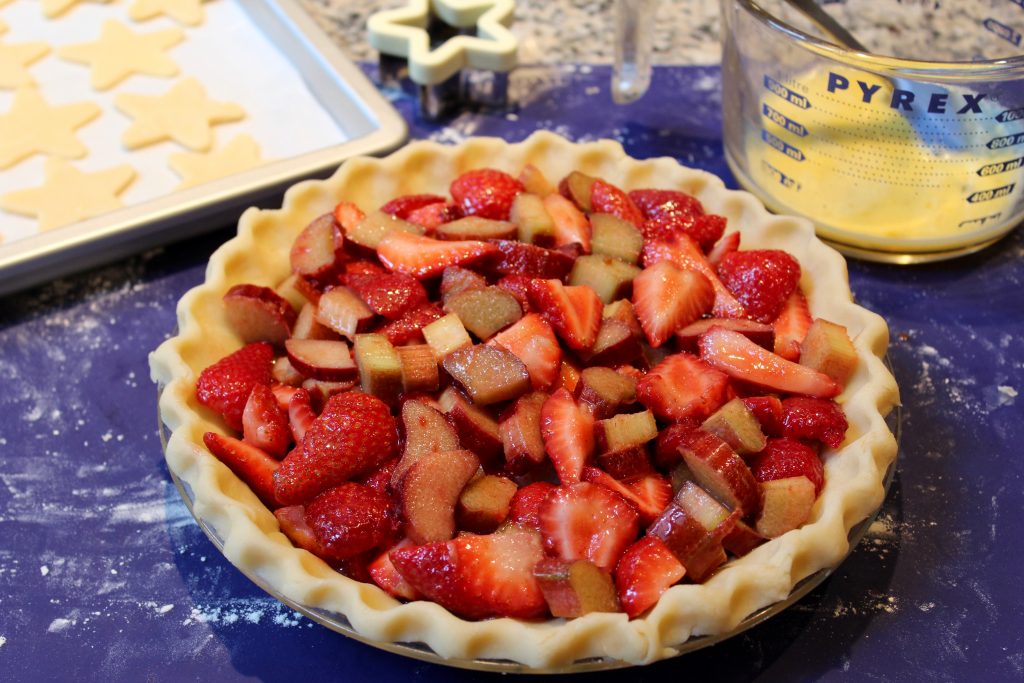
Pie Filling:

  • 3 cups fresh rhubarb, sliced 1/2" thick
  • 3 cups fresh strawberries, halved or quartered if large
  • 1/2 cup granulated sugar
  • 1/3 cup light brown sugar
  • 1/4 cup cornstarch
  • 1/8 teaspoon salt
  • 1/2 teaspoon ground cinnamon
  • 1 teaspoon fresh lemon zest
  • 1 teaspoon fresh lemon juice
  • 1/2 teaspoon vanilla

Egg Wash:

  • 1 large egg
  • 1 tablespoon water
  • 2 tablespoons coarse sparkling or granulated sugar

Instructions 

  • Arrange oven rack to lowest position. Preheat oven to 400 degrees F.
  • Roll out bottom pie crust to 1/8" thickness and fit in standard 9" pie plate. Crimp the edges and place in refrigerator
  • In large bowl, stir together all the pie filling ingredients.
  • Line a baking sheet with parchment paper or silicone mat. Roll out the top crust to 1/8" thickness. Cut 25 stars with 2 1/2-inch cookie cutter. Place them on lined baking sheet and refrigerate until ready to assemble.
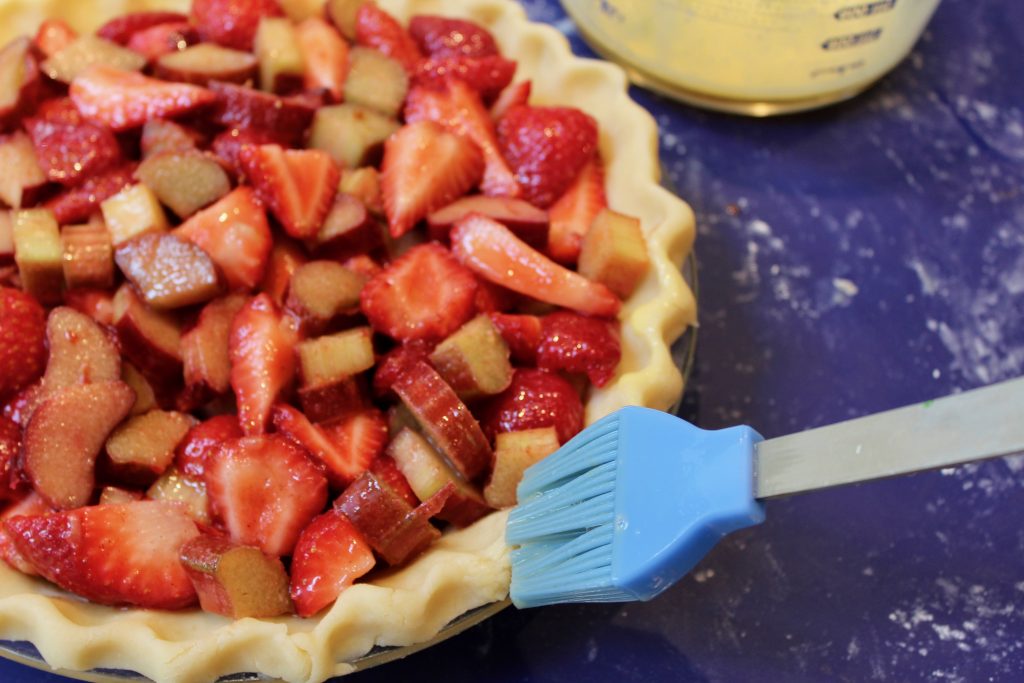
  • Prepare egg wash: Use a fork to whisk together egg and water in small bowl.
  • Add filling to bottom pie crust. Brush the edge of crust with egg wash
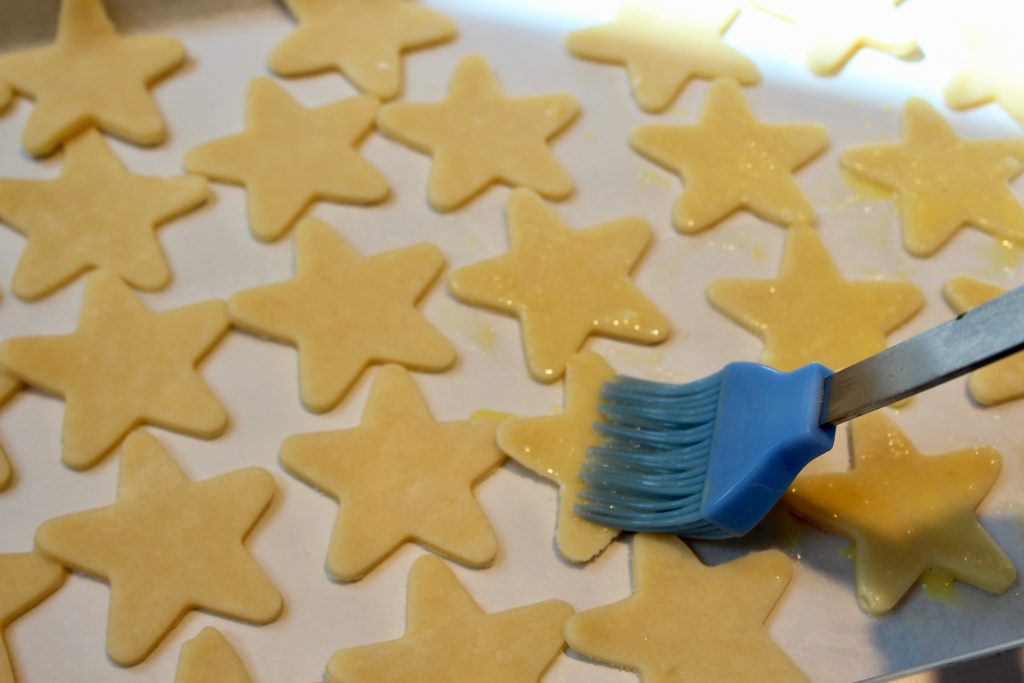
  • Brush stars with egg wash and start placing them around the edge of the pie plate, they should overlap about a 1/4". Gently press where the stars touch the edge crust and each other.
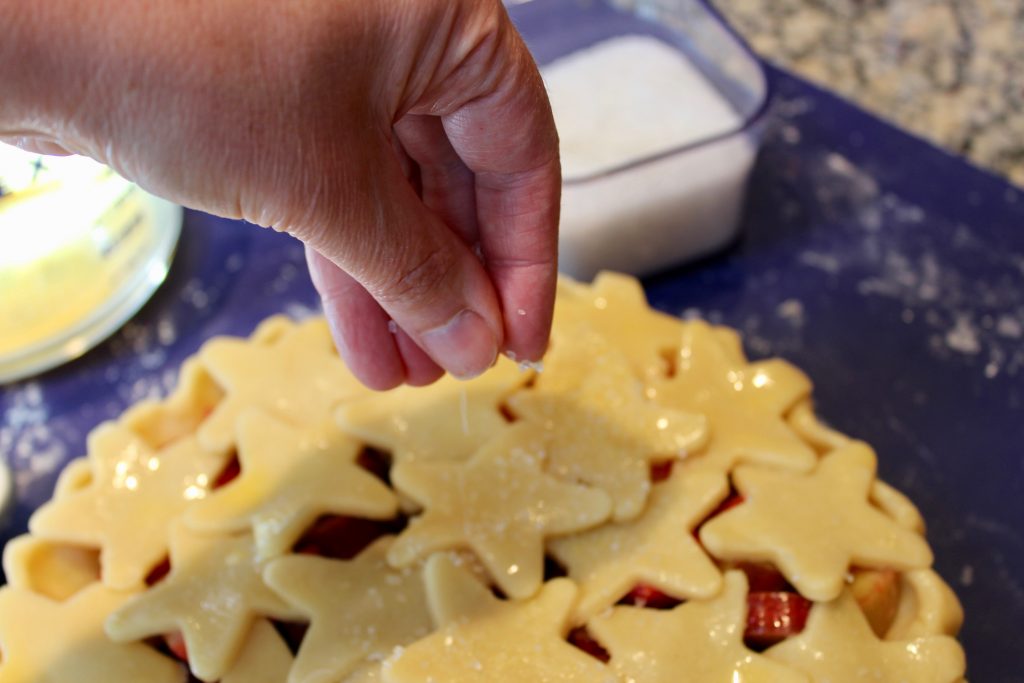
  • Sprinkle the crust and stars with sugar. Refrigerate the pie for 15 minutes to allow the crust firm up again.
  • Bake the pie on a lined baking sheet for 20 minutes at 400 degrees. Turn the oven down to 350 degrees and bake for 30-40 minutes more or until the filling is bubbly and the crust is golden brown. If the crust starts to get too dark in any area, lightly cover that area with foil.
  • Let the pie cool on a wire rack for 3-4 hours or until room temperature. This is important as it allows the juices to fully thicken. Serve with vanilla ice cream or whipped cream.

Notes

The open spaces between the stars allow some of the juices of the pie to evaporate.  You could also use a lattice type pie crust. 
The pie can be stored covered at room temperature for 2 days.
Tried this recipe?Share it! Tag @epicuricloud - Please Leave A Comment & Rating Below! TY!

Filed Under: Dessert, Fourth of July, Holiday Recipes, Pie Tagged With: mailchimp, pie, Pie Crust, rhubarb, star cutout pie crust, star spangled pie, strawberry, strawberry rhubarb pie

Reader Interactions

Leave a Reply Cancel reply

Your email address will not be published. Required fields are marked *

Recipe Rating


Primary Sidebar

Welcome to epicuricloud!

Hi I'm Tina, Mom-Teacher-Foodie-Recipe Creator

On-Air Guest for KitchenAid on QVC

EPICURI: Foodie, passion for food and drink.
CLOUD: A sharing place.
Love to share my recipes here! Join me!

Read More…

Search

KitchenAid on QVC Calendar:

Jan
28
Sat
11:00 am KitchenAid on QVC2 Airing!! In T... @ QVC2 Channel (Tina at QVC Studio)
KitchenAid on QVC2 Airing!! In T... @ QVC2 Channel (Tina at QVC Studio)
Jan 28 @ 11:00 am – 3:00 pm
From QVC Studio KitchenAid Espresso Maker KitchenAid 7-Cup Food Processor    
View Calendar
Add
  • Add to Timely Calendar
  • Add to Google
  • Add to Outlook
  • Add to Apple Calendar
  • Add to other calendar
  • Export to XML

Dinner & Lunch Recipes:

Shiitake, Ginger & Pork Pot Sticker Soup

Butternut Squash Stuffed Shells

Whiskey Glazed Corned Beef Hash and Eggs

Whiskey Glazed Corned Beef: 2 meals in 1

Roasted Asparagus Soup with Pumpernickel Croutons & Prosciutto Crisps Recipe (+ Vegan Version)

Empanada Party: 4 Fillings + 3 Sauces = YUM!

PB & Fluff Push Pops (Just a Quick Idea)

Warm Farro Salad w/ Grilled Flank Steak

All-Time Favorite Recipes:

Beet, Oat & Chocolate Muffins

Creamy Potatoes Au Gratin - Close up photo of casserole with a spoonful lifted out.

Creamy Potatoes Au Gratin

Cool Beans Breakfast Cookies

Back to the Bake-Off

Mushroom, Bacon and Shallot Nachos

Make Ahead Whipped Cream (Stabilized)

Halloween Candy Corn and Eyeball Pretzel and Kisses Treats

Easy Homemade Salsa

Pet Treat Recipes:

Homemade Dog Waffles – “Woofles”

Purr-fect Kitty Salmon Treats

Ruff, Ruff Truffles: Pumpkin & Peanut Butter Dog Treats

Peanut Butter and Pumpkin Doggie Biscuits

Meow-ums Kitty Crackers

“gnaw, gnaw” Biscuits: Teeth Tamers for Guinea Pigs and Rabbits

Cockatiel Seed “Tweets”

Peanut Butter and Banana “Barkies” (Dog Cookies)

Recipe & Post Archives

  • January 2023 (2)
  • December 2022 (2)
  • November 2022 (6)
  • October 2022 (3)
  • September 2022 (3)
  • July 2022 (1)
  • June 2022 (4)
  • May 2022 (1)
  • April 2022 (4)
  • March 2022 (1)
  • February 2022 (1)
  • January 2022 (3)
  • December 2021 (1)
  • November 2021 (1)
  • October 2021 (3)
  • September 2021 (1)
  • August 2021 (2)
  • July 2021 (3)
  • June 2021 (4)
  • May 2021 (5)
  • April 2021 (3)
  • March 2021 (3)
  • February 2021 (1)
  • January 2021 (2)
  • December 2020 (2)
  • November 2020 (3)
  • October 2020 (2)
  • September 2020 (4)
  • July 2020 (2)
  • June 2020 (6)
  • May 2020 (3)
  • April 2020 (4)
  • March 2020 (6)
  • February 2020 (6)
  • January 2020 (6)
  • December 2019 (4)
  • November 2019 (4)
  • October 2019 (5)
  • September 2019 (8)
  • August 2019 (6)
  • July 2019 (6)
  • June 2019 (5)
  • May 2019 (5)
  • April 2019 (6)
  • March 2019 (4)
  • February 2019 (5)
  • January 2019 (3)
  • September 2014 (1)
  • August 2014 (1)
  • August 2013 (1)

Tina’s Recipe Categories

Appetizer BBQ sides Beef Blender Recipe bread Breakfast Breakfast & Brunch Brunch cake chicken Chopper Recipes Christmas Christmas Recipes Cocktails / Beverages Condiment Cookies Cooking for A Crowd Dessert Desserts for a Crowd Dinner / Lunch Easter food adventure Fourth of July Halloween Holiday Recipes Lunch Box Ideas Pasta Pet Treats QVC Demo Links by Date QVC Recipe salad Salads / Sides / Vegetables Sauce Sauces & Condiments School Treats Side Dish Snacks Soup Spring Foods summer foods Thanksgiving Uncategorized Vegetables Vegetarian yeast dough

Footer


Subscribe via Email!


Copyright © 2023 epicuricloud (Tina Verrelli)

251 shares
  • Facebook
  • Twitter
  • Pinterest
  • Yummly
  • Email

Homemade Made Easy Cookbook - Order Now! Dismiss