Make Your Own Creamy Smooth Homemade Peanut Butter!
I love “natural” peanut butter, but find the oil separation and stiff refrigerated texture annoying. I love the unbeatable fresh flavor when I make homemade peanut butter – and I get to create the texture that I like! I’ll show you how I make homemade peanut butter that stays spreadable and emulsified in the refrigerator!
Why Make Your Own Peanut Butter?
- Tastes better!
- Cheaper to buy bulk peanuts than store bought peanut butter.
- When you make with a high-powered blender it stays emulsified – no oily layer
- Texture – You can create the texture you like! Thicker vs Thinner, Smooth vs Chunky
Problem with Store Bought Natural Peanut Butters:
Natural Peanut Butters from the grocery store separate and it’s hard to get them mixed back together. Also you need to store them in the refrigerator – where they get pretty hard. I have to microwave them to get them soft enough to add to my Greek yogurt and berry bowls.
Solution: Make Homemade Peanut Butter (stays spreadable in refrigerator)
I add a little avocado (or other neutral oil) to my peanuts to help them blend smoothly. The amount of oil you choose to use will determine the spreadable texture after being refrigerated. I like mine on the softer side as I like to stir it into my Greek yogurt and berry bowls.

Why Use a Blender to Make Homemade Peanut Butter?
Peanut Butter made in a high-powered blender breaks down the nut solids to such small micro-pieces that gravity doesn’t push them to the bottom of the jar (leaving the oil at the top) as easily as more coarsely ground peanut butter.
The action of the blender is able to create an emulsion by whipping the oils and solids together.
In my experience, the peanut butter stays emulsified when stored in the refrigerator – long enough for us to finish the jar!
What Kind of Blender Should I use to Make Homemade Peanut Butter?
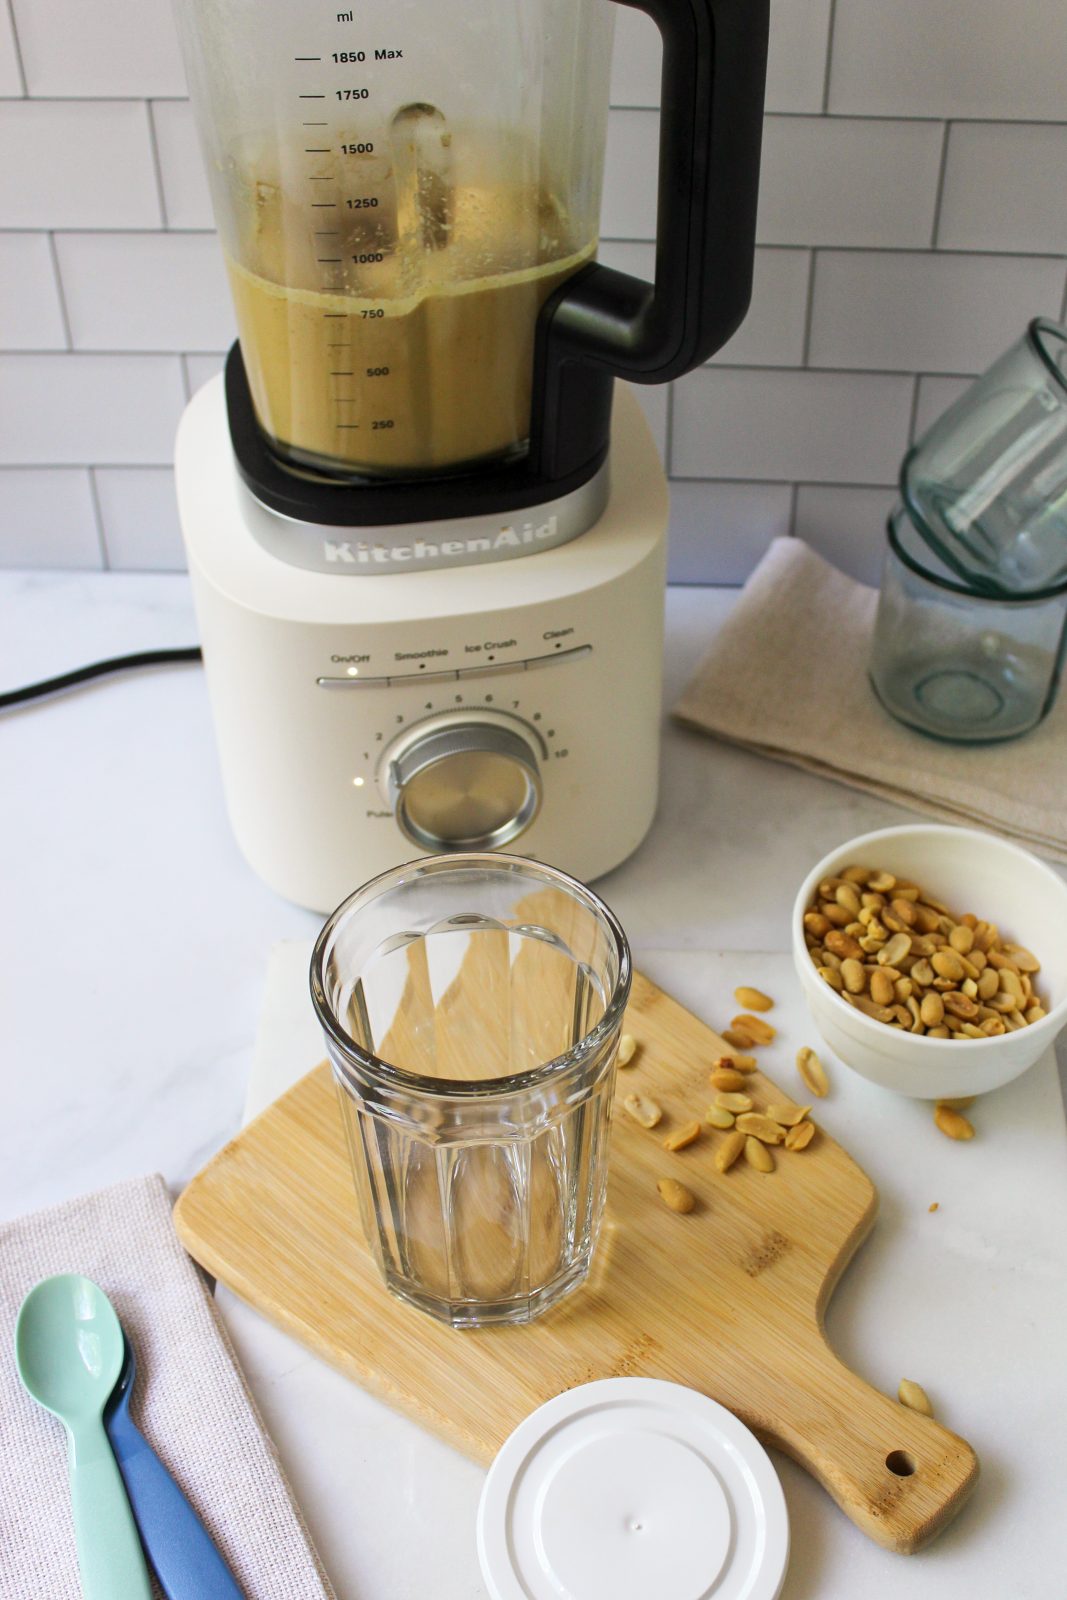
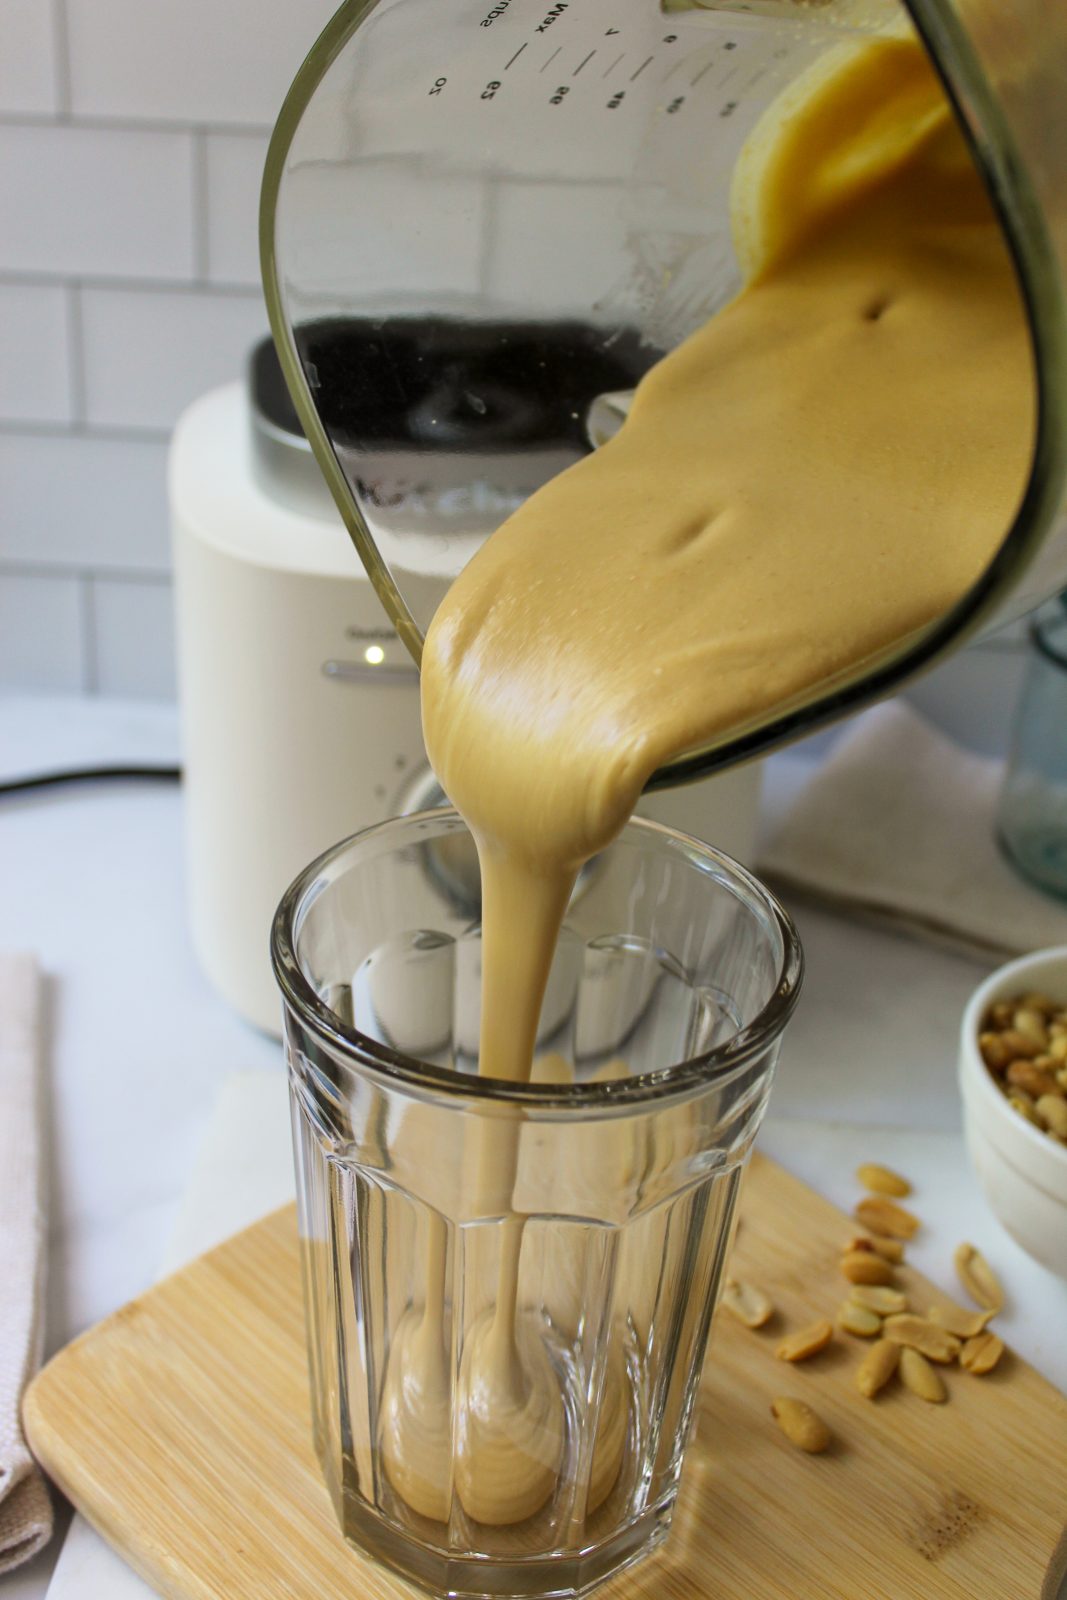
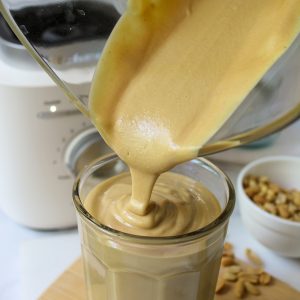
You need a high-powered blender or food processor to make this type of homemade peanut butter. In the photos you can see me using the (COMING TO QVC 7/5/26) KitchenAid Pure Power Blender with Glass Jar! (1700 Watts Peak Power, 360 degree Asymmetrical Blade Design, Precision Speed Control – Great Blending!)
Can I customize the Texture of my Homemade Peanut Butter for Chunky – Crunchy or Smooth?
You can absolutely customize the texture of your homemade peanut butter. For chunky style, before making your peanut butter, take some (about 1/4 to 1/3) of the peanuts and pulse them to the texture you want for the chunks. You’ll then add them to your freshly blended peanut butter to make it chunky.
Homemade Peanut Butter FAQs:
- Can I use Homemade Peanut Butter in Baking Recipes?
- I tend to still use regular styles of traditional store-bought peanut butter for baking as the texture of homemade peanut butter can vary.
- What Kind of Peanuts Work Best for Homemade Peanut Butter?
- I like to use salted Cocktail style peanuts.
- Do I need Any Special Equipment to Make Homemade Peanut Butter?
- Yes, you need a high powered blender or food processor.
- Does Homemade Peanut Butter Need to Be Refrigerated?
- Yes, since it doesn’t have any preservatives, I store in a glass jar with a tight lid.
- Can I Make it Crunchy – Chunky or Smooth?
- Yes, you can reserve some peanuts, chop them and stir them in after blending your peanut butter?
- Can I Customize the Thickness of the Peanut Butter?
- Yes, you can adjust the amount of oil you use while blending.
- Why Does My Peanut Butter Look Runny After Blending?
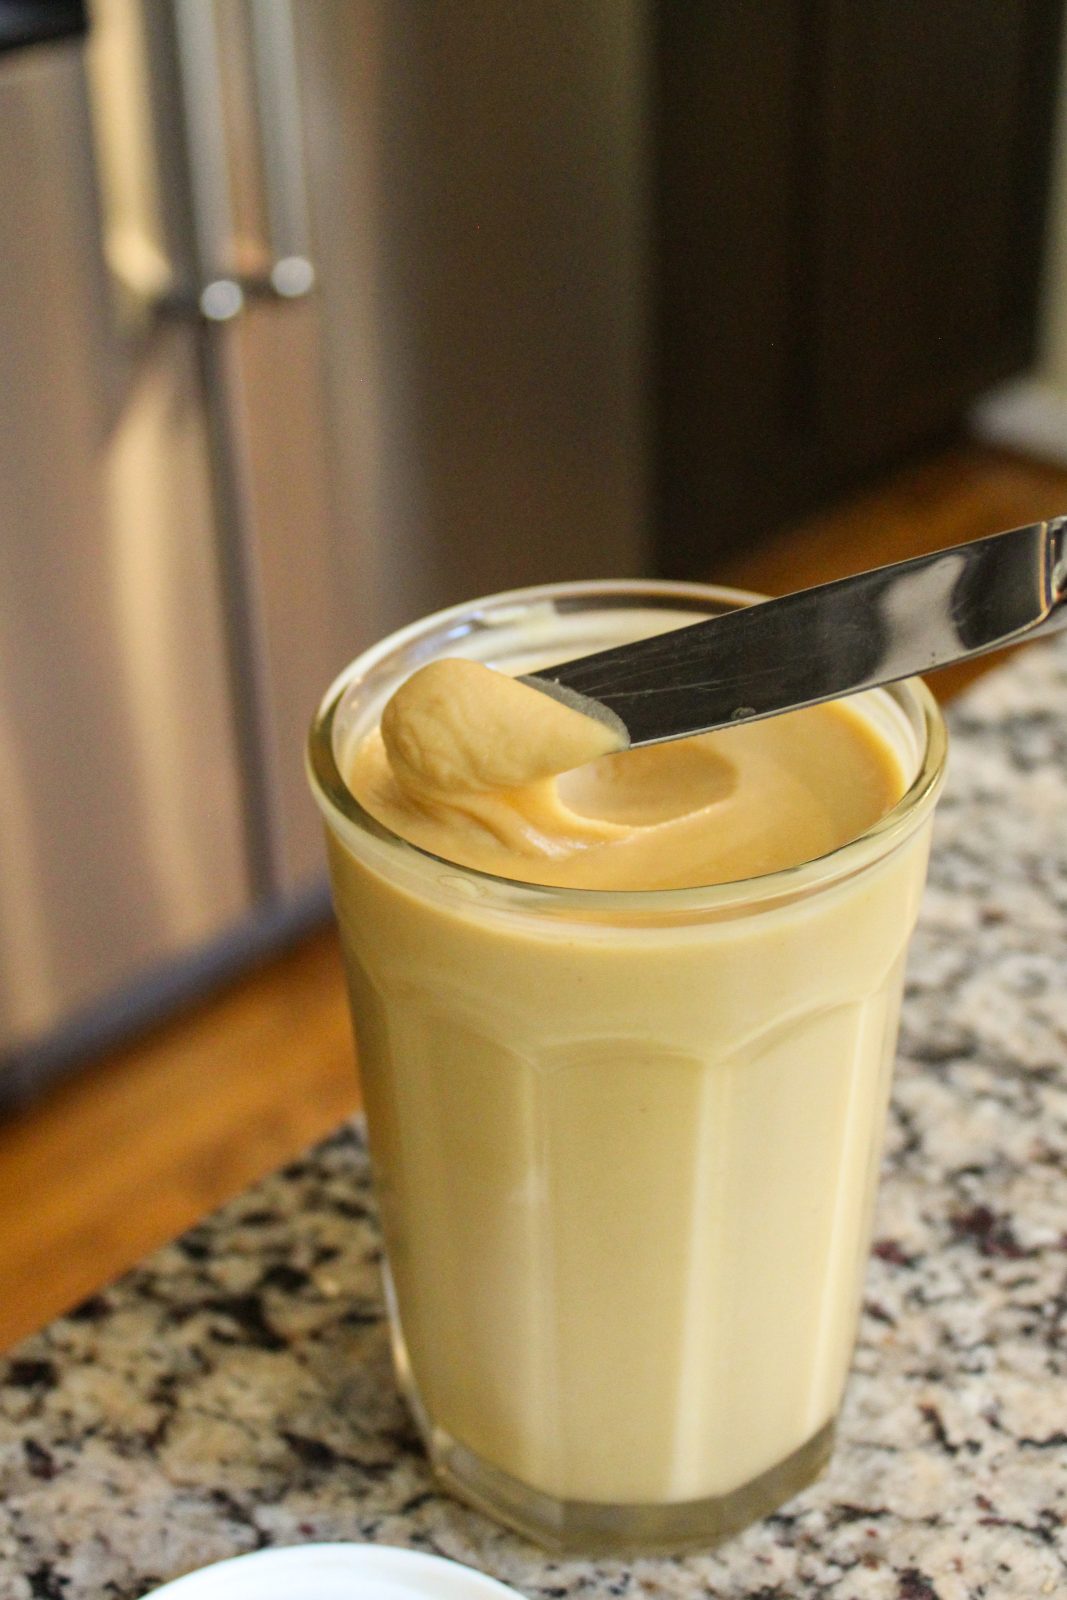
- The peanuts release their natural oils while blending, combined with the oil we add and the heating of the mixture from the friction of blending – it will be more runny right after blending – which is nice for pouring into your jar. Once it chills for at least 24 hours in the refrigerator it will thicken up (It can thicken more up to a week after refrigerating).
- Will My Homemade Peanut Butter Stay Emulsified?
- In my experience, when stored in the refrigerator it stays emulsified until we finish the jar (usually within 2-weeks)
Other Blender Recipes:
- Banana Oat Pancakes
- Frozen Rose Cocktail – Frose’
- Chunky Blender Salsa
- Quick and Easy Tomato Soup
- Tropical Green Smoothie
Homemade Peanut Butter (Stays Spreadable in Refrigerator)
Equipment
- 1 high-powered blender or food processor I used my KitchenAid Pure Power Blender with Glass Jar
Ingredients
- 4 cups salted cocktail peanuts
- 1/4 -1/3 cup avocado oil (or neutral oil) Adjust amount of oil to your texture preference. See Notes
- 2 teaspoons honey
- ¼ teaspoon salt
Instructions
To Make Chunky – Crunchy Peanut Butter: Remove 1/2 -1/3 cup peanuts and chop to desired texture. Stir into smooth peanut butter after blending.
- Add peanuts, oil, honey and salt to blender or food processor jar.
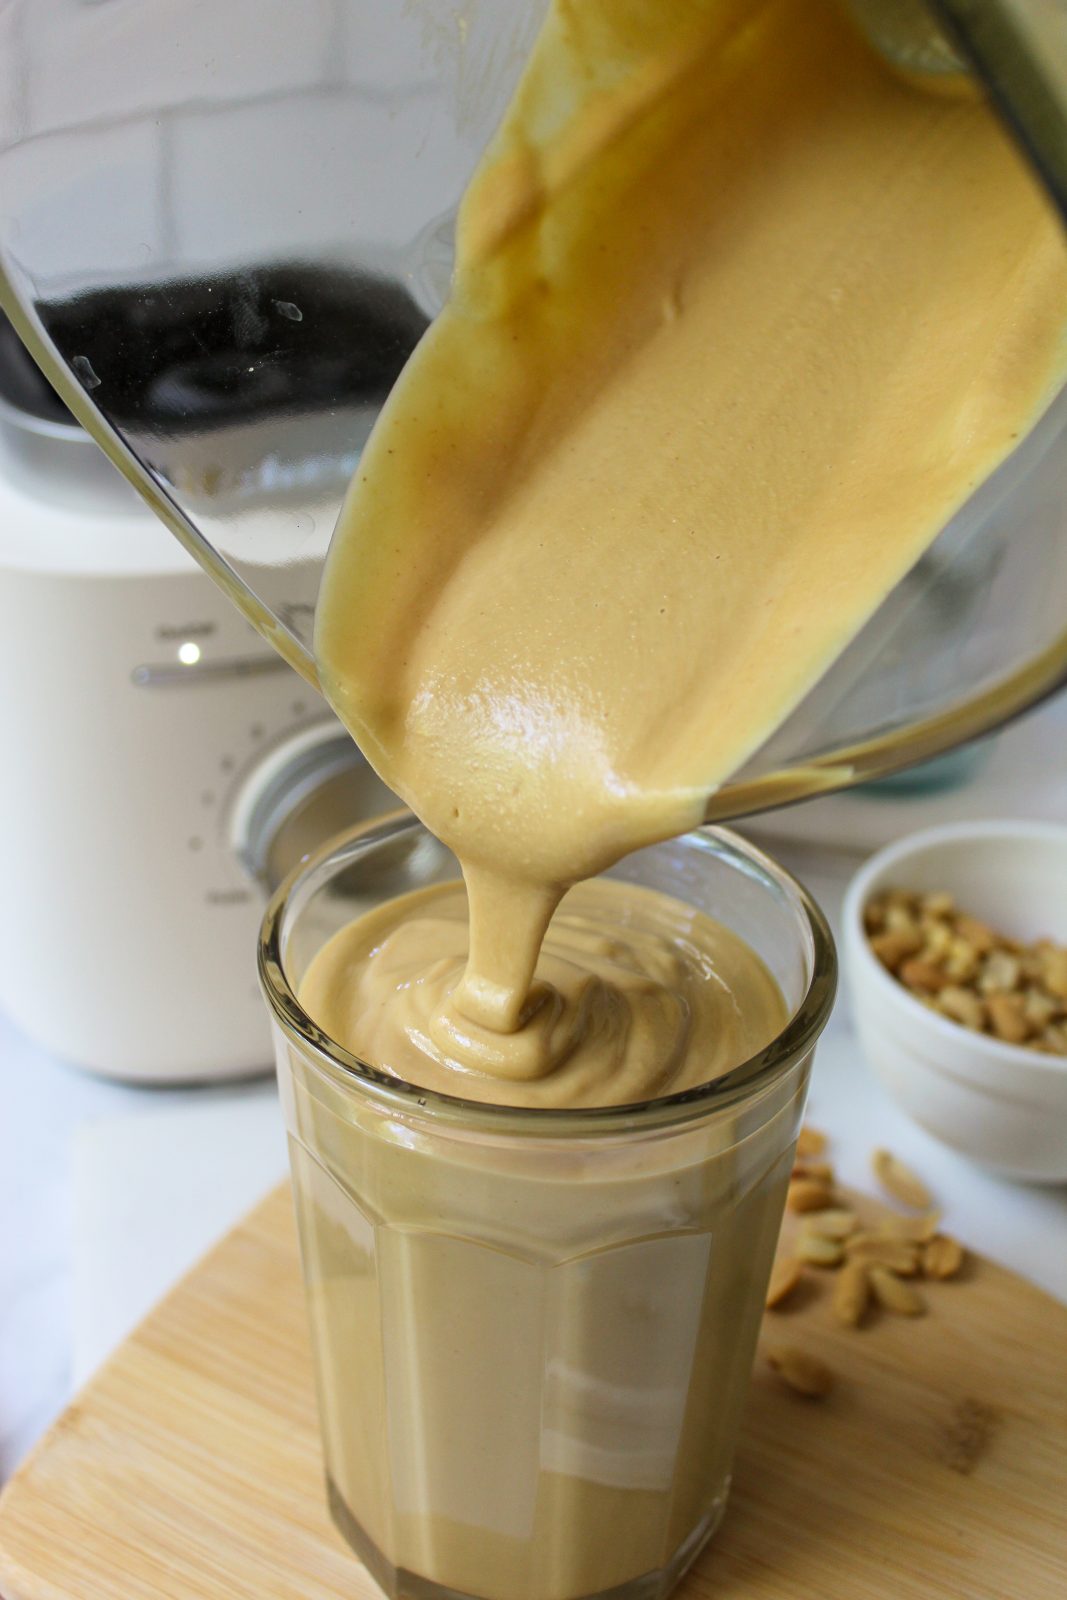
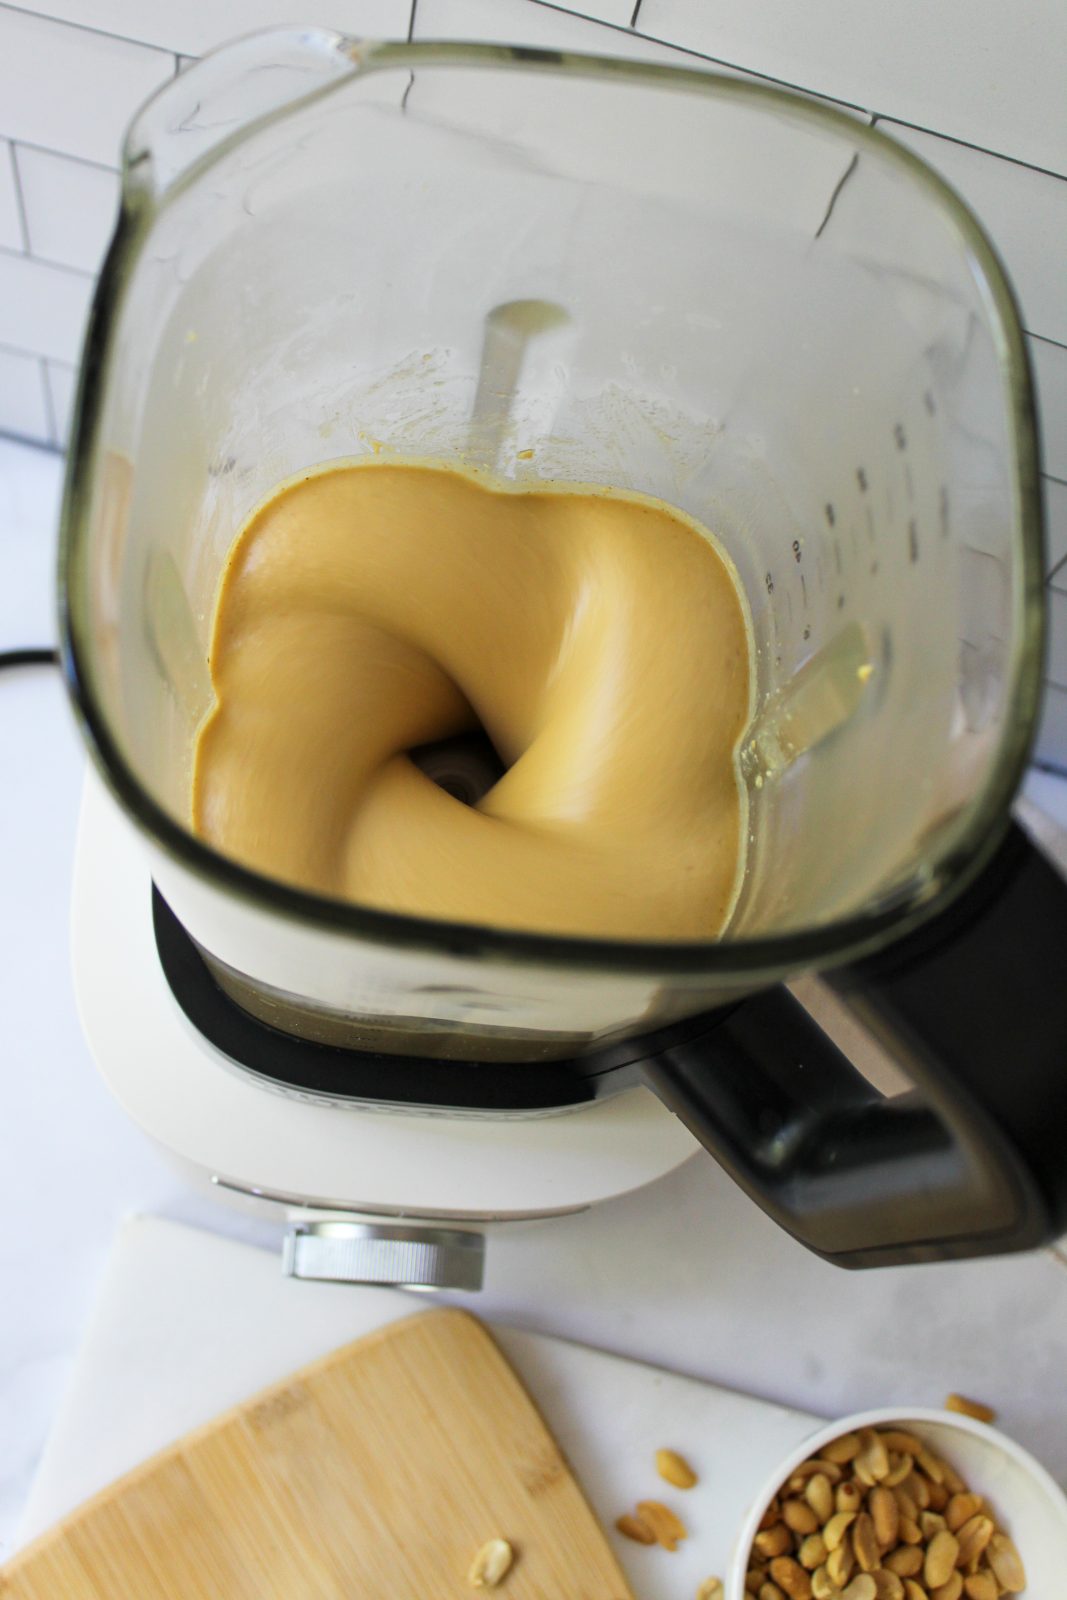
- Blend, stopping blender to scrape the nuts in toward the blades with a spatula as many times as needed until the mixture forms a freely moving vortex.
- Blend to desired smoothness.
- Pour into jar that holds at least 2 cups. Refrigerate for 24 hours to cool down for thicker consistency.
Notes
Amount of Oil:
1/4 cup of oil – continues to get firmer in the refrigerator until several days later – it’s final texture for me is sandwich spreadable. I tend to use 1/3 cup of oil – as I want mine softer so I can stir it into Greek yogurt. Keep in mind it takes several days (up to a week) – until it thickens to it’s final texture. Once taken out of the refrigerator it will soften/loosen up in texture.Homemade Peanut Butter FAQs:
- Can I use Homemade Peanut Butter in Baking Recipes?
- I tend to still use regular styles of traditional store-bought peanut butter for baking as the texture of homemade peanut butter can vary.
- What Kind of Peanuts Work Best for Homemade Peanut Butter?
- I like to use salted Cocktail style peanuts.
- Do I need Any Special Equipment to Make Homemade Peanut Butter?
- Yes, you need a high powered blender or food processor.
- Does Homemade Peanut Butter Need to Be Refrigerated?
- Yes, since it doesn’t have any preservatives, I store in a glass jar with a tight lid.
- Can I Make it Crunchy – Chunky or Smooth?
- Yes, you can reserve some peanuts, chop them and stir them in after blending your peanut butter?
- Can I Customize the Thickness of the Peanut Butter?
- Yes, you can adjust the amount of oil you use while blending.
- Why Does My Peanut Butter Look Runny After Blending?
- The peanuts release their natural oils while blending, combined with the oil we add and the heating of the mixture from the friction of blending – it will be more runny right after blending – which is nice for pouring into your jar. Once it chills for at least 24 hours in the refrigerator it will thicken up. It will continue to thicken for several days.
-
Will My Homemade Peanut Butter Stay Emulsified?
-
In my experience, when stored in the refrigerator it stays emulsified until we finish the jar (usually within 2-weeks)
-
Leave a Reply