Cauliflower is everywhere now! In our house it’s one of those vegetables that, surprising to me, everyone likes – so I’m always game for a new way to make it! We already love roasted cauliflower, cauliflower rice, mashed cauliflower and Roasted Cauliflower & Cheddar Soup… So, I was excited to make my first Cauliflower Pizza Crust!
I tried a store bought “Pizza Crust with Cauliflower” which was a whopping $10.00 per box of 2 10″crusts. The ingredient list had 14 ingredients! I couldn’t really taste the cauliflower, so I wondered just how many of those 14 ingredients were actual cauliflower?
I read a lot of cauliflower pizza crust recipes, each had varied methods and ingredients. I made my version using what made sense to me and tweaked it with each new batch. My recipe uses only 4 ingredients, it’s made mainly from cauliflower, 2 heads-worth to make 2, 9”-10” crusts. After making the crusts 4 different times here’s what I’ve learned:

12 Tips for Making Cauliflower Pizza Crust:
- Does it taste like cauliflower? It does taste like cauliflower as that’s largely what it’s made from. It is a roasted/mild cauliflower flavor. I think more of what you taste is what you top the pizzas with.
- Is it crispy? It does get crispy around the edges, and the center is firm enough to hold in your hands to eat like traditional pizza.
- Is Cauliflower Pizza Crust hard to make? It’s not hard to make, but it’s more time consuming than ordering a pizza for delivery…the good thing is you can make the crust ahead and even freeze them.
- -The Basic Steps Are: make cauliflower rice, cook cauliflower rice, squeeze it dry, mix it with 3 ingredients, form and bake the crusts.
- Cauliflower has a lot of moisture in it – surprised me just how much! The process of making the crust is largely trying to reduce the moisture of the cauliflower. I carry this out through my cooking method.
- Oven bake the cauliflower rice. I saw lots of recipes that called for steaming or boiling, which didn’t make sense to me – if I’m trying to reduce moisture – I want to use a dry cooking method. I did try cooking in a skillet, but it was tricky to cook it evenly and you have to stand at the stove stirring the whole time. When you bake it in the oven, it’s evenly cooked and the oven does all the work. Plus, if you’re going to turn the oven on anyway to cook the crusts…
- Once the cauliflower rice is cooked, you need to squeeze out excess moisture – you’ll be shocked at how much remains after oven baking!
- I mix my crust with lightly whipped (just foamy) egg whites, Parmesan cheese and some dried Italian herb blend. I saw some recipes with whole eggs and mozzarella cheese, both of these, in my opinion would add unnecessary moisture.
- Parchment Paper is essential as the crust is very crumbly (think sand castle crumbly) until it’s cooked a bit. You need the parchment paper to transfer into the oven. Once the bottom of the crust is baked, you can discard the parchment.
- Do I need a pizza stone? I find I get the best results with a pre-heated pizza stone. I did try baking it on a baking sheet – it does work, but you don’t get the same texture. It doesn’t get as thin or as crispy on the edges. I think the pizza stone helps draw more moisture from the crust as it bakes.
- Let the crusts cool on a cooling rack after they are baked – they firm up as they cool and the cooling rack allows the steam to escape and not make the crust soggy.When you’re ready to add toppings – go a little lighter than you normally would. If you don’t want the edges to get too much darker, spread the cheese to the edge. If I use sauce, I add dots of it on top of the cheese. Adding the sauce right to the crust could make it soggy. I put the topped pizza back in the oven just until the cheese is melted and bubbly at the edges.
1. Make Cauliflower Rice:
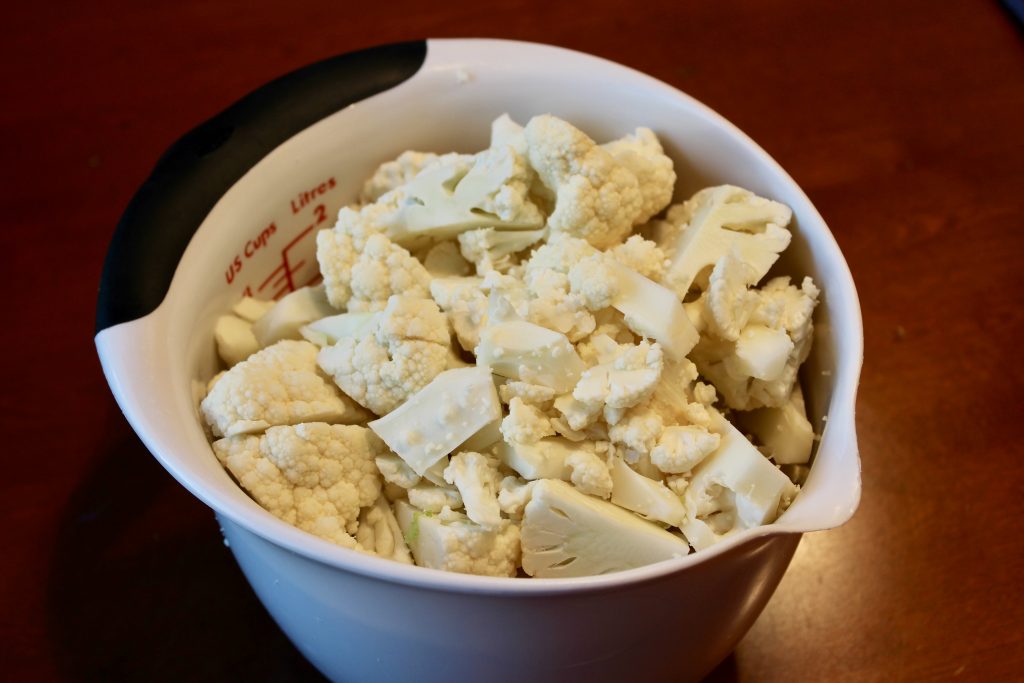
Start with 8-cups cauliflower florets from 2 heads cauliflower. 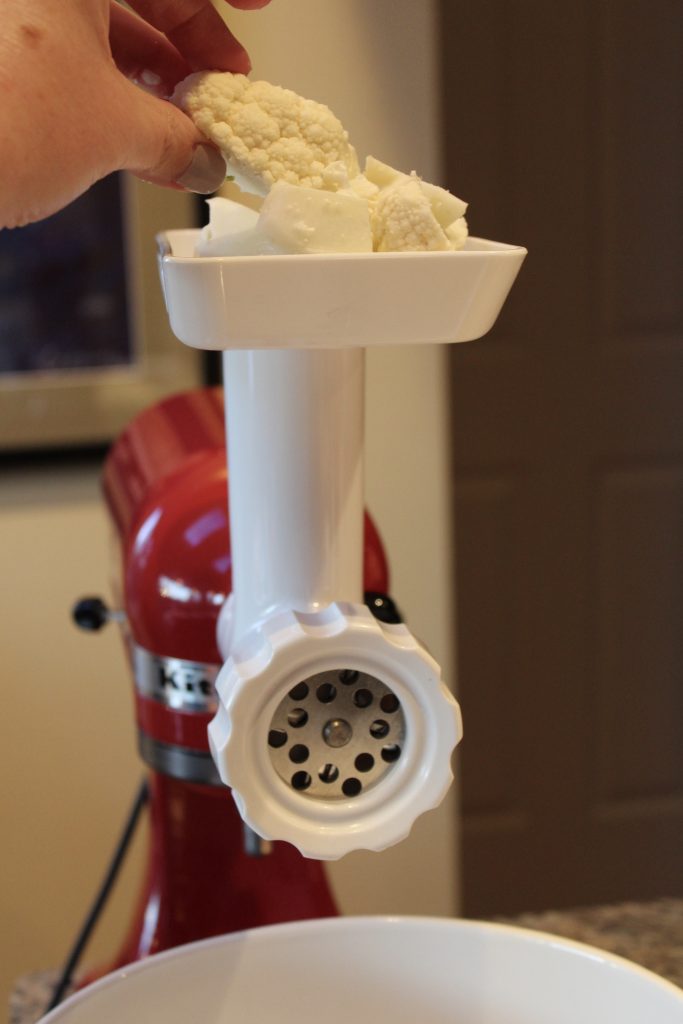
Make cauliflower rice by using grinder or food processor. 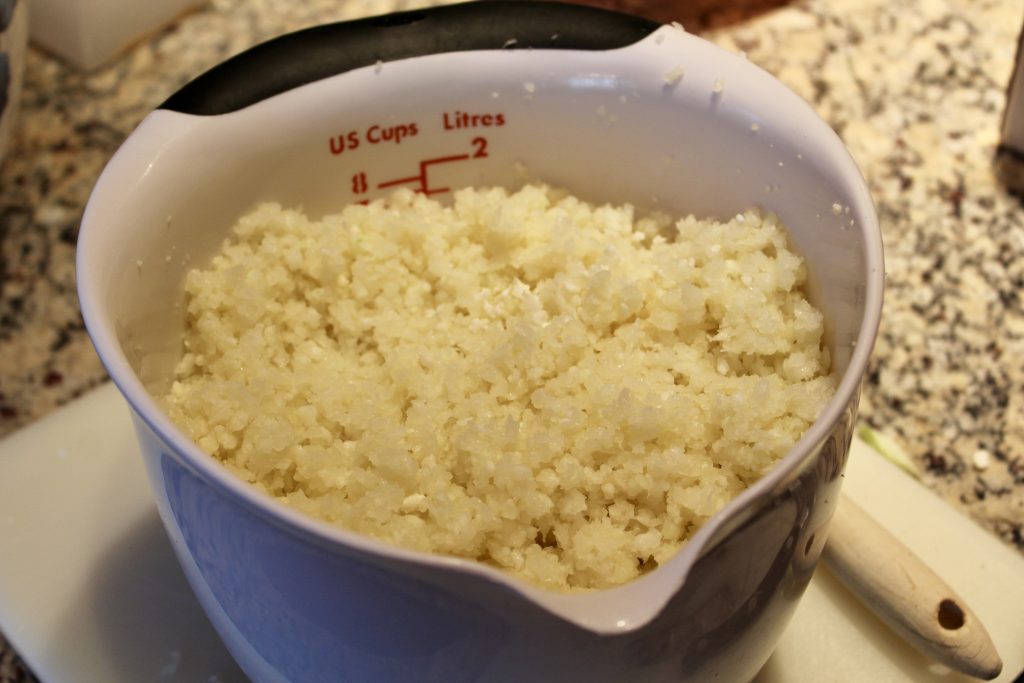
8 cups of cauliflower florets makes about 8 cups cauliflower rice.
2. Bake the Cauliflower Rice:
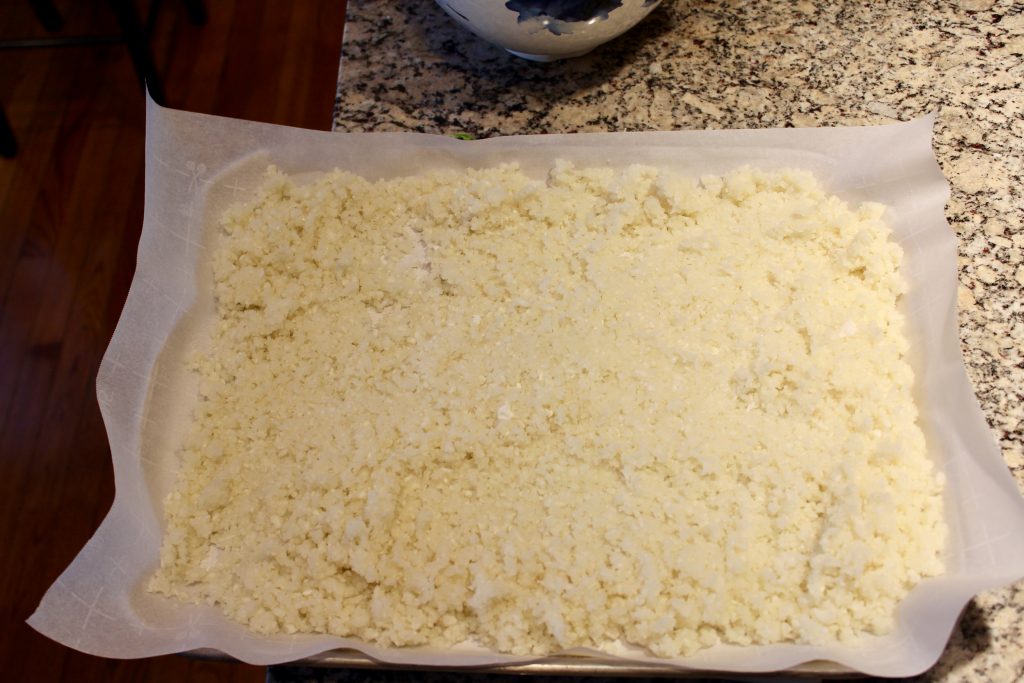
Spread cauliflower rice on baking sheet and bake for 40 minutes at 350 degrees, stirring every 10 minutes to release moisture. 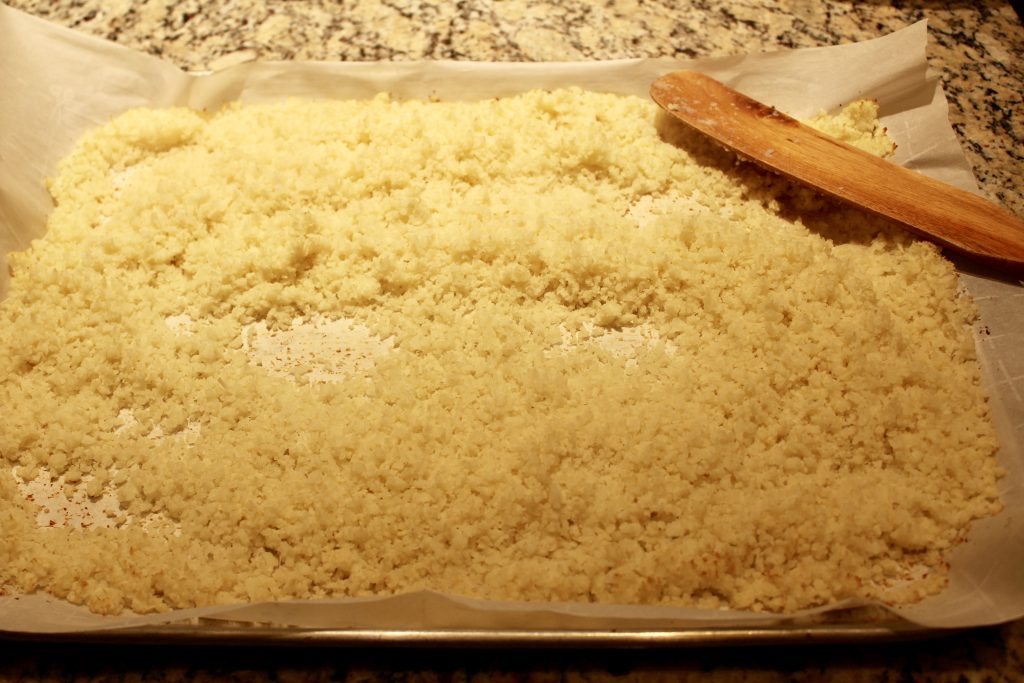
After baking allow to cool enough to handle. 
After cooking the volume decreases. This is the first step in reducing the moisture of the cauliflower.
3. Squeeze Out Liquid:
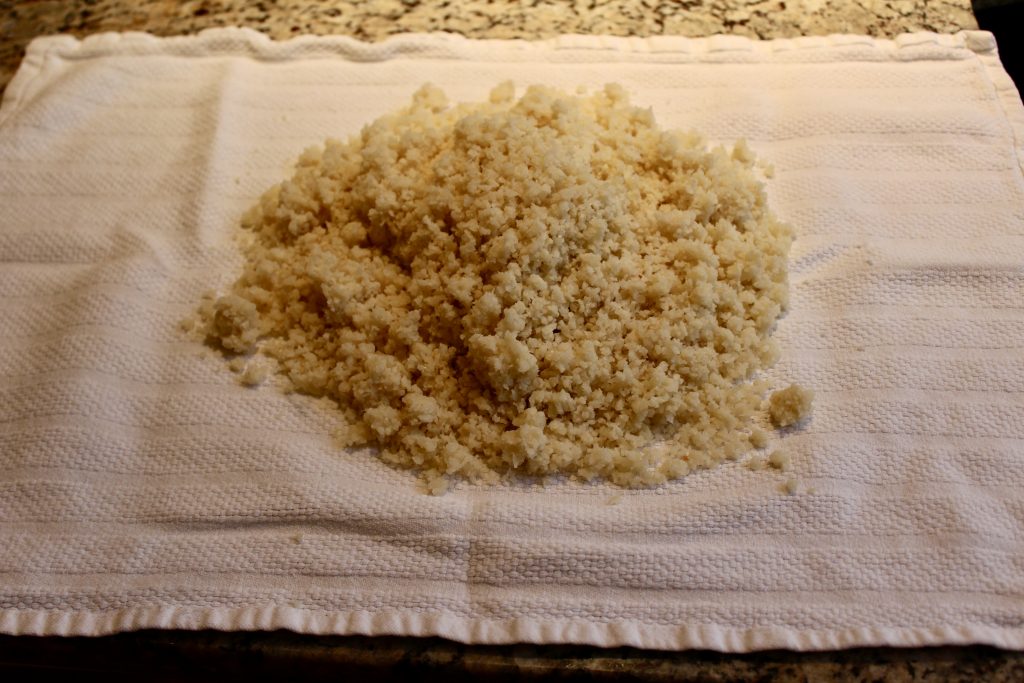
Place cooked cauliflower in the center of a clean kitchen towel or cheesecloth. 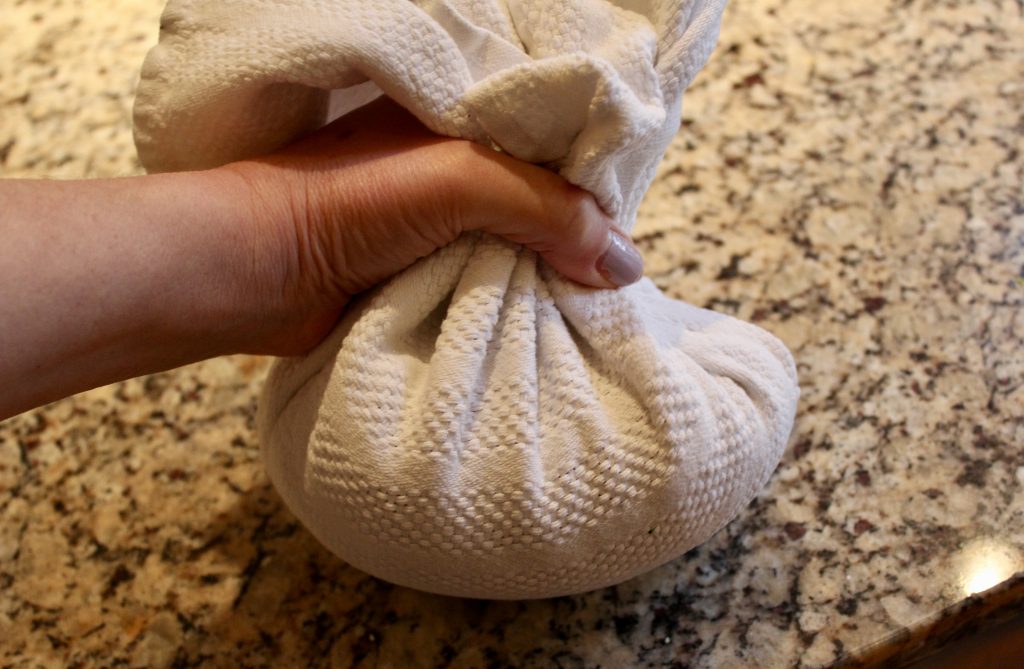
Twist towel and squeeze out as much liquid as possible. 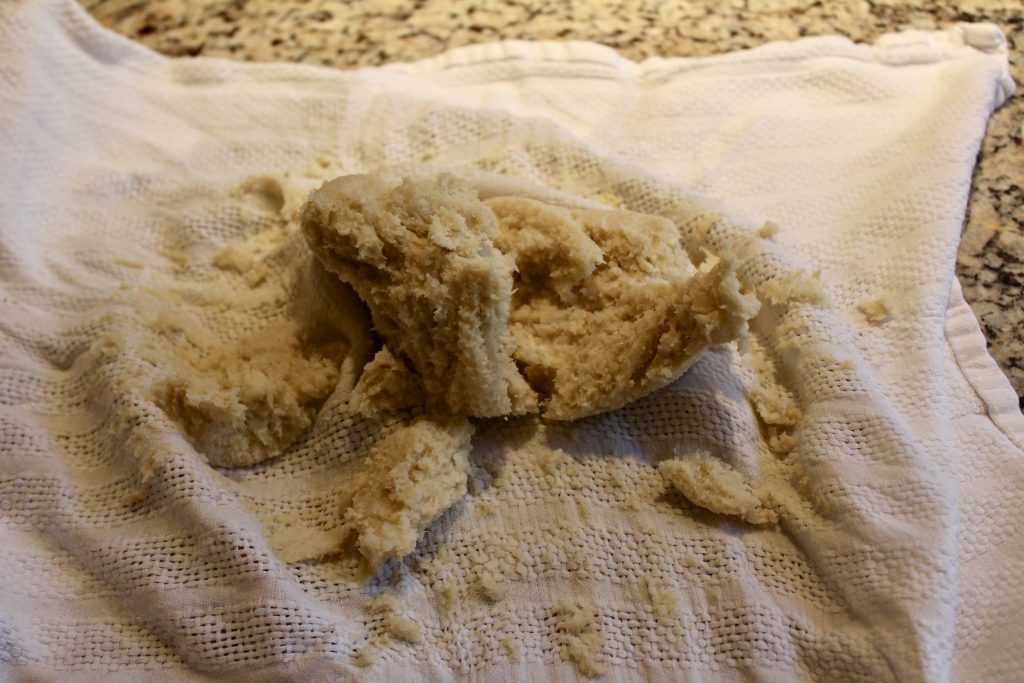
Here’s what it looks like after squeezing. 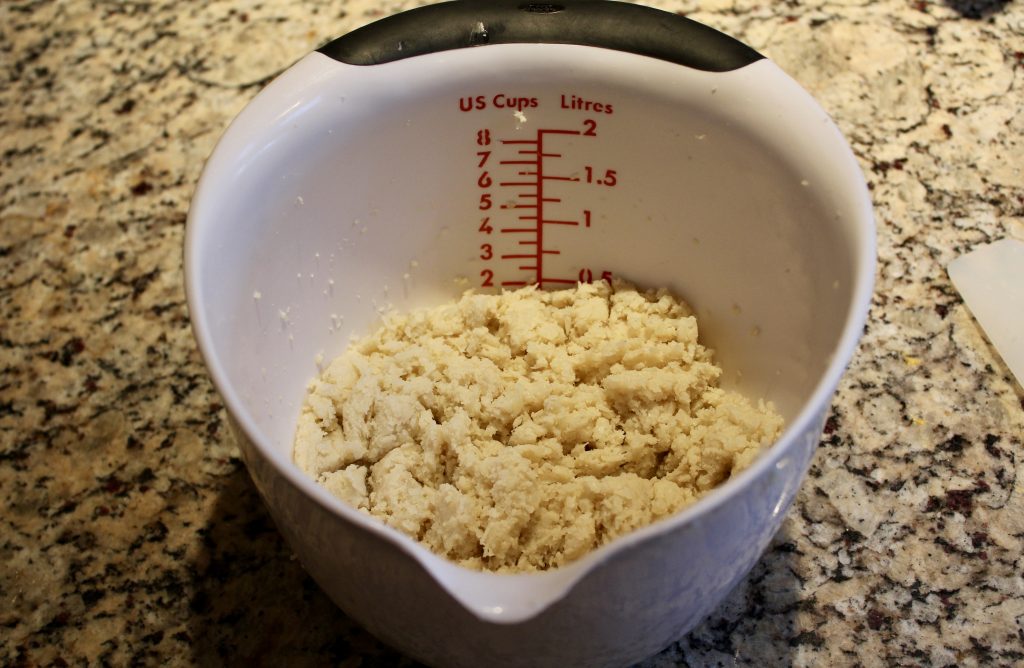
Cooked and squeezed cauliflower rice – reduced in volume to 2 cups – from 8 cups.
4. Mix the 4 Cauliflower Crust Ingredients:
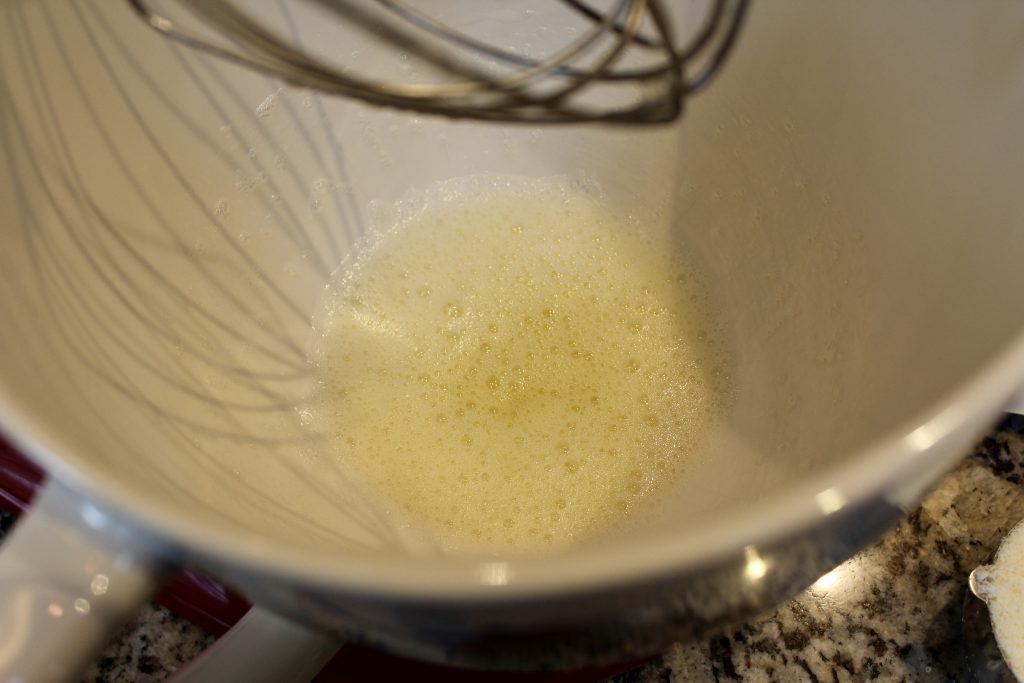
Whisk 2 egg whites until foamy. You can do this by hand or with a hand or stand mixer. 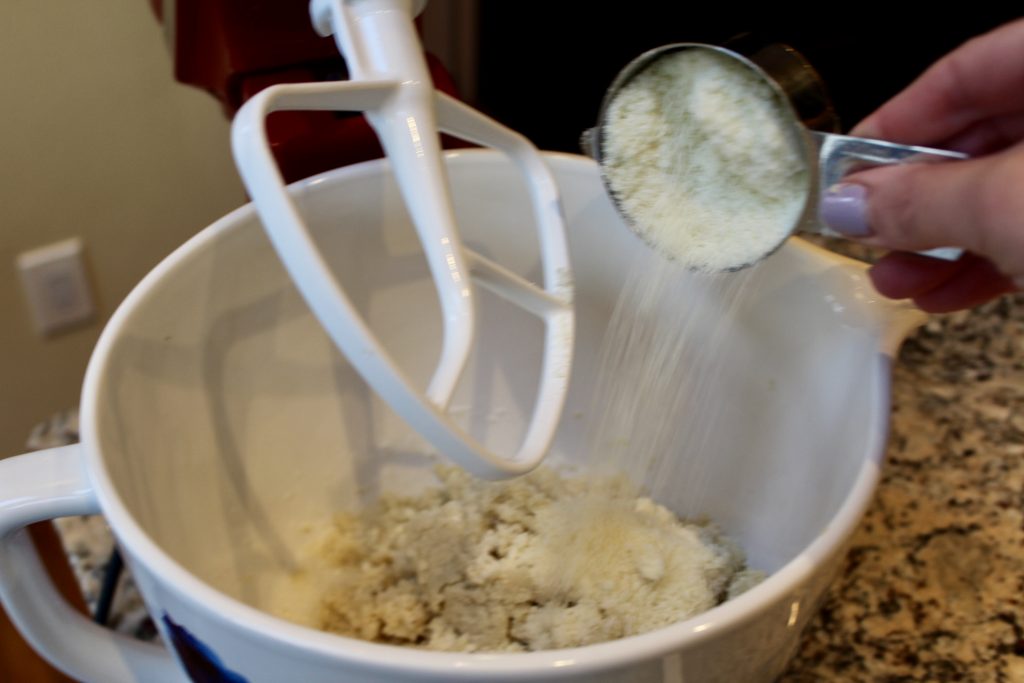
Add 1/2 cup grated Parmesan Cheese… 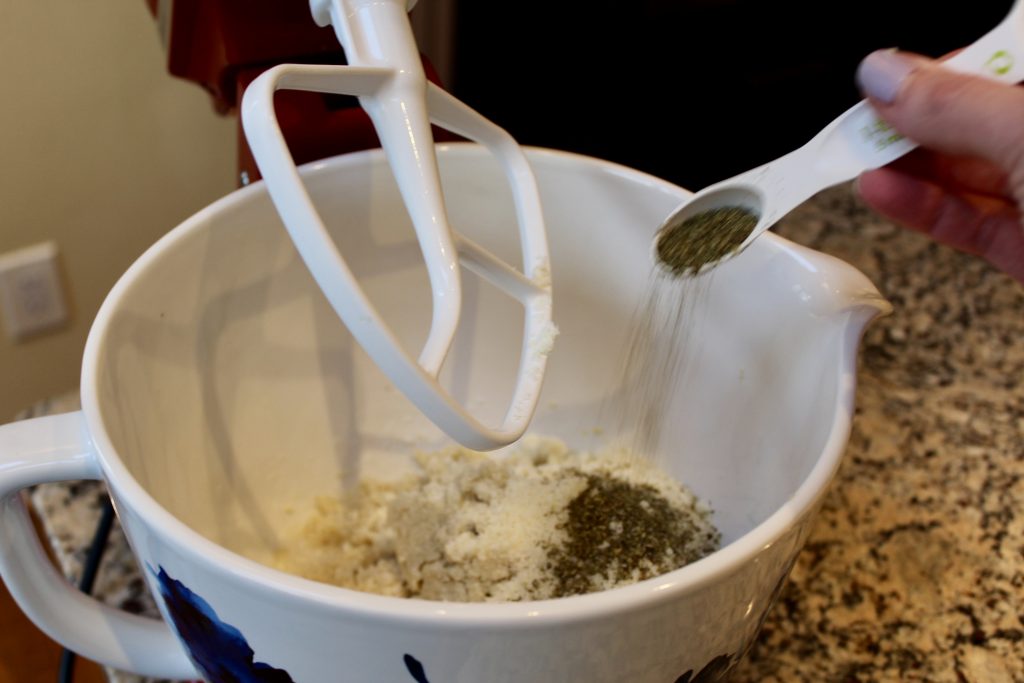
…and 1 teaspoon dry Italian Seasoning. 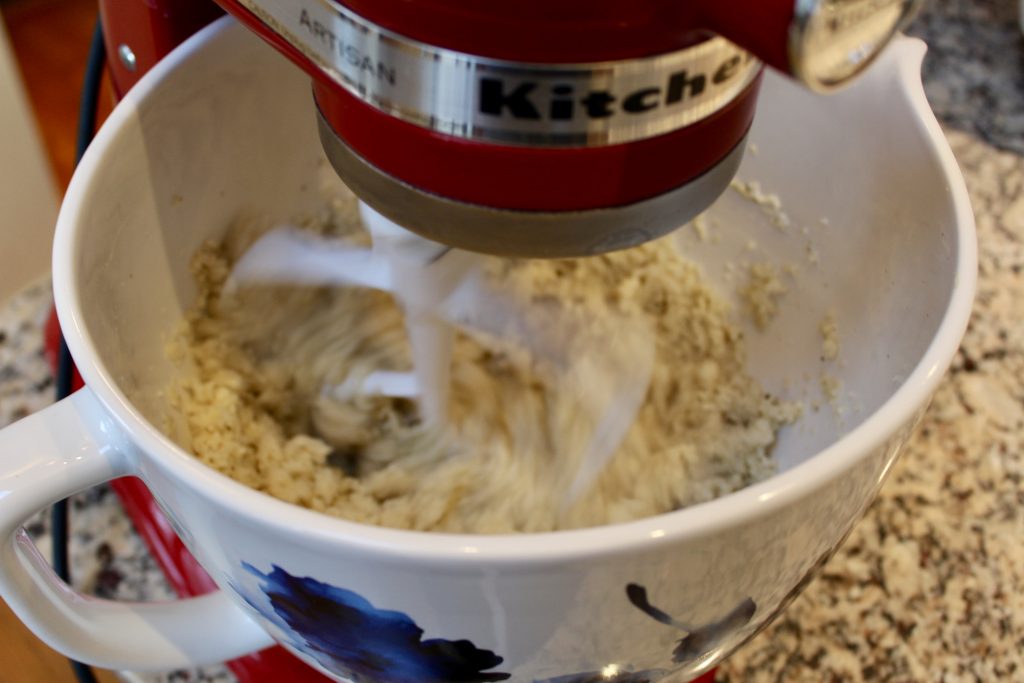
Mix to combine.
5. Form the Crusts:

Cut 2, 12″ x 12″ squares of parchment paper. 
Divide the cauliflower mixture in half. 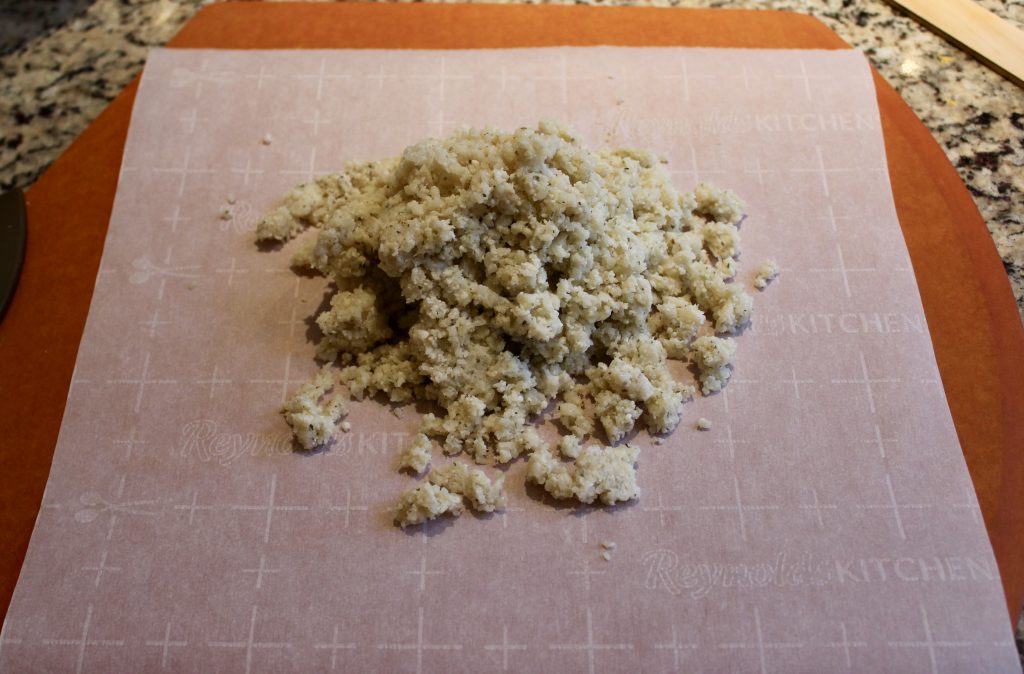
Place half the mixture on a parchment square and start pressing with your hands or spatula to form a 9-10″ round. 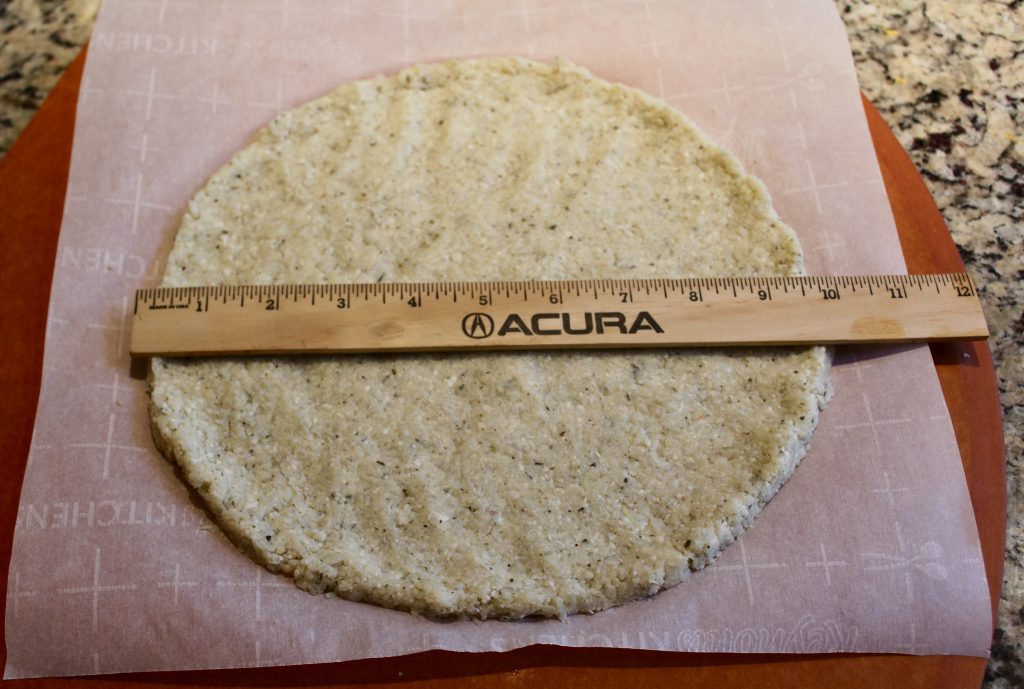
Press with your hands or spatula to form a 9″ – 10″ round. 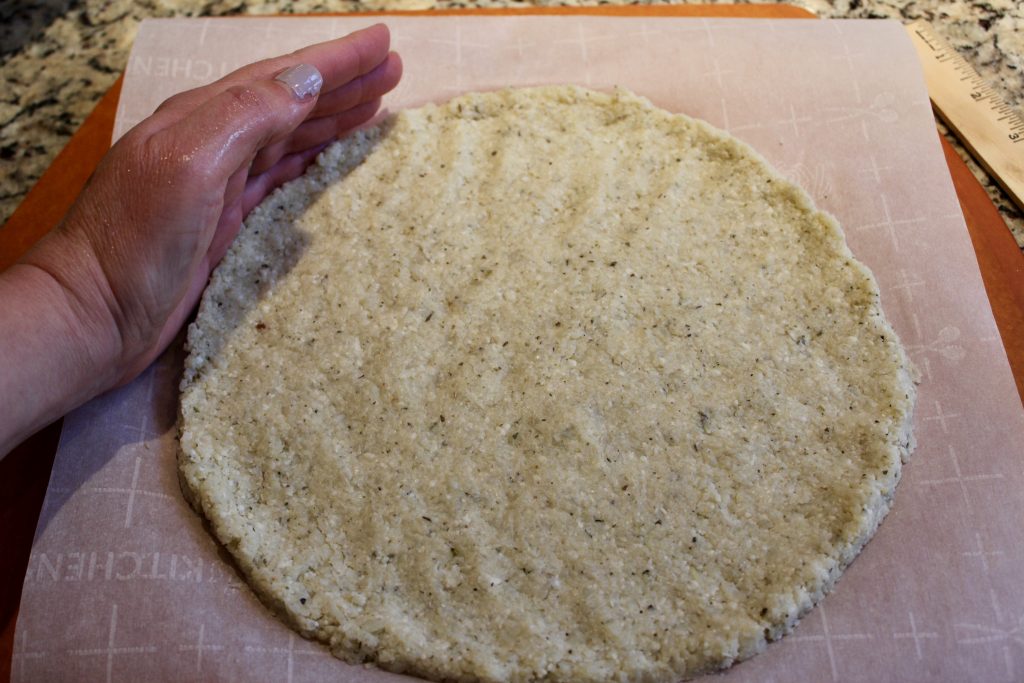
ΩForm a crust edge with your hands.Ω
6. Bake the Crusts:
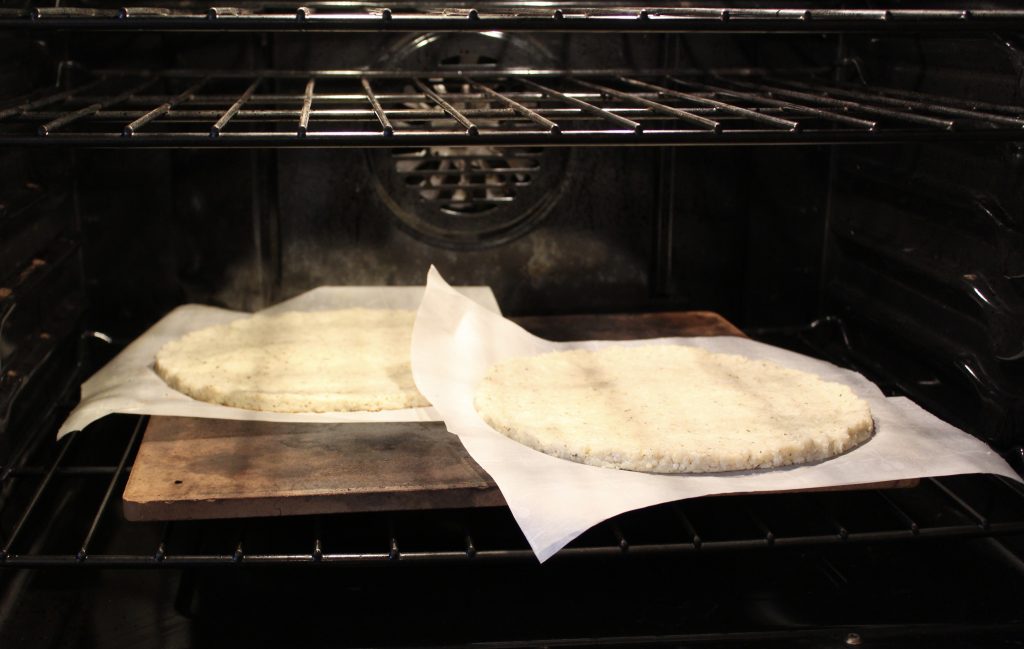
Place on pizza stone in preheated 400 degree oven. 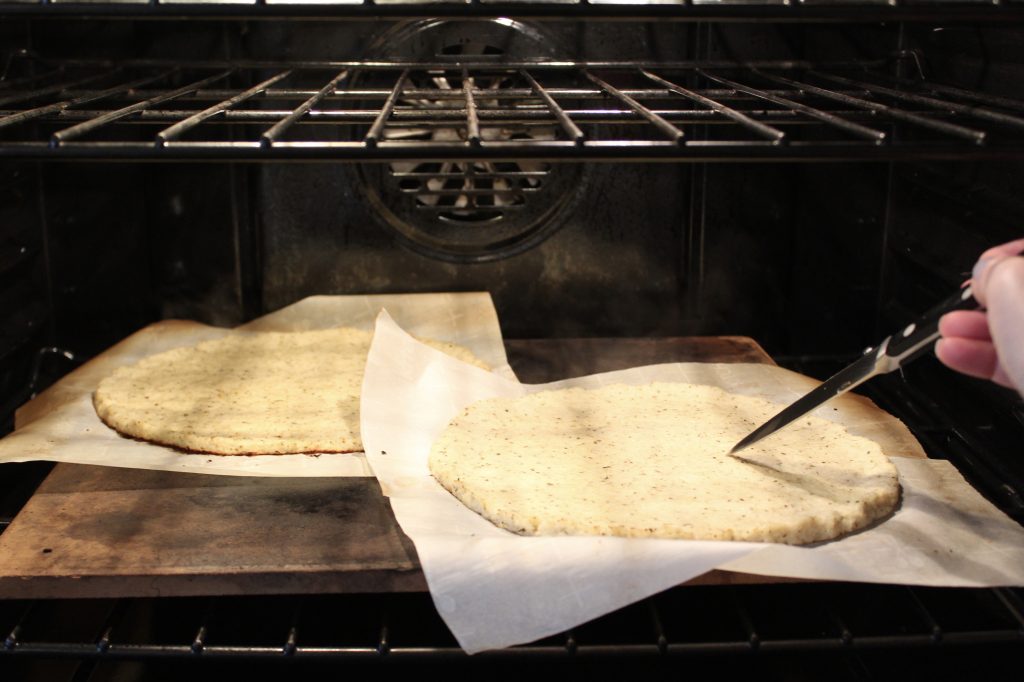
Bake for about 20 minutes on the first side. If any air bubbles puff up – poke them gently with the tip of a knife to release air. 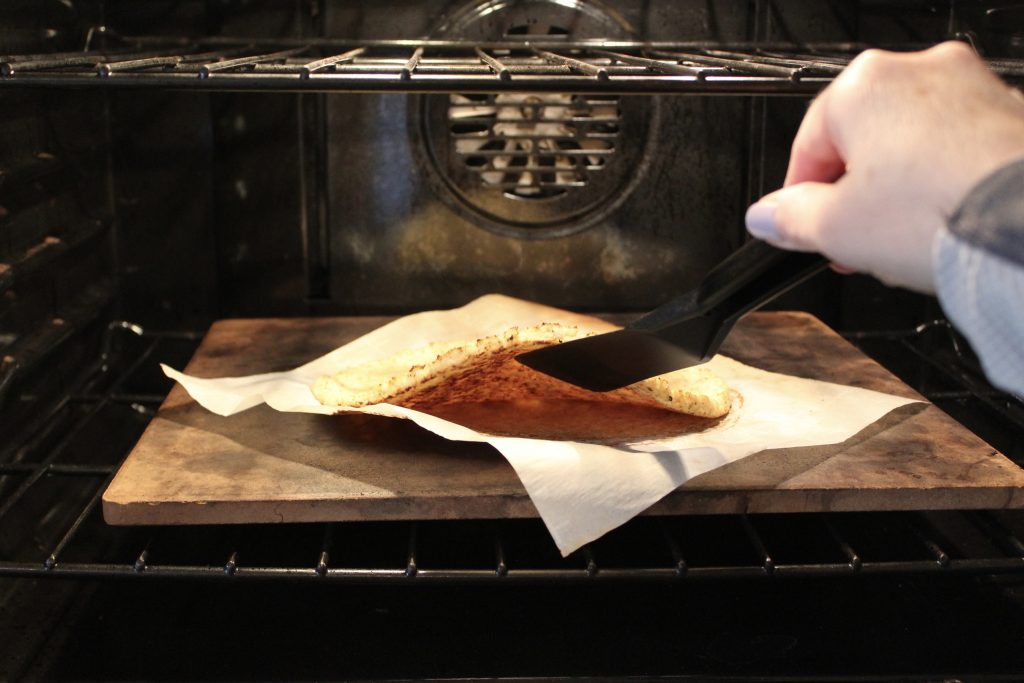
Once the crust is cooked and browned (15-20 minutes) on the bottom, it will be sturdy enough to flip and discard the parchment paper. 
Flip the crusts and cook for another 15-20 minutes. Cool on cooling rack until you are ready to add your toppings. They will firm up more as they cool. You can cool them and refrigerate or freeze at this point too!
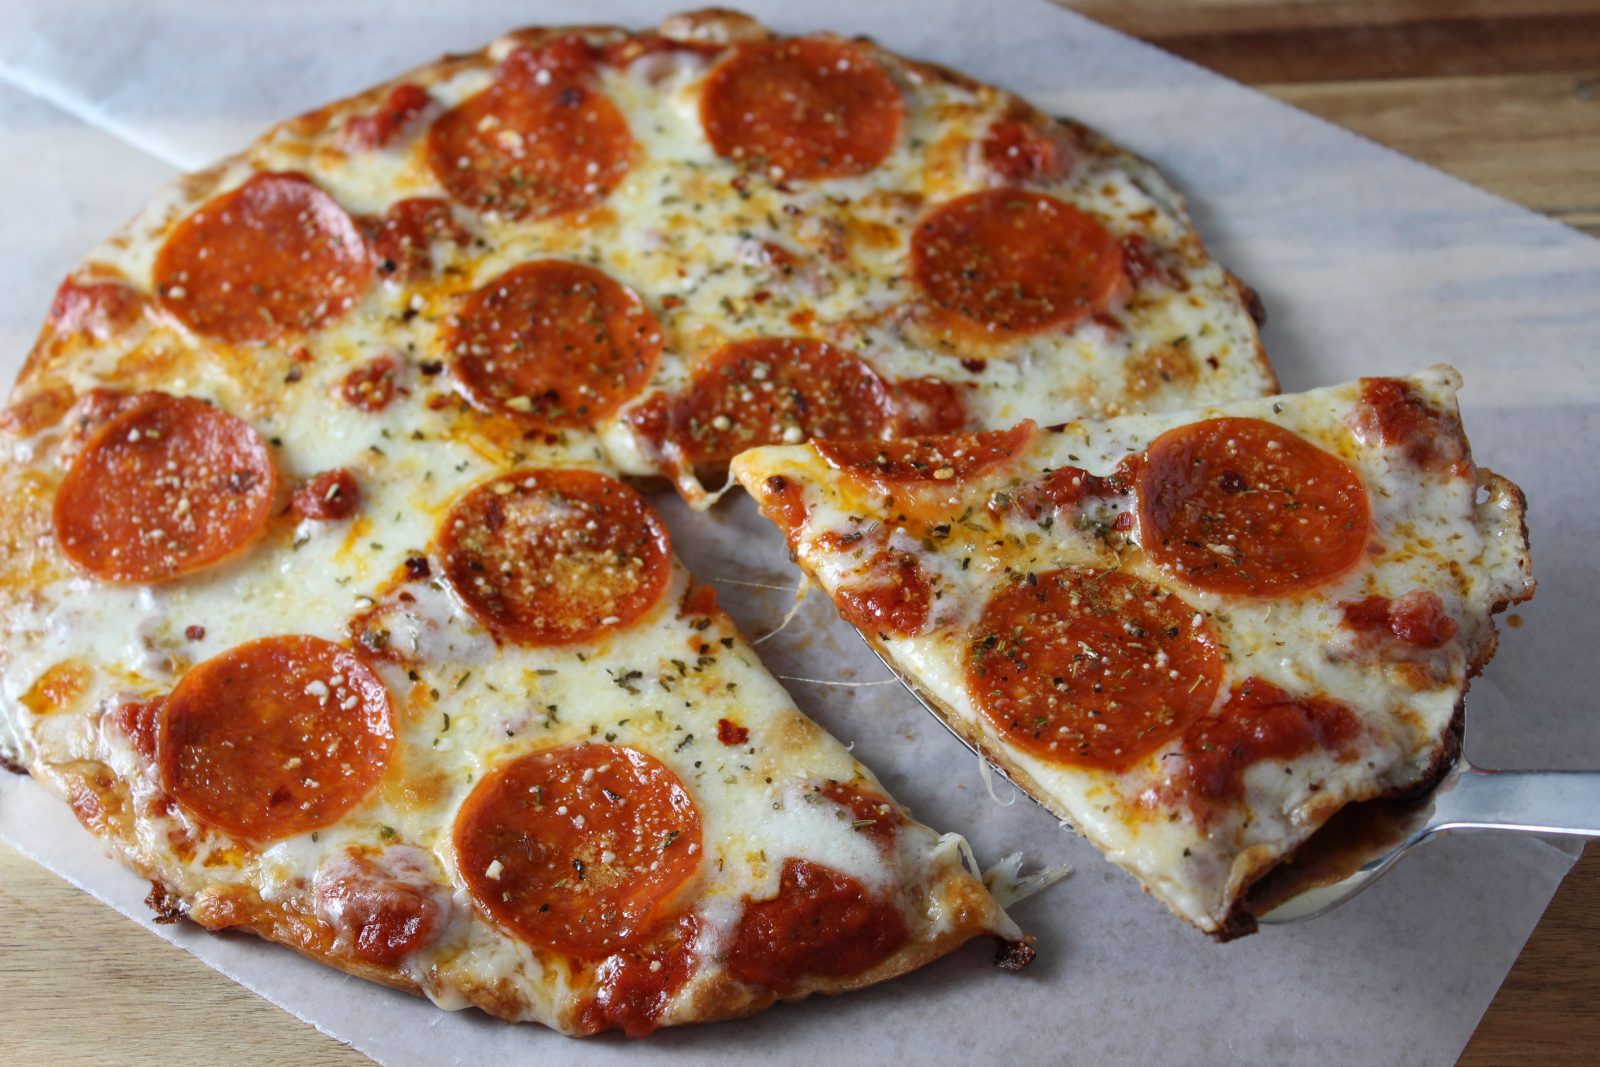
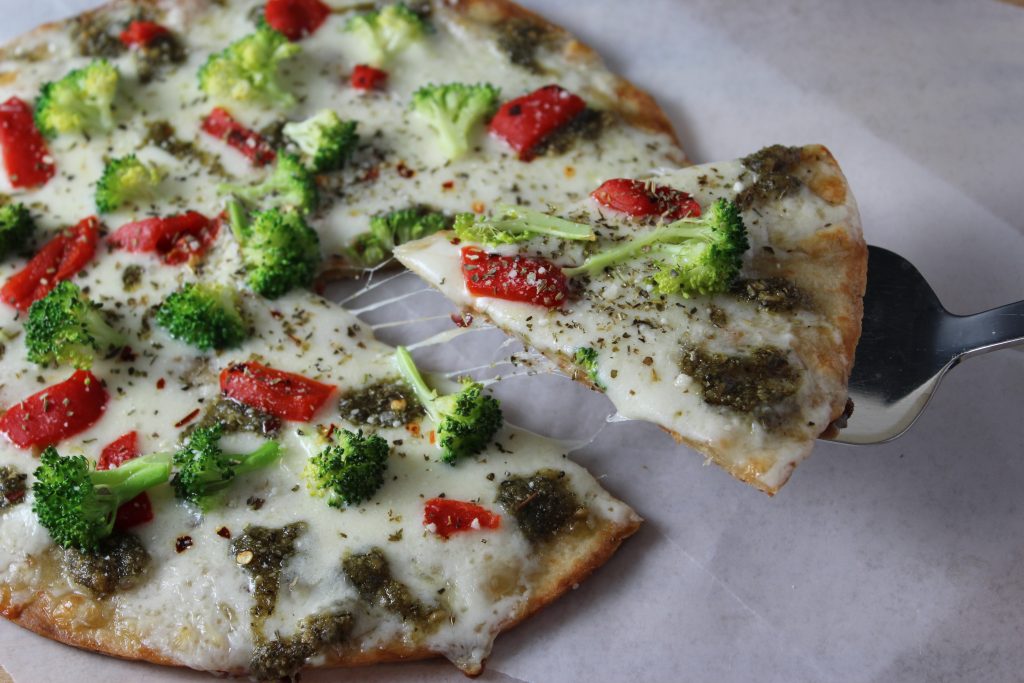
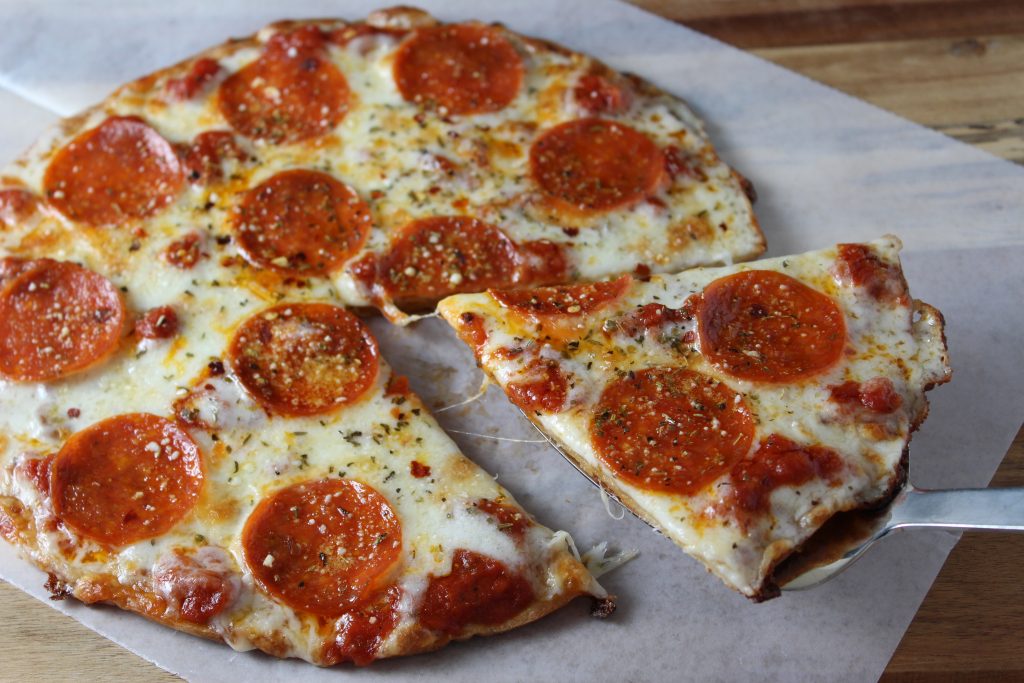
7. Add Toppings, Bake & Enjoy!

Cauliflower Pizza Crust
Ingredients
- 8 cups cauliflower florets from 2 medium heads cauliflower
- 2 egg whites from large eggs
- 1/2 cup grated parmesan cheese
- 1 teaspoon Italian seasoning
Instructions
- Preheat oven to 350 degrees F. Line 1-2 large rimmed baking sheet(s) with parchment paper.
- Use food grinder* or food processor to make 8 cups cauliflower rice. I used 2 heads of cauliflower.
- Place cauliflower on prepared baking sheet (You can also spread out on two baking sheets if it seems too much for one, but it will cook down and I hate doing extra dishes.) and bake in oven for 40 minutes. Stir every 10 minutes or so to help release moisture.
- Remove and allow to cool enough to handle. Place cooked cauliflower rice in center of clean kitchen towel or cheesecloth and twist and squeeze to release as much liquid as possible.
- Place a pizza stone on the bottom rack of your oven. Increase oven temperature to 400 degrees F. Allow pizza stone to preheat at least 20 minutes.
- Use a whisk, hand mixer or stand mixer with wire whip to whip egg whites until foamy. Add the cooked and squeezed dry cauliflower rice to egg whites. Add in Parmesan and Italian seasoning. Mix until combined.
- Cut 2, 12" x 12" squares of parchment paper. Place one parchment square on pizza peel or flat baking sheet you can use to slide crust into oven.
- Divide cauliflower mixture in half and place one half on center of parchment square. Use your hands or a spatula to pat the mixture into a 9"-10" round. Use the edges of your hands to press the sides of the round to form a crust edge. Repeat to form other crust.
- Depending how large your pizza stone is, you can bake one at a time or two at a time.
- Slide crust(s) with parchment square onto preheated pizza stone. Bake for 15-20 minutes on one side until the bottom is lightly browned and firm enough to flip. Use spatula or pizza peel to flip the crust(s) to cook other side. Discard the parchment squares. Cook the other side for 15-20 minutes until evenly browned.
- Transfer cooked crusts to cooling rack, they will firm up more as it cools. You can add toppings and finish cooking now (keep oven on) or let completely cool then refrigerate for 2 days or freeze for up to 3 months. (wrap in plastic wrap and place in zip top freezer bag or container.
- Top crusts lightly with toppings. I add cheese to bottom, and if using sauce add a small amount lightly over the cheese. This will help keep the crust from getting moist. Place topped crusts back in oven until cheese melts and is bubbly on edges.
- Remove from oven, slice and enjoy! The crust will firm up as the pizza cools.
Hello there, I tried to make it, and it was perfec. I followed the recipe just on how you explain it. Thank you for the recipe and thank you Kitchen Aid for making easy on me?
So happy to hear my instructions were helpful for you!! Thanks Karla!
Can I use riced cauliflower in a bag from the store?
Hi Sylvia – I haven’t tried it myself, but you probably could. You need to cook it, then squeeze it in a clean kitchen towel or cheesecloth to squeeze the excess moisture out of it. I’m not sure how many bags you’d need. According to my photos, looks like I started with about 5 1/2 cups cooked cauliflower rice. Let me know how it goes!